Posts By :

admin

Jersey Framing and Sports Memorabilia Framing 150 150 admin

Jersey Framing and Sports Memorabilia Framing

Have you ever looked at a sports shirt and felt the rush of the game’s last moments?

What turns a regular football memorabilia or sports collectables into a valued item?

Is it the rarity, the history, or the emotional connection?

All these factors play a significant role in making sports memorabilia a valued article. You cannot separate the emotions and history. Without these factors, they are mere ordinary items.

Moreover, the professional framing of sports memorabilia further elevates their status as collectible art pieces. The art of framing is a protective measure — it immortalizes the sporting memorabilia Australia.

This article will guide you through the ins and outs of sports memorabilia framing, such as football jersey framing. You will get expert insights to turn your collectibles into showpieces.

The Art of Sports Memorabilia Framing

1. Selecting the Right Frame

When it comes to jersey framing, the devil is in the details. Selecting the right frame is a game of balance when framing your jersey. Your choice of material, size, and glass can make or break the visual impact.

Whether you’re framing a vintage jersey or the latest football or cricket kit. The journey begins with the perfect frame.

Wood or metal?

Black, white, or team colours?

The choices are as varied as the jerseys and sports collectibles themselves.

2. Proper Matting and Mounting

Matting and mounting your jersey are not merely about securing it behind glass. It’s about creating a visual storyline.

The colours you choose can echo team hues or contrast them for a dramatic effect.

Customization Options: Let’s not forget about custom frame design. This is where personality shines through.

Engraving a nameplate or attaching a photo of the big game can turn a simple frame into a narrative. Personalized plaques or signatures can turn a simple jersey into a storytelling centrepiece.

3. Protecting Memorabilia from Damage

The biggest threats to your memorabilia are light, humidity, and temperature. UV-protected glass and a stable environment are your best defences.

Types of Sports Memorabilia You Can Frame

Sports memorabilia Australia is more than just items. They are doorways to moments of victory. Here’s a roundup of sports treasures you can frame to keep those moments alive:

  1. Jerseys: From cricket to Football jerseys.
  2. Signed Balls: Baseballs, footballs, tennis balls, Golf clubs or basketballs.
  3. Equipment: Gloves, bats, Boxing shorts, Racing suits & helmets and racquets.
  4. Photos: Capture the action and emotion of the memorabilia sports.
  5. Tickets and scorecards
  6. Caps and Hats
  7. Trading Cards
  8. Medals and Trophies

Types of Frames for Sport Memorabilia Framing

Here’s a guide to the ideal frame for your sports memorabilia:

  1. Shadow Boxes: For that 3D item like a glove, autographed ball, or a bat, shadow boxes create depth and drama.
  2. Acrylic Cases: Ideal for balls and helmets, these offer a clear view from all angles.
  3. Jersey Frames: Specially designed to maintain the shape and colour of your prized jerseys such as framed football jumpers.
  4. Classic Wood Frames: Timeless and elegant, perfect for vintage memorabilia.
  5. Metal Frames: Sleek and modern, these frames bring a contemporary edge.
  6. Document Frames: Best for showcasing tickets or programs.
  7. Custom Framing: When off-the-shelf just won’t do, go bespoke.

Benefits of Professional Framing Sports Memorabilia Perth

Professional framing services for heirloom pieces and valuable items are important. It ensures preservation and a polished look.

  • Expert craftsmanship
  • Long-lasting preservation
  • Custom framing design options
  • Enhanced visual appeal
  • Value protection

Pro Tip for Budgeting

Balance your budget with the value (both sentimental and monetary) of your sports memorabilia. Sometimes, spending a little more on professional framing makes a difference in presentation and preservation.

A Frame is More Than Just Boundary Around Your Jersey

A well-framed sports memorabilia is a bridge between the past and the present. It is a nod to the sports legends, and a tip of the hat to the future generations of fans.

So, whether you’re a die-hard collector or a casual fan.

Remember!

The right frame doesn’t just display your memorabilia. It honours the stories behind them.

And with that, you’re a caretaker of its legacy. Embrace the tradition. Pick up the frame. Let your memorabilia take centre stage.

Get Your Sports Memorabilia Framed Now!

Welcome to Framous Picture Framing, your go-to expert for sports memorabilia Perth framing. Here’s why we’re the top choice:

  • Over 30+ years in framing sports memorabilia.
  • Wide-ranging services for all custom sports framing needs.
  • Experts in football jersey framing, cricket bats, boxing gloves, and more.

How It Works:

  1. Contact us online, by phone, or email — Perth-wide.
  2. Send or drop off your item at our shop.
  3. We’ll chat and design a mock-up.
  4. You approve, we produce.

Partner with Framous Picture Framing, for excellent sports memorabilia Australia displays.

Check us out on Facebook to see our work and get inspired!

FAQ

What is Jersey Framing?

Jersey framing is the process of preserving and displaying a sports jersey in a custom frame. It involves carefully mounting the jersey, along with additional items, and framing it to protect it from dust, UV rays, and damage.

Why should I frame my sports memorabilia?

Framing your sports memorabilia Perth protects it. It also allows you to proudly display your sporting achievements. It adds a professional touch. Also, it can be a great conversation starter.

Can I customize the framing options?

Yes, you can choose from a range of customization options for your jersey framing. You can choose the frame style and matting colour. And even add personalized plaques or photos to create a custom-made display for your sports memorabilia.

How long does the framing process take?

The framing process typically takes around 2-3 weeks, depending on the complexity of the project.

Can I frame other sports memorabilia besides jerseys?

Absolutely! Framing services extend beyond jerseys. You can frame various sports memorabilia, such as signed balls, medals, caps, and even photographs.

How do I care for my framed sports memorabilia?

Keep framed sports memorabilia away from direct sunlight and high-humidity areas. Regularly dust the frame with a soft cloth. Avoid using any harsh cleaning chemicals. If you notice any damage or deterioration, contact professionals for restoration services.

What frames to use for jerseys?

For jerseys, use shadow box frames, jersey display cases, or acrylic-fronted frames. These frames often include UV-protective glass to prevent fading and matting to keep the jersey in place.

How to Frame Movie Posters? Comprehensive Guide 150 150 admin

How to Frame Movie Posters? Comprehensive Guide

So the question is “How to Frame Movie Posters”. Wait what movies posters??? Did you jot down the list of your favorite movies 2023? Did you like any digital movie poster frame or cinema poster frame? What are you preferences to frame movie posters?

Hold on….. How about #barbie #topgun #oppenheimer #fastx #missionimpossible #nun or #thepopesexorcist #johnwick

Else…you may also wonder:

  • What is the movie poster worth?
  • How long a movie poster can be framed?
  • Can frame movie posters be displayed in direct sunlight?
  • Where to explore frame movies posters ideas?

Well, Framous Picture Framing is at your service.

How to Frame Movie Posters? Get the Idea

Movie poster frames provide an ideal way in which to display your collection. In fact, a well-chosen framing solution will enhance the look of any poster and at the same time provide protection against accidental damage and reduce the effect of sunlight damage.

Framing movie posters is an art that not only adds beauty to your space but also ensures the preservation of your valuable collectibles. Whether you’re looking to display your “Spider Man or Super Man or Conjuring” framed poster, vintage movie posters, or cherished classics like God Father or romantic tragedy like Titanic, framing is an essential step.

Let us walk you through the process of how to frame movie posters and help you make informed decisions.

Importance of How to Frame Movie Posters: Professionally

Framing movie posters is fun for their preservation, display, and overall value. It is essential for movie poster collectors, movie freaks, and business owners like us as it helps protect the delicate nature of these collectibles from damage from light, moisture, and dust.

A well-framed poster can transform a piece of paper into a work of art, making it a focal point in any room or space. If you are movies freak then you know the decoration value of frame movie posters.

Collecting movie posters can be a valuable hobby or investment, and a properly framed poster is likely to retain its value or appreciate over time. Framous Picture Framing offer a range of options, including frame style, matting, customized frames and glass or acrylic choices, to match the poster’s aesthetic and interior decor.

Museum-grade UV-protective glass or acrylic can help prevent the fade and damage of movie posters over time. High-quality framing materials and techniques make the frame more durable and resistant to wear and tear.

A well-chosen frame and mat can enhance the overall visual impact of the poster, making it stand out and look more professional. Professionally framed movie posters come with necessary hardware for easy hanging, and their framing options cater to various display needs, from short-term exhibitions to long-term preservation.

Framing a movie poster professionally can be a satisfying and rewarding experience, as it ensures the protection and presentation of a piece of cinematic history or personal significance.

Components of Framing Movie Poster:

Framing a movie poster involves selecting a frame, selecting a covering material, hanging hardware, and optional backing materials. These components work together to create a professionally framed movie poster that not only protects the artwork but also enhances its visual appeal.

Glass or Plexiglass is an important covering material for both protection and aesthetics.

Traditional glass provides excellent clarity but is heavier and more fragile, while plexiglass (Acrylic) is lightweight, shatter-resistant, and UV-protected to prevent fading.

The mounting backboard, typically made of “mount-board,” serves several purposes like protection, support, acid-free and pH-neutral options.

Matting, an optional element between the poster and glazing, creates a border around the poster and adds an aesthetic touch. Matting can be made from various materials, including paper, fabric, or suede, and comes in various colors and thicknesses.

Hanging hardware, such as D-rings, wire, or saw-tooth hangers, is needed to display the framed movie poster on your wall. Some frames may have a backing material like foam core or cardboard for added support and protection. UV protection is optional for valuable or collectible posters, shielding them from harmful UV rays.

Factors to Frame a Movie Poster

Before framing, consider factors such as

  • The poster’s value
  • Intended display duration
  • Exposure to sunlight
  • Environmental conditions
  • Moving the poster regularly
  • Size, Material, Colors, Dimensions and Style
  • Movie poster selection with theme and preferences

For posters of little value, a cost-effective frame may suffice. However, if your poster holds sentimental or monetary value, consider conservation-grade framing. UV-protected glass or plexiglass is a must to prevent fading due to sunlight.

While framing can seem expensive but it’s an investment in preserving your poster for the long term.

Examine How to Frame Movie Posters?

StepsInstructions
InspectionThoroughly inspect the poster for damage, tears, or stains.
Frame SelectionChoose the right frame that complements the poster’s style and theme. Use UV-protective glass or acrylic to prevent fading from sunlight.
Mat and Backing BoardsUse acid-free mats and backing boards to preserve the poster’s quality.
Flatten FoldsAvoid folding in the opposite direction. Flatten folds by placing the poster under a heavy book or between clean, acid-free paper.
Linen BackingConsider consulting a professional for linen backing if the poster is valuable and in less-than-mint condition.
MountingMount the poster within the frame using acid-free tape or photo corners. Avoid using adhesives directly on the poster. Use UV-protective glass or acrylic in the frame to shield the poster from UV rays. Securely mount the frame to prevent shifting or sagging.
HangingHang the framed poster securely, using appropriate hardware. Avoid direct sunlight and extreme temperature or humidity fluctuations.
MaintenancePeriodically inspect the framed poster for signs of damage, such as warping or fading, and address them promptly.

Conclusion:

Framing movie posters is a meticulous process that balances aesthetics and preservation. Whether you’re showcasing iconic vintage posters or the latest blockbuster prints, following this complete guide will ensure your movie posters are protected and presented in their full glory.

Movie posters are not just pieces of paper; they are iconic representations of our favorite films. Framing these posters can elevate them from mere collectibles to captivating pieces of art. Whether it’s your prized “Star Wars” framed poster or a vintage classic like “Scarface,” we will help you frame movie posters with care and style. We got you covered if your option is digital movie poster frame, cinema poster frame, best movie poster frames, old movie posters framed or any kinda of frame.

We hope we have provided you with necessary answer to your query “how to frame movie posters”?

FAQs

Should You Frame a Movie Poster to Sell?

Framing a poster to sell is generally not recommended unless it’s a short-term display in a snap frame. The cost of framing might not be recouped when selling, and potential buyers may be hesitant to purchase framed posters due to condition concerns and shipping difficulties.

Frame movie posters for your personal enjoyment, not as an investment.

How to choose the right frame?

Selecting a frame is a matter of personal preference and the decor where the poster will be displayed. Black frames with white mount boards are a common choice, but frames are available in various colors and materials, including wood, metal, and aluminum.

Take your time to explore different options, as the right frame can significantly enhance the visual appeal of the poster.

Glass or Plexiglass, Which is best?

When choosing between glass and plexiglass, consider factors like weight, UV protection, and fragility. Glass offers various options, from plain to museum-grade conservation glass, while plexiglass is lighter and shatter-resistant.

Use glass for stationary posters with less risk of damage and for optimal UV protection. Plexiglass is ideal for high-traffic areas but may require a higher budget for UV protection.

Should movie poster be framed in light boxes?

Framing a movie poster in a light box can breathe life into it and add depth to the image. This works best with double-sided movie posters, where the reverse image allows light to pass through.

Oil Painting For Beginners: A 6-Step Tutorial 150 150 admin

Oil Painting For Beginners: A 6-Step Tutorial

Are you ready to learn oil painting on canvas?

Read on as we guide you through the essential steps to create stunning oil paintings and oil painting frames.

Whether you’re a beginner or a seasoned painter, these 6 steps will help you master the art of oil painting.

You will also learn about oil painting frames which come in various styles and materials to complement your artwork. A framed oil painting is a complete work of art ready to adorn your walls.

Oil Painting For Beginners: 6-Step Tutorial

To get started with oil painting for beginners, you’ll need essential supplies like brushes, oil paints, and canvas.

Step 1: Pick the Perfect Picture/Subject

Choose the right image as a subject and use it as your guide.

Start your oil painting by choosing the perfect subject.

If you’re just beginning, opt for simple subjects like still life. They’re like the training wheels for your artistic journey.

As you gain confidence, you can venture into more complex themes like portraits and landscapes.

To make your life easier, use a photograph as a reference.

This allows you to oil paint without constantly checking the clock. And if drawing isn’t your strong suit, you can trace the image onto your canvas.

It’s a nifty trick to ensure your proportions are on point.

Step 2: Create Your Composition

Design your painting by finding the right angles and elements.

Your next task is to compose your painting.

This is where you bring your creative vision to life.

Look for a thread that ties together the elements in your scene – lines, shapes, colours, and light. Trust your instincts; they’re your best friends in this artistic endeavour.

Don’t be afraid to experiment with unusual angles. They can add an exciting dimension to your artwork. Observe your subject closely, focusing on details or taking in the entire scene.

You can even use a cardboard window or frame with your hands to frame the composition. If you’re working from a photo, play around with strips of paper to reframe it.

Before you dive into your masterpiece, do some practice on paper. Create multiple studies, adjusting the framing and the interplay of shadows and light. Use different techniques to capture the changing light and atmosphere in the case of oil painting landscapes.

It’s like warming up before a big game.

Step 3: Sketch Your Drawing

Make a preliminary drawing to guide your painting.

Now, let’s get down to business with a preliminary drawing.

Think of this as a roadmap for your painting.

Not an exhaustive masterpiece in itself. While it’s not mandatory, it can be immensely helpful.

You have options for this step.

  1. Use charcoal for a clean base (don’t forget to spray on some fixative).
  2. Alternatively, sketch very lightly with a pencil, ensuring it won’t show through the oil based paint.
  3. If you prefer, you can even use oil paint or acrylics in a neutral, diluted colour.

Feeling a bit shaky with your drawing skills?

No worries!

If you’re working from a photo, employ the grid technique or tracing paper to sketch the major lines of your subject.

Keep it simple and focus on capturing the basic elements. You don’t need to replicate every tiny detail at this stage.

Here’s A Pro Tip: Squint your eyes when observing your subject. This blurs the unnecessary details and simplifies the forms, making it easier to capture the essence.

Step 4: Lay the Base Coat

Apply the first layer of oil paint for a strong foundation.

Now, it’s time to lay the foundation.

Your oil based paint needs a good base to adhere well and dry without cracking.

The big question here is: white or coloured background?

  1. If you want to brighten your shades and create a vibrant painting, go for a white background.
  2. On the other hand, a coloured background can give your artwork a unified tone.

Choose the colour based on the overall tone you want for your painting – whether it’s warm, cool, light, or dark.

When applying the background, use well-diluted oil paint.

Make sure it’s completely dry before moving on to the next steps.

If patience isn’t your strong suit, you can also opt for acrylic paint, which dries much faster.

Here’s a nifty trick to check if your background is dry:

  1. Lightly run your finger over a few spots.
  2. If it doesn’t pick up any oil paint, even if it feels slightly sticky, you’re good to go.

Step 5: Add Layers of Paint

Build your painting by layering on colours and shadows.

Now comes the fun part – adding layers of colour to breathe life into your painting.

To achieve the best results, follow the golden rule of oil painting: “thick on thin.”

Each successive layer should be slightly thicker, containing more oil than the previous one.

  1. Start by applying areas of shadow and light.
  2. Fill in larger areas with colour.
  3. Then, patiently layer on more intense colours as you progress.

Remember to let each coat dry thoroughly before moving on to the next. This prevents your painting from flaking over time.

There’s another technique for experienced painters called “alla prima” painting.

This method is perfect for capturing spontaneity or painting outdoors. With alla prima, you finish your painting in a single session. Applying each layer of colour while the previous one is still fresh.

Step 6: Final Touches and Refinements

Bromley, William; The Finishing Touch; Russell-Cotes Art Gallery & Museum; http://www.artuk.org/artworks/the-finishing-touch-58204

Bring your artwork to life with the finishing touches.

This is where the magic happens.

Framed canvas oil paintings are cherished for their elegance and artistic value. The final touches and refinements are where your painting truly comes to life.

Instead of slapping on oil paint, think of it as making oil painting on canvas sing.”

It’s all about harmonizing tones and creating a polished finish.

For this stage, use undiluted oil paint straight from the tube.

Stand back frequently from your artwork to evaluate it from a distance – you’ll notice details you might have missed up close.

Take your time; there’s no rush. Fine-tune your piece gradually, adding highlights, working on shadows, and refining the smallest details. For instance, creating an oil painting portrait requires careful attention to details, such as facial features and expressions.

At this stage, any major colour change will affect the entire painting, so choose your adjustments wisely.

And finally, when you’re satisfied with your masterpiece, proudly sign your work – it’s your signature on a masterpiece. Now frame oil painting on board to preserve and protect the artwork.

Summary

Steps  
Step 1Choose a SubjectPick your subject for oil painting on canvas.
Step 2Create Your PictureMake your art by finding a common theme and angles.
Step 3Draw a SketchMake a simple drawing to guide your oil painting.
Step 4Add the BackgroundPaint a base layer, either white or coloured.
Step 5Paint in LayersAdd oil based paint colours layer by layer.
Step 6Final TouchesFinish your painting, fix tones, and tiny details.

How To Frame A Canvas Oil Painting Like A Pro

A framed oil painting is a focal point in any room. Frames for oil paintings serve both aesthetic and protective purposes.

Want to know how to frame a canvas oil painting like a pro?

Here’s why it’s essential to do it professionally.

  1. Protection: Professional framing shields your oil painting from dust, dirt, and potential damage.
  2. Enhanced Presentation: It elevates the visual appeal of your artwork, making it stand out.
  3. Preservation: Proper framing helps preserve your painting’s beauty for years to come.
  4. Increased Value: An oil painting in frame is more valuable if you ever decide to sell it.

Quality and durability are essential factors when determining the best frames for oil paintings to ensure long-lasting beauty.

Framing Ideas For Oil Paintings

Following are some best frames for oil paintings!

  1. Classic Frames: Wooden oil painting frames are a popular choice for their classic and timeless appeal. Opt for a wooden frame with a clean finish.
  2. Gallery-Style Floater Frames: These oil painting frames create the illusion that your artwork is floating inside. They’re modern and eye-catching.
  3. Ornate Antique Frames: Give your oil painting a touch of vintage charm with an ornate, gilded frame. Antique frames for oil paintings can add a touch of nostalgia to your collection.
  4. Minimalist Frames: Choose a simple, slim frame to let your artwork shine without distractions.
  5. Colour Pop Frames: Select a frame colour that complements or contrasts with your painting for a striking effect.
  6. Custom Frames: Go for a personalized touch with custom-made oil painting frames tailored to your artwork’s size and style.
  7. Shadow Box Frames: Ideal for textured paintings, these frames provide space between the artwork and the glass, creating depth.
  8. Floating Frames with Gaps: A floating frame oil painting adds a modern touch to traditional art. Try frames with gaps between the frame and the artwork for a unique and modern look.
  9. Reclaimed Wood Frames: Embrace the rustic feel with frames made from reclaimed wood, adding character to your art.
  10. Mixed-Media Frames: Combine different materials like metal and wood for a truly unique framing solution.

Frame it with Framous!

Congratulations!

You’ve just completed a tutorial on oil painting for beginners in 6 easy-to-follow steps. So, pick up your brushes and let your artistic journey begin!

Choose Framous Pictures for professional framing today!

“Don’t miss out on the best frames for oil paintings!” Get your artwork framed to preserve its beauty. Our website features a variety of frames suitable for ‘oil paintings for sale’, from landscapes to abstract art.

Why Is Custom Framing So Expensive? 150 150 admin

Why Is Custom Framing So Expensive?

Wondering… why is picture framing so expensive? Why do frames cost a lot? What are the reasons of expensive framing canvas?

Let’s find out few considerations with Framous Pictures to understand how and why custom picture framing is so expensive?

Why Custom Framing Can Be Expensive: Factors

Find the reasons of factors below with “Framous Pictures” about custom picture framing expenses.

  • Framing Material:

Framing material does matter especially high quality frames. They oftenly made from expensive materials such as solid wood, metal, edging, or plastics. Apart from that quality matting, glass or acrylic glazing, and backing materials put importance as well. They protect and preserve the artwork, which can drive up the cost.

Custom frames Perth craft with high-quality materials to ensure the longevity and preservation of the artwork or photograph. The choice of materials, such as premium wood, glass, matting, and UV-protective coatings, significantly impacts the cost.

  • Design Complexity:

Mirror framing, wedding photo framing, framing canvas, and other specialized framing services often require intricate designs. The more complex the design, the more time and expertise need, leading to higher costs.

  • Framing Size:

The larger the frame, the higher the price. This is primarily due to the amount of material required to manufacture the item. More meters of moulding to finish the frame’s perimeter, as the amount of glazing and supporting board required. The size of the frame may also affect delivery prices, however most sellers will have a set pricing below a certain size. Larger items, such as movie posters and music posters, require more materials and labor to frame properly. Size and dimensions play a significant role in determining the overall cost.

  • Picture Printing:

Including a photograph in your frame will raise the price, which will vary depending on the size of the print and the material. Combining a print with your frame will raise the price, but you may actually save money compared to buying a frame and paying for a separate print from a different company, so if you don’t have a physical copy of what you want to frame, look for retailers who offer a picture printing and fitting service alongside their frames.

  • Readymade Frames:

Looked for cheap picture frames, you’ve probably come across ready-made choices. These frames are mass-produce and available in a restricted number of standard sizes. The least expensive of these ready-made frames are manufactured from the least expensive materials. Framing is an art form in itself. Art framers Perth, such as those in Victoria Park, bring their creativity and expertise to create unique and aesthetically pleasing frames. The artistic touch adds value but can also increase the price.

  • Framing Making:

Professional framing requires skilled labor and craftsmanship. Framers need to measure accurately and cut material accordingly. Assemble the frame, mount the artwork, and make sure it is properly secured and aligned. This level of expertise and attention to detail contributes to the cost.

  • Framing Customization:

Many picture frames like mirror framing are made to order to fit the exact dimensions of the artwork. Custom framing takes more time, effort, and resources than mass-produced, standard-sized frames. Cheap poster frames are readily available, but they lack the customization and quality of custom framing. While custom framing may be expensive in comparison, it offers superior protection and aesthetics for your artwork.

  • Art Preservation:

If the artwork has sentimental or monetary value, the framing process may include conservation-grade materials and techniques to keep it from deteriorating over time. These conservation methods are frequently more expensive. With growing environmental awareness, businesses like Planet Ark promote sustainability in framing practices so, why not to recycle and reshape the old frames.

  • Special Framing Features:

Some frames may include extras like intricate designs, beveled edges, or decorative elements, which raise the overall cost. Ark paint, Ark soap, and Ark oil are specialty products used in the preservation of sustainable work. These products, while essential, can add to the expense of custom framing, as they ensure the artwork’s longevity.

  • Location:

Framing costs can also depending on where you live. Framing services may be more expensive in areas with higher living costs or limited competition.

  • Framing Shop Expenses:

Rent, utilities, insurance, and employee wages are all operational factors costs into frame shop pricing.

  • Delivery Expenses:

If the artwork needs to be transported or shipped to a framing shop or anywhere even if it’s an order, additional costs for packaging and handling may apply.

  • Digital Marketing and Branding:

Businesses offering custom framing services often invest in digital marketing in Perth and branding efforts. These expenses pass on to customers, contributing to the overall cost of custom framing services.

  • Brand and Reputation:

Certain framing shops may have established a reputation for their expertise and craftsmanship, allowing them to charge higher prices due to brand recognition.

Money Saving Tips:

  • Buy frames in bulk if possible 
  • Compare prices from different retailers and brands 
  • Get the image printed and framed at the same time rather than choosing separate options 
  • Lighter, thinner & simpler designs will be more affordable 
  • Choose stained edges 
  • Must look for sales specially in brands like Framous Pictures 
  • Recycle old frames or look for second hand frames
  • Just replace the mount 
  • Keep the frames clean and protected

Conclusion:

It’s important to note that the cost of framing can vary greatly depending on above mentioned factors, so getting multiple quotes and comparing prices is always a good idea before making a decision. Furthermore, for less valuable or non-sentimental artwork, less expensive framing options are fine that still provide adequate protection and display quality. Branding Perth can vary from business to business as one should explore prices through their social media marketing. The value of custom picture framing can attribute in the quality of materials, design complexity, digital marketing and branding efforts, artistic expertise, specialty products, sustainability practices, and the size of the framed items. While it may seem expensive, custom framing provides a valuable service in preserving and showcasing your cherished memories and artwork. Understanding these factors can help individuals and businesses make informed decisions when investing in custom picture framing services in Perth or anywhere else.

Biggest Benefits of Painting for Toddler 150 150 admin

Biggest Benefits of Painting for Toddler

Exploring the world of painting for kids and painting with kids is a magical journey filled with colors and creativity. Engaging in painting activities for kids not only brings smiles to their faces but also offers a multitude of benefits. From enhancing their motor skills to nurturing their imagination, painting for kids is a gateway to a realm of growth and joy. Whether it’s finger painting, brush strokes, or experimenting with different textures, the canvas becomes a playground for young artists to express themselves while reaping the rewards of cognitive and emotional development.

The current era buzzing with screens and digital experiences, the tactile joy of dipping a brush in paint and creating something tangible is an experience like no other. So, set up that mini art studio, spread out the paints, and let your toddler dive into this world of colors and creativity. With each brushstroke, they are painting not just on paper, but on the canvas of their own happiness and development.

There are different brain development activities for toddlers, but painting is the most guaranteed and powerful for toddler’s brain. Every child is born with their own skills and creativity. Imagine different ideas and creativity on canvas which allows you to comprehend your own kids talent and imagination skills. Stick to the article with Framous Pictures and learn about the benefits of toddlers painting and importance of drawing.

Discover the Magical World of Toddler Painting: Benefits beyond the Canvas

Unleash the artist within your little one with a splash of colors and a stroke of imagination! Toddler painting isn’t just about creating a messy masterpiece on paper; it’s a gateway to a world of developmental wonders. From sparking creativity to enhancing motor skills, the benefits of painting for toddlers are truly captivating. So, let’s dip our brushes into the vibrant palette of benefits and explore why this colorful adventure is a must for your growing tots.

Creative Fireworks:

Imagine a blank canvas as a playground for your toddler’s imagination. Painting invites them to create their own reality, concoct stories, and give shape to their thoughts. As they swirl, dab, and stroke, their minds are busy concocting stories, experimenting with colors, and envisioning the world as they see it. This creative exercise fosters self-expression, helping toddlers communicate feelings and ideas that words may fail to capture.

Motor Skills Flourish:

Every delicate brushstroke and careful finger dab contributes to refining fine motor skills. As toddlers grasp brushes and mix colors, they are strengthening the muscles in their fingers and hands. These actions enhance every child’s hand-eye coordination, helping them gain better control over their movements. This newfound dexterity extends beyond painting and influences their ability to handle everyday tasks, such as buttoning shirts and tying shoelaces.

Colors, Shapes, and Patterns:

Toddlers adore exploring the kaleidoscope of colors. Painting provides them with an opportunity to understand the properties of different colors and color recognition – mixing them to create new shades or discovering the magic of complementary colors. Shapes and patterns also come alive as they draw circles, lines, and squiggles. This early exposure to these concepts sets the foundation for future learning in math and geometry.

Emotional Expression and Confidence:

Toddlers have feelings just as big as their imaginations, and sometimes, they can be difficult to put into words. Painting becomes a canvas for their emotions. Whether they’re ecstatically painting with bold strokes or gently dabbing with pastel hues, their creations become emotional reflections. This practice helps them manage their emotions and builds self-esteem as they proudly present their work to the world.

Focus and Patience Unveiled:

In our fast-paced world, cultivating focus and patience is an invaluable skill. Painting gently nudges toddlers towards this important ability. As they devote time to their artwork, they learn to concentrate on one task, observing how each brushstroke adds to the overall picture. This practice molds their ability to tackle challenges with patience and concerntration.

Sensory Symphony:

From the texture of the paint to the swirls of color, painting is a sensory delight. Toddlers engage their sense of touch, sight, and even smell those enticing aromas of paint while exploring this artistic journey. This sensory engagement stimulates cognitive growth and encourages their brains to make connections between different senses.

Bonding Bonanza:

Painting isn’t just an individual activity. It’s a bridge that connects toddlers with their caregivers, friends, or siblings. Sitting together, sharing brushes, and admiring each other’s strokes create moments of connection and joy. These shared experiences strengthen relationships and make lasting memories.

Wonderful Ways Toddler Painting Makes Kids Happy and Smart

Do you know why letting your little one play with colors is a super cool idea? Well, it turns out that painting isn’t just about having fun although it’s super fun!. It also helps your toddler become smarter and happier as benefits of drawing for toddlers is rocking thing. Let’s check out how:

Learning Colors:

Painting helps us learn about colors. When we mix red, blue, and yellow, we make new colors. It’s like a magic trick with colors! And guess what? When grown-ups tell us the names of the colors we use, it helps us remember them better.

Making Cool Shapes:

Toddlers are like little artists. They can make circles, lines, and all sorts of cool shapes with their paintbrushes. This is like drawing but with a twist. Learning these shapes is like playing with a puzzle, but a colorful one!

Being a Superhero of Imagination:

Imagine painting a world of your own. That’s what toddlers do! When they paint, they can create anything – a happy sun, a big green tree, or even a purple elephant wearing sunglasses. This is called using your imagination, and it’s like being a superhero of your own stories.

Feeling Everything:

Toddlers have lots of feelings, just like grown-ups. Sometimes, they’re happy, sad, or excited. Painting helps them show these feelings even if they can’t find the right words. It’s like saying “I’m happy” with a picture instead of talking.

Talking with Art:

You know how we talk with words? Well, painting is like talking with pictures. We can use our paintings to show how we feel or what we’re thinking. It’s like our paintings are saying, “Hey, this is what’s in my heart!”

Super Hands and Fingers:

Using paintbrushes and their hands to paint makes toddlers’ hands and fingers super strong. This helps them do things like tying shoelaces, holding a pencil, and building awesome LEGO towers. It’s like exercising their fingers, but with colorful paint!

Making Friends with Patience:

Painting takes a little time. Your toddler needs to wait for the paint to dry and think about what they want to paint. This helps them learn patience – a fancy word for waiting without getting upset.

Having Fun with You:

Painting is even more fun when you do it together. You and your toddler can be painting buddies! You can talk, laugh, and make funny pictures together. This makes you both happy and helps you become even better friends.

Super Senses:

When your toddler paints, they touch the paint and feel its gooeyness. They also see the colors and smell the paint. This is like a party for their senses – the parts of their body that help them understand the world around them.

Exploring Creativity:

Guess what? We’re born with a huge dose of creativity and imagining skills. Painting lets us use it and make amazing things. We can draw anything we want – like the sun, trees, and even funny animals. It’s like a magical adventure with colors.

So, there you have it! Painting isn’t just about making a mess (although messes can be fun too!). It’s like a magic potion that helps your toddler grow smarter, stronger, and happier. So, grab those paintbrushes and start the colorful adventure!

15 Fun and Creative Painting Ideas for Toddlers:

Finger Painting Fun:

Let your toddler explore with their fingers! Use washable paint and let them create colorful patterns and shapes using just their hands.

Nature Prints:

Go on a nature hunt and gather leaves, flowers, and sticks. Dip them in paint and press them onto paper to make beautiful prints.

Bubble Wrap Stamps:

Wrap a piece of bubble wrap around a rolling pin or an empty cardboard tube. Dip it in paint and roll it onto paper to create unique textures.

Sponge Painting:

Cut sponges into different shapes and sizes. Dip them in paint and dab them onto paper for a textured and fun effect.

Straw Blown Art:

Drop blobs of paint onto paper and let your toddler blow through a straw to spread the paint and create interesting patterns.

Q-tip Pointillism:

Use Q-tips to make tiny dots of paint on the paper. Combine different colors to create beautiful dot art.

Marble Painting:

Place a piece of paper in a shallow box and add a few drops of paint. Drop marbles onto the paint and let your toddler tilt the box to make the marbles roll and create abstract art.

Squirt Gun Painting:

Dilute paint with water and put it in squirt guns. Hang a large piece of paper outside and let your toddler shoot the paint onto the paper for a splatter effect.

String Painting:

Dip pieces of string in paint and place them on paper. Fold the paper in half and pull the string out to create a colorful abstract design.

Toy Car Tracks:

Dip toy cars’ wheels in paint and let your toddler roll them on paper to create colorful tracks. benefits of car track painting allows your toddler to explore new creative ventures.

Collage Painting:

Provide your toddler with various materials like tissue paper, fabric scraps, and buttons. Let them glue these materials onto their paintings to create mixed-media masterpieces.

Hand and Foot Prints:

Create keepsake art by having your toddler dip their hands and feet in paint and press them onto paper. Turn them into animals, flowers, or even monsters!

Painting with Kitchen Tools:

Let your toddler experiment with kitchen tools like potato mashers, pastry brushes, and basting brushes to create unique textures.

Shadow Tracing:

Place objects with interesting shapes on a piece of paper. Have your toddler paint around the objects, and when you remove them, they’ll have colorful shadows left behind.

Ice Cube Painting:

Freeze water with a bit of paint in ice cube trays. Once frozen, let your toddler use the colorful ice cubes to paint on paper as they melt.

Remember, the focus is on having fun and exploring creativity. These ideas are meant to spark your toddler’s imagination and let them enjoy the world of colors and art! painting benefits for toddlers are way too much than we think.

Painting Offers a Wealth of Psychological and Physical Benefits for Toddlers

Fostering their development in both these crucial areas. Painting activities for toddlers may have so many benefits which leads to their physical and psychological growth. Let’s explore some important information regarding physical and psychological benefits of painting activities for toddlers.

Psychological Benefits:

Self-Expression:

Painting allows toddlers to express their thoughts, feelings, and imagination in a non-verbal way. This creative outlet helps them communicate and share their inner world, boosting their self-esteem.

Emotional Regulation:

Through painting, toddlers learn to manage their emotions. They can channel their feelings, whether happy, sad, or excited, onto the canvas, helping them cope with emotions constructively.

Confidence Building:

As toddlers create their artistic masterpieces, they gain a sense of accomplishment and pride. Displaying their art and receiving positive feedback from caregivers bolsters their self-confidence.

Problem-Solving Skills:

Painting encourages toddlers to make decisions while mixing colors, choosing brush strokes, and planning their creations. This helps develop their critical thinking and problem-solving abilities.

Creativity and Imagination:

The open-ended nature of painting fosters creativity and imaginative thinking. Toddlers explore various concepts, experiment with colors, colors recognitionane and envision new worlds, all of which fuel their cognitive development.

Focus and Concentration:

Engaging in painting requires sustained attention, helping toddlers practice focusing on a task. This skill transfers to other areas of their lives, promoting better concentration and attention span.

Communication Skills:

Through art, toddlers learn to interpret visual information, analyze patterns, and discuss their work with others. This practice enhances their vocabulary and communication skills.

Physical Benefits:

How does painting help a child’s development?

Fine Motor Skills:

Holding and controlling a paintbrush helps toddlers refine their fine motor skills. These skills are crucial for tasks like writing, using utensils, and buttoning clothes.

Hand-Eye Coordination:

Painting demands coordination between hand movements and visual input. This enhances toddlers’ hand-eye coordination, which is essential for various activities, including playing sports and navigating the environment.

Gross Motor Skills:

Even the act of setting up a painting station – from arranging materials to moving around – promotes gross motor skills. Toddlers engage their larger muscle groups as they reach for paint, dip brushes, and move their arms.

Sensory Stimulation:

Painting engages multiple senses – sight, touch, and sometimes even smell – providing rich sensory experiences that contribute to toddlers’ overall sensory development.

Spatial Awareness:

While painting, toddlers learn about space and how objects relate to each other on a two-dimensional surface. This spatial awareness is valuable for understanding spatial concepts in the real world.

Hand Strength:

The pressure exerted while painting with brushes and sponges strengthens toddlers’ hand muscles. This strength is beneficial for activities like gripping objects and performing fine motor development awtasks.

Hand Dexterity:

The diverse motions involved in painting, from gentle brush strokes to firm finger dabbing, improve toddlers’ hand dexterity, allowing them to manipulate objects with precision.

In essence, painting for toddlers provides a holistic developmental experience. It nurtures their emotional well-being, cognitive growth, and physical skills, laying the foundation for a well-rounded and confident individual with self-esteem. Painting gives a strong control on anger and pain issues. Toddler paintings itself is a calming painting activity for babies. It enhances their pre-writing abilities.

Conclusion:

According to Framous Pictures, the benefits of painting aren’t limited to older children; even babies and toddlers can benefit from this artistic adventure. Baby canvas painting ideas for toddles bring a unique charm as tiny hands and feet leave colorful imprints on the canvas. Benefits of painting for children is a mind boosted activity to make your fresh and healthy.

These creative explorations not only foster sensory stimulation but also promote bonding between parents and babies. Gentle strokes of baby-safe paint introduce them to colors, textures, and the world of self-expression, setting the stage for a lifetime of artistic appreciation.

When it comes to painting activities for kids, the possibilities are as vast as a painter’s palette. Toddler painting ideas range from using everyday objects like sponges and straws to creating textured masterpieces along with create awareness of objects. This process isn’t just about making pretty pictures; it’s a powerful tool for toddler development.

As they mix colors, practice hand-eye coordination, and build their concentration, toddlers are also nurturing their emotional expression and creativity. Engaging in kids’ painting activities encourages growth across physical, cognitive, and emotional domains, turning every stroke of the brush into a stepping stone for holistic development. Still wondering what are the benefits of painting especially what are the benefits of painting for babies and how children painting drawing benefits for toddlers? Find the answer in the blog post by Framous Pictures and get benefits of painting in early childhood for your toddlers.

How to Frame a Mirror in 8 Steps | Killer Ideas 150 150 admin

How to Frame a Mirror in 8 Steps | Killer Ideas

Mirrors frames are more than just functional items; they also serve as stunning decorative pieces in interior design. Mirror framing along with custom picture framing can add a touch of elegance, elevate your decor, and personalize your living space. Walls adorned with all frames and mirrors, make the space appear more spacious and elegant.

Whether you have a plain bathroom mirror frames or a frameless wall mirror in your living room, upgrading it can completely transform the room’s ambience. Set free your mirror framing DIY skills and transform your mirror into a stunning focal point by adding a frame. Say goodbye to dull, unframed mirrors and embrace a stylish upgrade that reflects your taste with the framing a mirror ideas mentioned below.

In this step-by-step guide, we’ll show you how to make mirror framing in 8 easy steps. By the end of this mirror framing DIY project, you’ll have a beautifully framed mirror that perfectly complements your interior style.

Elevate Your Mirror Game: A Creative Guide to Mirror Framing

Step 1: Gathering the Tools and Materials

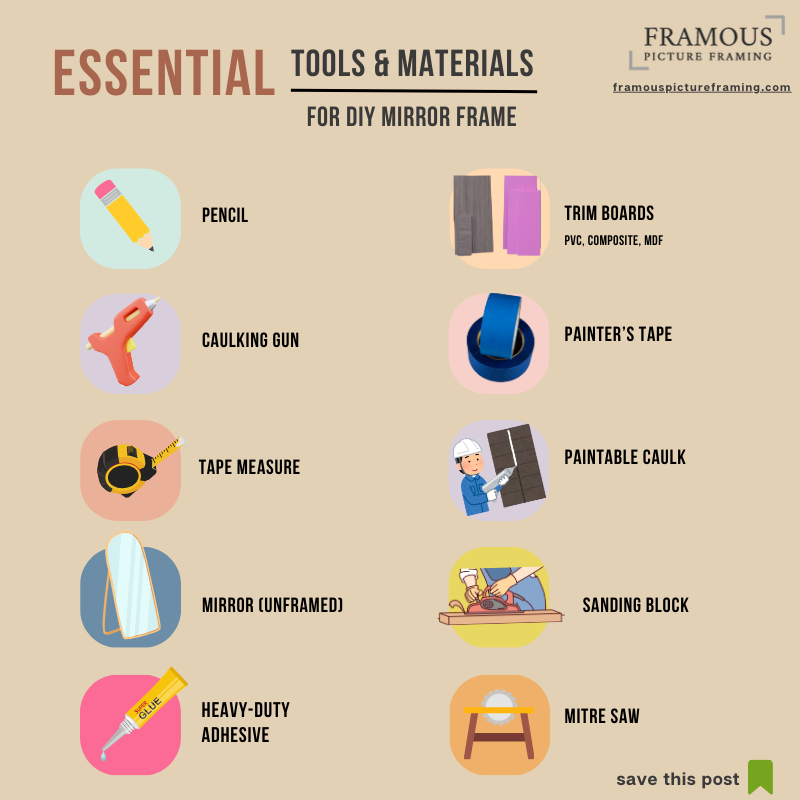
So, how to make mirror frames and where to start? First, prepare for your mirror framing adventure by gathering all the necessary tools and materials. The materials include a wood frame, mirror adhesive, paint or stain, and nails or screws.

You’ll also need tools like a saw, measuring tape, level, paintbrushes, sandpaper, and safety equipment like gloves and safety glasses for framing a mirror. Ensuring you have all the required materials at the start will save time and prevent interruptions during the process.

You can find most of these mirror frames items at your local hardware store or online. The online store offers a wide variety of all frames and mirrors and styles for custom picture framing and mirror framing, allowing customers to create personalized masterpieces.

Here’s the list of mirror framing items:

  1. Primed MDF baseboards
  2. Tape measure
  3. Level
  4. Mitre saw
  5. Liquid nails or extra-strength wood glue
  6. Caulk and a caulk gun
  7. Extra fine sandpaper
  8. Non-water-based paint
  9. Paintbrush, roller, or spray gun
  10. Painter’s tape
  11. Tack cloth

Step 2: Measuring Your Mirror

The key to a successful mirror framing project is accurate measurements.

  1. Measure the dimensions of all frames and mirrors carefully, ensuring your account for any bevelling on the edges. Take precise measurements of your mirror using a tape measure.
  2. Next, decide on the mirror frames’ size and thickness, considering your room’s decor and personal preferences.
  3. With the measurements in hand, select the appropriate type and size of wood for the mirror frames.
  4. Make note of any mirror clips, or framed mirror bunnings and consider their placement when determining the size of your frame. Also, measure the distance between the framed wall mirror and other objects on the wall to ensure ample space for the frame.
  5. Ensure your workspace is clean, well-ventilated, and adequately protected from spills or paint splatters when framing a mirror.

Step 3: Cut & Assemble the Frame Baseboards

  1. Using a saw, cut the wood pieces according to the measurements you took earlier. Remember to make precise 45-degree mitre cuts at the corners for a seamless and professional finish.
  2. Using a mitre saw set at a 45-degree angle, cut the baseboards to the appropriate length to make a stand for mirror. If you’re new to using a saw, practice on scrap wood first.
  3. If you don’t have a mitre saw, many home improvement stores offer pre-mitred mirror trim for use in-store.
  4. Once the pieces are cut, dry-fit the frame mirror to ensure everything aligns perfectly before gluing and nailing it together.
  5. Lay out the four pieces of the MDF board separately to ensure proper alignment when installing the mirror frame.
  6. Apply wood glue to the mitred corners, then gently tap in the nails or screws to secure the frame stand for mirror.
  7. If attaching the frame mirror to the wall, remember to cut a notch for the mirror to ensure a flush fit.

Step 4: Painting the Baseboards

It’s time to add colour and character to your mirror frames. Let your creativity shine as you paint the baseboards. Choose a colour for framing a mirror that complements your space and personal style.

  1. Apply paint or stain according to your desired style of mirror framing. You can opt for a classic, natural wood finish or get creative with bold colours that complement your room’s theme.
  2. Don’t forget to add any decorative elements, like carvings or embellishments, at this stage.
  3. It’s best to use non-water-based acrylic, oil, or latex paints to prevent damage to the absorbent MDF boards when mirror framing.
  4. Apply the paint evenly to all sides, including the back, which will be reflected in the mirror. Allow the paint to dry for at least two hours.

Step 5: Sanding the Baseboards

  1. To achieve a polished and smooth finish, sand the entire frame with medium-grit sandpaper. Pay close attention to the edges and corners to remove any roughness.
  2. After sanding, wipe off any dust with a tack cloth.
  3. Consider applying a topcoat or sealer, such as polyurethane, to protect the frame, especially if it’s a bathroom mirror frames prone to water splashes.
  4. Let the mirror frames sit for four to eight hours to allow the proper drying of stand for mirror.

Step 6: Installing the Mirror Frame

Now it’s time to bring your mirror framing to life. Once your mirror frames are dry and finished, it’s time to attach the mirror.

  1. Starting with the bottom piece, apply liquid nails to the back of the board, excluding the edge closest to the mirror.
  2. Use mirror adhesive for framing a mirror, which is specially formulated to secure mirrors to various surfaces. Apply the adhesive to the back of the mirror frames, making sure to spread it evenly.
  3. Be cautious and avoid getting adhesive on the mirror surface, as it can damage the reflective coating. Carefully place the mirror onto the adhesive, ensuring it’s centred and level.
  4. If you’re worried about the mirror slipping while the adhesive sets, use painter’s tape to hold it in place temporarily.
  5. Press the board onto the mirror or wall and use a level to ensure it’s straight. Secure it with painter’s tape while the adhesive dries.
  6. Repeat the process for the two side pieces, and finish by adding the top piece. Wipe away any excess glue.

Step 7: Touch up the Frame & Securely Mount the Mirror

  1. Once the frame mirror has dried completely (approximately 24 hours), remove the painter’s tape.
  2. Use caulk to fix any uneven corners or gaps between the mirror frames and the wall. Apply a bead of silicone caulk along the joints and smooth it with a wet finger.
  3. After the caulk dries, touch up any areas with paint to achieve a seamless finish when framing a mirror.
  4. With the mirror attached to the frame, it’s time to mount it on the wall.
  5. Start by locating the wall studs using a stud finder or use wall anchors for added support.
  6. Enlist the help of a second person to hold the stand for mirror in place while you mark the desired location on the wall.
  7. Using a level, double-check that the framed wall mirror is perfectly aligned.
  8. Depending on the mirror’s size and weight, use appropriate hanging hardware like D-rings or a French cleat system to ensure a secure mounting. The framed mirrors Bunnings come in various sizes and styles.

Step 8: Set Your Creativity Free

Customizing mirror frames allows you to infuse your personality and style into a practical piece of decor. Embrace the opportunity to customize your mirror frame and make it truly unique. You can easily browse framing a mirror ideas through Pinterest for different home decor styles and take inspiration.

While using an MDF baseboard for mirror framing is the easiest option, you can experiment with different materials for a one-of-a-kind look.

Here is some creative framing a mirror ideas to get you started on customizing your mirror frame:

  1. Mixed Media Magic: Combine various materials like seashells, beads, buttons, or even broken pieces of colourful ceramics onto the frame mirror. Use a strong adhesive to secure them and create an eye-catching mosaic mirror framing effect.
  2. Stencilled Sophistication: Utilize stencils to add intricate designs or patterns to the frame. Choose patterns that complement your room’s decor and add an elegant touch to the mirror frame.
  3. Whimsical Wirework: Incorporate wire wrapping or shaping techniques around the framed wall mirror. Form vines, flowers, or other designs to give your mirror a charming and whimsical appearance.
  4. Nature’s Touch: Glue dried flowers, leaves, or twigs onto the frame mirror to bring a touch of nature indoors. This organic approach of framing a mirror adds a rustic and enchanting element.
  5. Colourful Ombre: Paint the framed wall mirror in a gradient of colours, going from one hue to another, creating an ombre effect. This modern and vibrant look adds a burst of personality to your mirror framing.
  6. Glamorous Gilding: Add a touch of luxury with gilding or metallic leaf. Apply gold, silver, or copper leaf to certain parts of the frame mirror or create a distressed gilded look for an opulent finish.
  7. Intricate Wood Carvings: If you’re skilled in woodworking or want to challenge yourself, try intricate wood carvings or engravings on the frame. Consider reclaimed wood for a rustic touch, bold paint colours that coordinate with your wall, or adding a textural element.
  8. Vintage Charm: Distress the mirror frames with sandpaper and apply a layer of antique glaze to give it a vintage or shabby-chic appearance. Embrace imperfections and wear for a charming, well-loved feel.
  9. Mirror-on-Mirror Magic: Create a mirror-on-mirror effect by gluing smaller mirrored tiles or broken mirror pieces onto the frame. This reflective design adds dimension and sparkle.
  10. Play with Patterns: Experiment with various patterns when framing a mirror like chevron, herringbone, or Moroccan motifs. Paint or use patterned washi tape to add a pop of visual interest to the mirror framing.

Safety Precautions

  1. Always wear safety glasses and gloves when using power tools or handling glass to protect your eyes and hands when framing a mirror.
  2. Use appropriate safety gear like dust masks and a well-ventilated workspace to minimize exposure to wood dust and fumes from paint or stain.
  3. Be cautious when handling mirror frames, as they can be fragile and easily break.
  4. Keep all sharp tools out of the reach of children and follow the manufacturer’s guidelines for safe usage.
  5. Avoid inhaling fumes from adhesives, paint, or stain. Use them in a well-ventilated area or consider wearing a respirator.

Helpful Tips

  1. If you’re unsure about the type of wood or finish to use, create a small sample frame to test different options before proceeding with the full project.
  2. Measure twice, cut once! Double-check your measurements to avoid costly mistakes.
  3. When attaching the frame to the mirror, use clamps to hold the pieces together until the adhesive dries to ensure a strong bond.
  4. Before mounting mirror frames, create a paper template of its size and use it to plan the ideal location on your wall.
  5. Consider adding LED strip lighting behind the mirror framing for an illuminated and dramatic effect.

Ready to Give Your Mirror an Upgrade?

By following these eight steps and taking inspiration from above mentioned creative framing a mirror ideas, you can transform any ordinary mirror into a stunning piece that reflects your style. Mirror Framing DIY is a simple and rewarding project that allows you to unleash your creativity.

So, grab your tools, gather your materials, and get ready to give your mirror the upgrade it deserves. Let your mirror selfies capture the beauty of stunning mirror frames. Also, custom mirror framing can be done by a professional framer.

Searching For A Chic Framed Mirror? Visit Framous Pictures!

Planning a gallery wall for your home? Explore the diverse range of custom frames Perth at Framous Pictures to showcase your style. Framous Pictures offer custom picture framing services to preserve and display your cherished memories. The store was decked with all frames and mirrors, creating a stunning display of beauty.

Five Ideas for Decorating Your Nursery Walls 150 150 admin

Five Ideas for Decorating Your Nursery Walls

Preparing a space filled with love to welcome new life is an extraordinary experience. whether it’s your first child or transforming a nursery for your little one’s younger siblings. The process of decorating a nursery involves love, care, and the desire to create a special environment.

So, whether you’re a Pinterest pro looking for finishing touches or seeking a fresh new theme, this blog is here to inspire you with five fantastic ideas to decorate your baby’s new space.

Safety First: Protecting Your Little One

When it comes to nursery walls, safety should always be a priority. By following these tips, you can create a safe nursery for your little one.

  1. Secure Your Wall Hangings: It’s crucial to ensure that anything hung on the walls is securely fastened, and if needed, seek assistance from professionals.
  2. Keep Crib Safety in Mind: keep the crib away from any hanging decorations to avoid potential accidents. Regardless of how well-secured your wall decor is, always keep the crib away from the walls. This reduces the risk of accidents and ensures your baby’s safety.
  3. Make Crib Center of Attention: In a room big and bold, let the crib take centre stage by placing the crib in the centre. This keeps it at a safe distance from any objects on the walls or shelves.
  4. Small Space Solutions: If your nursery is smaller in size, it’s a great idea to limit wall decor to one or two walls. Place the crib on the opposite side of the nursery, creating a balanced and functional layout.

Fun & Playful Nursery Wall Décor || 5 Ideas

The nursery is a space where you’ll create precious memories with your little one. Make it extra special by decorating the walls with framed prints, photographs, or custom canvas art.

Here are five delightful options for your nursery decor:

1. Mixed Gallery Wall: Artistic Wall Collage

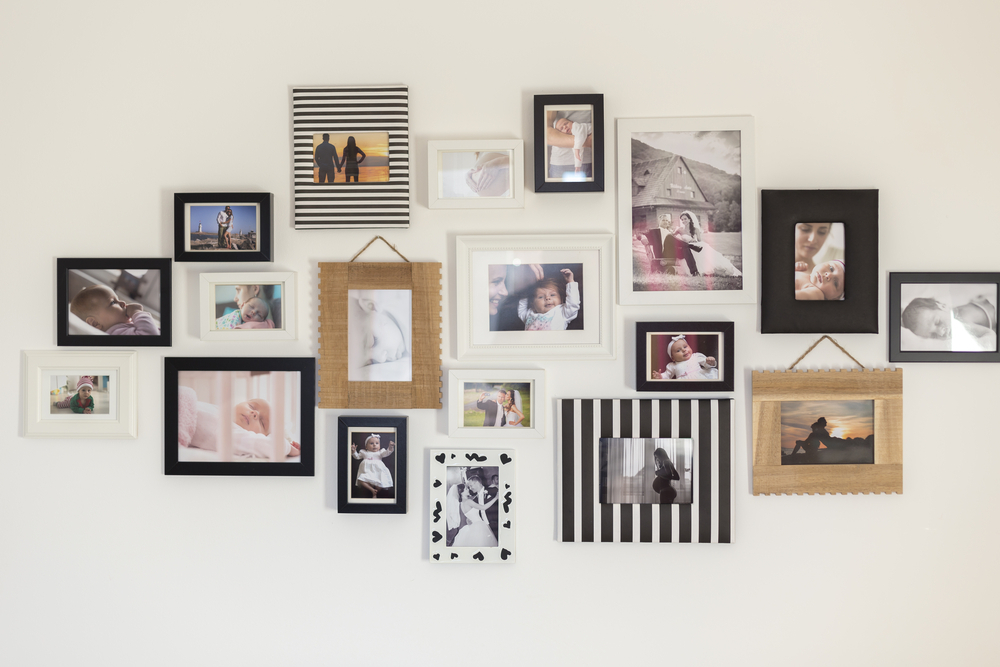
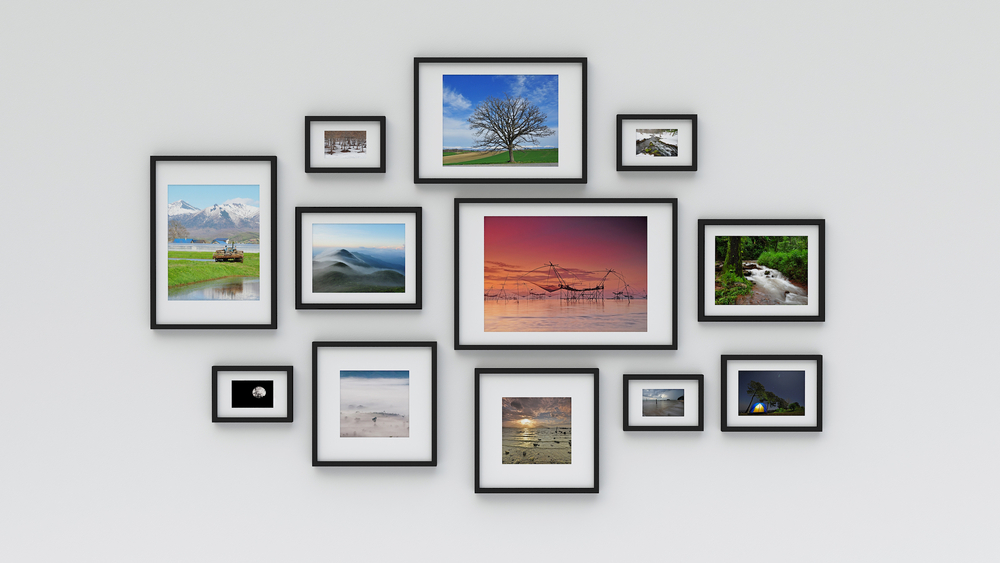
Creating a gallery wall using a mix of picture frames is a fun and personal way to decorate your baby’s nursery. Select meaningful family photos and art prints that align with the nursery’s overall aesthetic. Experiment with different frame styles and sizes to add visual interest.

For a cohesive look, stick to a colour scheme or choose frames with a similar finish. Plan the layout by arranging the frames on the floor or a table before hanging them on the wall. Start with the centre point and work your way out for a visually balanced and warm gallery wall that oozes personality.

2. Character-Themed Print Series: Bring Beloved Characters to Life

Another option is to create a nursery feature wall using framed prints of your favourite book or nursery characters. This unique and playful approach adds colour, charm, and early exposure to beloved stories and characters.

For the best results, consider professional framing to protect and preserve the prints while adding a polished touch to the wall. A nursery feature wall with professionally framed prints not only adds visual interest but also holds deep sentimental value.

3. Custom Canvas: Personalized Artwork for Little Dreamers

Using a custom canvas with your baby’s name or initial is a creative and personalized way to decorate the nursery wall. This choice becomes even more meaningful if you’ve selected a unique or family name for your child.

Custom canvas prints can feature any design or text of your choice and are available in various sizes to suit your nursery’s wall space. For optimal results, have the canvas professionally stretched, ensuring a taut and even surface.

Professional stretching helps maintain the canvas’s integrity, preventing sagging or wrinkling over time. The result is a thoughtful and special addition to the nursery that will endure for years to come.

4. ABC Theme: Fun & Educational Wall Decor

Decorating a nursery wall with framed ABC art prints is an engaging and educational option. Colourful illustrations corresponding to each letter of the alphabet introduce your child to letters and their sounds.

To fully enhance these prints, professional framing is essential for their protection and preservation. Furthermore, professional framing adds a polished and finished look to the wall, elevating the overall aesthetic.

5. Framed Cross-Stitch Piece: Handmade with Love

For a personal and handmade touch, consider framing a cross-stitch art piece for your baby’s nursery decor. Cross stitch is a traditional embroidery technique that involves creating intricate patterns by crossing threads over a fabric grid.

This time-consuming process often results in cherished and sentimental artwork. Framing a cross-stitch piece professionally adds character to the nursery and ensures its long-term protection and beauty.

Dream Nursery Ideas with Personal Touches

Lift your baby’s nursery with a personal touch through framed artwork, family photos, and charming wall hangings. These decorative elements not only add visual interest but also hold sentimental value, creating a space filled with love and warmth.

Framed Artwork and Family Photos:

Add a sprinkle of your personal touch to your baby’s room. Picture this: framed artwork and family photos gracing the walls, each telling a unique story. Let love and individuality shine through every stroke and frame.

Wall Hangings & Prints Should Match the Color Scheme:

Create a consistent and cohesive look by choosing wall hangings and framed prints that complement the colour scheme of your nursery. Let the artwork dance harmoniously with the room’s palette, adding an extra touch of charm.

Bring Life to Your Nursery with Stylish Shelving & Lively Greens:

Elevate your nursery’s style with the simplest of additions. Install shelving to display adorable trinkets and add a splash of greenery to breathe life into the space. It’s a delightful way to infuse style and personality effortlessly.

Hang Cute Baby’s Clothes on Display:

Transform your baby’s clothes into a delightful decor element by showcasing them on an open clothes rack. Those tiny, adorable mini coathangers bring a smile to everyone’s face and add a sprinkle of charm to the room. Who can resist such cuteness?

Bring Your Baby’s Nursery to Life with ‘Framous Pictures’

We hope these ideas have sparked your imagination for decorating your baby’s nursery. Creating a special space where precious moments are shared is essential.

Custom picture frames provide an opportunity to display art, prints, and photos that complement your style while preserving your treasured memories.

Framous Pictures specializes in creating frames that enhance and complement any space, including nurseries. From photographs to artwork, mirrors to memorabilia, their expertise covers all framing requirements. Get in touch with Framous Pictures today to bring your nursery to life and transform it into a space filled with warmth, love, and creativity.

How To Choose The Right Frame For Your Artwork 150 150 admin

How To Choose The Right Frame For Your Artwork

Choosing the right frame for your artwork is crucial in enhancing its beauty and protecting it over time. Framing is an art in itself, and understanding the purpose of frames and how they can complement your art is essential. This article will guide you through the process of framing artwork, selecting the perfect frame for your artwork, and considering factors such as colour, material & style, and sizes.

Framing Is An Art

Painting framing goes beyond merely enclosing your artwork. It is a way to enhance its presentation, add depth, and create a visual connection between the art and its surroundings. A well-chosen frame can transform the overall appearance and impact of your artwork.

Purpose of Frames

Painting framing serves multiple purposes, including protecting your artwork from dust, moisture, and physical damage. Framing artwork also provides structural support, preventing the art from warping or sagging. Additionally, custom framing Perth offer a visual border that helps focus attention on the art itself and complement its style.

A Guide to Choosing the Right Frames for Your Art

So, you’ve found the perfect piece of art that speaks to your soul, and now you’re ready to give it the frame it deserves. Choosing the right custom framing Perth can enhance the beauty of your art and elevate its overall presentation.

But where do you start custom picture framing?

Fear not! We’ve got you covered with this handy guide to help you choose the perfect custom frames Perth for your beloved artwork.

1. Choose A Frame That Complements The Art

When framing artwork, your priority should be to find one frame that complements the style and mood of the artwork. Consider the subject matter, the era, and the overall aesthetic of the piece when custom picture framing. A modern, minimalist painting might benefit from a sleek and simple frame, while a traditional landscape painting might look stunning in a more ornate and elaborate frame. Let the art itself guide your frame selection.

2. Consider The Colours In Your Art

The colours in your artwork play a vital role in determining the frame that will best showcase it. Look for a frame colour that either matches or complements the dominant colours in the art. A neutral frame can provide a clean and timeless look, while a contrasting colour can add a pop of vibrancy and make the art stand out. Be sure to consider both the foreground and background colours of the artwork when custom picture framing.

3. Find A Frame Style

Frame styles can vary widely, from classic and traditional to modern and contemporary. Explore different custom picture framing styles to see which one resonates with the overall feel of your framing artwork. If you have a vintage-inspired piece, an antique or distressed frame might be a great fit. On the other hand, if your art has a more avant-garde vibe, a sleek and minimalistic frame can create a captivating contrast.

4. Select A Frame Finish

The finish of a frame can significantly impact its overall appearance. Choose a finish that complements the style of your art and the ambience of the room where it will be displayed. A glossy finish can add a touch of elegance and sophistication, while a matte finish can create a more subdued and understated look. Experiment with different custom frames Perth finishes to find the one that enhances your art’s unique qualities.

5. Make The Shape Count

The shape of the frame can play a significant role in how your art is perceived. Square or rectangular frames are the most common, but don’t be afraid to think outside the box when custom picture framing. Circular frames can add a whimsical touch to your art, while unconventional shapes can bring a sense of creativity and uniqueness. Consider the composition of your framing artwork and choose a frame shape that complements it best when custom framing Perth.

6. Choose Your Matting: Mat Size Matters

Matting refers to the border between the artwork and the frame. It adds depth and visual interest to your art while protecting it from touching the glass directly. When choosing matting, consider the size of your framing artwork and the overall dimensions of the frame. A wider matting can create a more dramatic and spacious look, while a narrower one can provide a clean and contemporary feel. Experiment with different mat sizes to find the perfect balance.

7. Determine The Size Of The Frame, Not The Art

When it comes to painting framing, remember that the size of the frame should be determined by the space where it will be displayed, not the size of the framing artwork itself. Consider the available wall space and the visual impact you want to achieve before deciding on the frame size. A large artwork might demand a larger frame to create a bold statement, while a smaller frame can bring attention to more delicate pieces. Take measurements and envision how the artwork will fit within the frame and the room as a whole.

8. Choosing the Right Colour, Material & Style

When it comes to frames, the custom frames Perth options are practically limitless! With many colour, material & style available, you have the opportunity to find the perfect frame for your artwork.

However, it’s important to remember that the frame and the artwork should complement each other. They should work together to create a harmonious and balanced visual presentation.

After all, you don’t want a frame that overpowers your precious artwork or fails to give it the presence it deserves.

So, let’s dive into the exciting world of custom picture framing and explore colour, material & style for painting framing:

  1. Complement, Don’t Compete: The frame you choose should be less eye-catching than your artwork. Avoid frames that are too similar in colour or as busy in decoration as the artwork itself. The goal is to enhance the framing artwork, not distract from it.
  2. Embrace Contrast: Consider how a frame can effectively present your artwork. For instance, a dark frame on a light painting can create a moderate amount of contrast, helping to make your framing artwork stand out and grab attention in any room.
  3. Play with Materials: Frames come in a variety of materials, from classic wood to sleek metals and even unconventional options like acrylic or recycled materials. Explore different materials and textures to find the one that best suits your framing artwork’s style and the overall aesthetic you want to achieve.
  4. Embrace Your Style: Your painting framing should reflect your taste and style while also complementing the framing artwork. Whether you prefer a traditional, ornate frame or a minimalist, modern design, there’s a frame out there that can capture your unique aesthetic.
  5. Size Matters: Consider the size of your artwork when choosing a painting framing. The frame should provide a balanced border around the framing artwork without overwhelming it. Remember, the frame’s role is to enhance, not overshadow, the artwork.
  6. Experiment and Have Fun: Don’t be afraid to think outside the box and have some fun with your frame selection. Mix and match styles, colours, and materials to create a frame that adds an unexpected and delightful touch to your framing artwork.

Framing For Prints: Adding Pizzazz to Your Walls

Prints are like the life of the party when it comes to filling up your wall space. They’re accessible, affordable, and they bring a whole lot of personality to any room.

But how do you choose the perfect painting framing for prints? Well, here are some tips for custom picture framing that will make your prints pop and turn your walls into a visual feast!

  1. Match the Colours to the Frame: For Prints, Take a good look at the spectrum of colours in your print and let them guide you. Choose a frame colour that complements the dominant colours in the print. If you have a black-and-white photograph, go for a sleek black or white frame. And if you have a vibrant, colourful print, find a painting framing that matches those eye-catching hues.
  2. Let Contrast Make a Statement: For Prints, contrast is like the secret sauce that adds that extra oomph to your prints. If you have a black-and-white photo with a lot of contrast, consider a bold frame that will make it stand out even more. On the other hand, if your photo has subtle tones, opt for a frame that enhances its soft and delicate beauty.
  3. Black and White Prints Deserve Black or White Frames: If you have a stunning black and white print, go for a black or white frame. This classic combination for Prints will accentuate the elegance and timelessness of the photograph.
  4. Let the Dominant Colours Shine: For Prints and coloured photographs, pay attention to the dominant colours that immediately catch your eye. Pick a frame colour that matches those colours. This will make the photograph stand out and create a visually stunning effect.
  5. Mix and Match: Who says all your frames need to be the same for prints? Have fun and mix it up! Create an eclectic gallery wall by using frames of different colours and styles. Let each print have its unique frame personality while still maintaining an overall cohesive look. It’s like throwing a party for your prints.

Framing For Drawings and Illustrations: Let’s Keep It Delicate & Protected

  1. Mind the Medium: For drawings and illustrations, if your framing artwork is created using delicate mediums like pastels, graphite, or charcoal, it deserves extra care and attention.
  2. The Magic of Mats: Give your delicate artworks the love they need by framing them with a mat. For drawings and illustrations, Mats are like superheroes that help preserve fragile pieces over time.
  3. Keep the Distance: Remember, for drawings and illustrations the glass should never touch your precious framing artwork directly. The mat comes to the rescue for painting framing by creating a safe space between the two. This prevents potential damage caused by rubbing or condensation.
  4. Protect from Moisture: If your framing artwork is made with graphite, for example, it’s crucial to avoid any moisture-related mishaps. Moisture can lead to pesky Mold and mildew. The mat creates an air gap, allowing your artwork to “breathe” without any worries.
  5. Paper Works, Too: Don’t forget that the same painting framing rule applies to all works done on paper and not just for drawings and illustrations. Whether it’s a stunning watercolour or an intricate pen drawing, make sure the glass and artwork have their space, courtesy of a trusty mat.

Framing For Oil Paintings: Unleash Your Creativity

Oil paintings, the ancient darlings of the art world, deserve frames as unique as they are. Let’s dive into the world of oil painting framing and unleash your creative spirit! Here’s what you need to know for oil paintings framing:

  1. Drying Time: Unlike acrylic or watercolour, oil paintings take a while to completely dry. Unlike other mediums, oil paintings require special attention due to their slow drying process. Even if they feel dry to the touch after a few weeks, they can take decades to fully dry. The thickness of the paint layer affects its stability, so cracking is a concern. So, keep in mind the delicacy of the paint for oil paintings framing and its potential for cracking.
  2. Colour Compliments: For oil paintings framing consider the dominant colours in your oil painting and how a frame can complement its overall composition. The choice is yours, and there are endless possibilities to explore for framing canvas.
  3. Choosing Bulkier Wooden Frames: For oil paintings framing, it’s all about personal preference. Oil painting framing provides the flexibility to choose more substantial wooden frames. Embrace the beauty of chunky frames that add a touch of elegance and grandeur to your artwork when framing canvas. Let your imagination run wild as you select the perfect frame to showcase your framing artwork masterpiece.
  4. Location, Location, Location: Where you’ll display your oil painting matters. For oil paintings framing consider the surroundings and ambience of the room. Is it a cozy study, a contemporary gallery, or a chic living room? The location can influence the oil painting framing style and size, enhancing the overall visual impact.
  5. Glass or No Glass? While opinions differ, some argue against using glass for oil painting framing. It’s believed that glass may trap moisture, potentially leading to framing canvas deterioration. Allow your painting to “breathe” and dry sufficiently before enclosing it behind glass.

Framing For Mixed Media and Acrylic

Mixed media artwork is a wild and captivating world where creativity knows no bounds. It combines elements from various mediums, giving it a unique and unpredictable nature.

These pieces are like chameleons, able to incorporate elements from various mediums. When framing for mixed media masterpieces, consider the following factors to find the perfect match:

  1. Embrace the Blend: Since mixed media art encompasses multiple mediums, think about how each element can be showcased. For mixed media consider the textures, colour, material & style in your framing artwork. Let the frame become part of the artistic fusion!
  2. 3D Delight: Some mixed media works boast three-dimensional characteristics, adding depth and intrigue. When choosing a frame for mixed media, keep in mind the dimensions and weight of your framing artwork. Go for a frame that can support and enhance the unique features of your creation like custom mirror framing.
  3. Balance & Contrast: Just like with other art forms, balance and contrast play a vital role in framing mixed media pieces. Choose a frame for mixed media that enhances the overall composition and complements the colours and textures within the framing artwork.
  4. Playful or Minimalist: The style of your frame can either complement or contrast with your mixed media artwork. Get playful with ornate and decorative frames to match the whimsical nature of your creation. Alternatively, choose a minimalist frame for mixed media that allows the artwork to take centre stage, highlighting its eclectic beauty.
  5. Lightweight or Sturdy: Consider the weight and bulkiness of your mixed media piece when selecting a frame. Lighter frames for mixed media can add an ethereal touch to delicate works, while sturdier frames provide a solid foundation for more robust creations.
  6. Think outside the Frame: Don’t limit yourself to traditional rectangular frames for mixed media. Mixed media artworks often invite experimentation, so consider the unconventional shape, colour, material & style that bring out the uniqueness of your creation.

Know Your Artwork’s Story

Delve into the fascinating history of your framing artwork. Just like a detective, uncover its past to gain valuable insights for painting framing. Discover how it was presented by galleries, curators, or even the artist themselves.

How did it catch your eye when you decided to make it yours?

Whether it’s a captivating Old Masters piece or a contemporary gem, research is key to finding the perfect painting framing that complements its story.

  1. Be sensitive to the period: Consider the historical context of the artwork and be aware of the period it belongs to. This knowledge can serve as a valuable guide when selecting a painting framing that complements the artwork’s style and era.
  2. Look into past presentations: Research how the artwork has been framed and presented in the past. Examine how galleries, curators, or even the artist themselves have chosen to showcase the piece. This can offer insights into painting framing choices that have successfully highlighted the artwork’s unique qualities like custom mirror framing.
  3. Consider the original frame: In the case of framing artworks with significant historical contexts, such as Old Masters, it may be appropriate to keep them in their original frames. These frames are often integral to the artwork’s overall aesthetic and authenticity. However, it’s important to note that prolonged periods in original frames can sometimes cause damage, so professional assessment is necessary.
  4. Assess damages: If the artwork has been housed in its original frame for an extended period, some damages may have occurred. It is crucial to have a professional assess the artwork and frame to determine if any repairs or restoration are needed.
  5. Research for contemporary pieces: For contemporary framing artwork, researching their painting framing history can provide valuable insights into how artists or curators have chosen to present them. This knowledge can guide your decision-making process in selecting a frame such as custom mirror framing that aligns with the artwork’s intentions and enhances its visual impact.

Preservation: Show Your Art Some Love

When it comes to choosing a frame, it’s not just about picking a pretty colour or material. We have to think about the long-term protection and care of your beloved artwork!

Let’s take prints, photographs, and delicate works on paper, for example. These little guys need some extra TLC when it comes to painting framing. We want to keep them looking fresh and vibrant for years to come.

So, here’s a checklist of things to consider for framing artwork:

  1. Matting Magic: Use acid-free mats and backings to keep your artwork free from stains and prevent that dreaded paper deterioration. It’s like giving your art a cozy, protective hug!
  2. Shield from the Sun: Protect your precious piece from those sneaky UV rays. Choose glazing options like ultraviolet light-filtering Plexiglass or glass. Custom mirror framing is like giving your art a stylish pair of sunglasses!

Remember, preserving your artwork with custom framing Perth is like keeping a time capsule of beauty. So, show your art some love and give it the frame it deserves. Considering visiting a local framing shop near me to discuss custom picture framing options.

Location of the Artwork

  1. Match the Mood: Consider the overall vibe of the space where your artwork will shine. If it’s a sleek and modern setting with cool tones, a monochrome frame will create a harmonious match. Think about how the frame can dance with the decor and elevate the style.
  2. Match the frame to the setting: Think about how the frame will complement the surrounding colours and design elements. For a modern space with Gray and white tones, a monochrome frame could be a perfect fit.
  3. Embrace the nautical vibe: If you have a coastal or nautical-themed room, consider a frame made from whitewashed timber that resembles driftwood. It will create a delightful pairing with the artwork and add a touch of seaside charm.
  4. Rustic elegance: In a rustic setting, opt for frames with natural wood tones. They will not only enhance the artwork but also harmonize with the overall interior, creating a cohesive and inviting atmosphere.

Be Unconventional: Have Fun With Colour, Style & Layout

  1. Break the Mold: Don’t shy away from stepping outside the box of conventional painting framing. Your artwork deserves to shine, and sometimes that means trying something unexpected and unique.
  2. Unleash Your Artistic Spirit: Who says your artwork must always be confined within a frame? Embrace the idea of going frameless and proudly display your painting on a tabletop, leaning against the wall. Let your creativity roam free!
  3. Rules Are Made to Be Broken: When it comes to painting framing, there are no strict rules set in stone. The ultimate goal is to highlight your artwork and make it the star of the show. So, feel empowered to experiment and find the perfect frame, or lack thereof, that truly brings out the essence of your creation.
  4. Colours that Pop: Explore a wide range of colours when selecting frames. Consider how different hues can complement or contrast with your framing artwork, creating an eye-catching and captivating display.
  5. Style for Impact: Your painting framing style should enhance the overall impact of your artwork. Don’t limit yourself to one particular style. Instead, play around with different aesthetics, from traditional to contemporary, until you find the one that truly speaks to your artistic vision.
  6. It’s All About the Layout: Arranging your framing artwork can be an exciting and creative process. Think about the placement and orientation of your pieces, exploring various configurations to achieve a visually stunning and harmonious display.
  7. Dare to Bare: Remember, the best frame might just be no frame at all! Sometimes, letting your artwork stand-alone can create a powerful and minimalist statement, letting the beauty of your creation speak for itself.

To Frame or Not to Frame: Artistic Freedom

Do All Artworks Need to be Framed?

In the world of art, rules are meant to be broken. When it comes to painting framing, not all artworks need to be confined within the borders of custom mirror framing. Many painters from the early 20th century boldly rejected frames altogether, embracing a sense of artistic freedom.

This approach can work well for sturdy mediums like framing canvas, but it’s important to note that delicate works on paper or perishable materials require extra care and protection.

Let the Art Speak for Itself

Skilled Perth picture framers should never shy away from suggesting that a particular artwork doesn’t need a frame. Instead, focus on proper stretching and ensuring that the piece has the right depth and shape to harmoniously adorn your chosen wall. Trust your instincts and consider the visual impact of the artwork on its terms when custom framing Perth.

When in Doubt, Go Black or White

If you find yourself on the fence about painting framing, black and white are timeless choices that can effortlessly complement most interior styles. Sleek black frames can infuse a touch of drama and give your artwork a defined presence, while white frames work harmoniously with colourful pieces and pristine white walls.

So, unleash your artistic spirit and don’t be afraid to break the frame when it feels right. Embrace the uniqueness of each artwork and let it shine without boundaries. And when you do choose to frame, let it be a deliberate decision that enhances the visual experience. After all, art is about self-expression and pushing the boundaries of creativity.

Conservation Tips To Prolong Framed Artwork Life

To prolong the life of your framed artwork, follow these conservation tips:

Avoid extreme changes in humidity and heat

Artworks can be sensitive to fluctuations in humidity and heat. Exposure to these extremes can lead to issues such as Mold, paint loss, and fading. Keep framing artwork away from sources of heat, such as fireplaces, heaters, and ovens. Additionally, avoid hanging artwork in rooms with high humidity or recently plastered walls, especially near air vents.

Protect from direct sunlight and electric lights

Direct sunlight and certain types of electric lights can be harmful to artwork. The pigments used in various mediums may be volatile and susceptible to fading when exposed to these light sources. Avoid placing artworks too close to windows or strong sources of light, unless they are LED lights specifically designed for art preservation.

Use appropriate framing with glass

If you plan to hang framing artwork in rooms with working fireplaces or where candles are frequently used, it is recommended to use glass frames. This will help protect the artwork from smoke and other potential damage. Additionally, consider using frames with UV-filtering glass to protect against harmful ultraviolet rays that can cause fading.

Avoid storing artwork in attics

Attics can be prone to extreme temperature fluctuations and high humidity levels. To preserve valuable or sentimental artwork, it is best to avoid storing them in attics. Instead, choose a more controlled environment with stable temperature and humidity levels.

Put Your Art in the Spotlight

Choosing the right frame for your artwork is an important decision that can greatly impact its visual appeal and longevity. By considering factors such as complementing the art, colours, style, finish, shape, and size, you can create a visually stunning and well-protected display.

Remember to prioritize conservation and preservation techniques to ensure the longevity of your framed artwork. Always search for a reputable art framing near me to provide high-quality framing services.

Explore Custom Framing Perth with ‘Framous Picture’

Wondering if there’s a professional ‘framing shop near me’ to preserve your cherished memories?

Get professional Memorabilia Framing services in Perth to preserve your cherished items for a lifetime. Trust our expertise in Wedding Photo Framing to showcase your special moments in an elegant and timeless display.

Preserve the magic of your favourite movies with our Movie Posters Framing services, creating a cinematic tribute to your passion for film. Celebrate your sports memorabilia collection with our dedicated Football Jersey Framing service, capturing the spirit of the game in a stunning display.

For expert assistance in choosing the right frame for your framing artwork, consult reputable Perth picture framers in your local area. Start showcasing your art with frames ─ enhance its beauty and protect it for years to come.

How to Pick the Perfect Picture Frame, According to an Art Consultant 150 150 admin

How to Pick the Perfect Picture Frame, According to an Art Consultant

We got pictures…so many pictures…either by photography or by paintings. We make the moments memorable and keeping them with us always. Pictures are not always meant to be used for decoration but sometimes to look and vibe the moment again and again. People often make it a hobby to frame their pictures and art.

Well, if you are not sure how to frame? Hmm… we have got some expertise by experts of Framous Pictures. So, allow us to fix the hassle of artwork frames. It can be difficult to frame your art as frames also contain different types like art. Generally, plan your idea of framing and jot down the requirements. Choose your artwork. Go for size, color combination, style and material. If you are not sure about what to do and how to do. Tap our website and consult anytime, you can also choose the best frames for your rooms or homes décor.

Framing itself is an Art!

Selection of frames is not just about appearance it has many other aspects like to check for quality, glass, how it prevents from damage and degradation. One must ensure that how long your art work can be protected and if the frame is right for your art type.

Consult Framous Pictures:

The first step is always take consultancy and guidance from experts specially if you are not sure about your artwork and what type of frame is required for it.

Affordability with Quality Matters!

Look for place that is not burdenzing your pocket and provides you with best advice and suggestion. Your artwork deserves to be on next level with surety of quality and long time commitment of protection from dust, scratches, cracks and weather changes. If you want to buy the ready-made art, simply click our website and get the hub of modern art frames and structural frame art with affordable prices.

A framer is not just a person to guide about frames, he or she will always understand your requirements and the contextual image of your mind by pointing expectations to make your frame top-notch. Always remember to first discuss the type of art you carry as every art belongs to different type of framing. Features like glass, wood, paper, size and style can be varied. Dimensions are highlighted part to build your frame. A good budget and understanding can be a game changer for art.

Play with Color, Style & Layout:

We advise picking a frame colour that complements the hue of the image, going with a bright frame colour for a dramatic effect, or picking a neutral tone. Almost any sort of art can be shown in this style of frame, which typically looks best in black, white, and natural wood finishes. If you are decorating or making a contrast of colors with your room or whatever the place is, we suggest to play with colors by selecting few. As if the look is funky then go for multi-frames but people usually like decent combinations ended on white, silver, golden or black.

Frames come up popularly with square and rectangular shape. Sometimes circle and heart shape as well but apart from them all the shapes are uncommon like star or triangular shaped. Good part is one can select the size and shape of frame according to his or her choice and requirement.

Consider highlighting and enhancing your interior when choosing an art frame, regardless of the colour and finish you choose. Think about the overall aesthetic of your room, and then consider the mood you want to create like what about framed canvas wall art?

Then try different hues to your frame or mount using the prominent colours that jump out in your artwork. While coloured artwork works best when the standout colours match the frame, black-and-white or monochromatic images seem both traditional and modern in monochromatic frames.

THINK ABOUT THE ROOM AS WELL AS THE ARTWORK

Do Plan the Place Where You Need Art Work To Be Displayed:

Is your place is big, small, messy or simple and clean? What is this place and what is the vibe of this place where you want your artwork to be framed? It can be office, bedroom, kitchen, washroom, hallways or even doors.

Before designing and starting the frame process for a favourite print, it’s crucial to take the location and context into account. You want to avoid a conflict that doesn’t feel carefully thought out, whether that means choosing a frame type that complements the era of the space or matching the paint or wallpaper in terms of colour. Focus on the entire styling process and all required decorating processes because matching and contrasting elements are crucial when decorating a space.

Taste and preferences may differ, but the final result depends entirely on the mental image you have in mind for this style. Whether it’s your art or you are purchasing ready-made, make sure to get what suits.

Use Art Glass:

The frame and mount are only one aspect of it. When it comes to elevating your artwork, glass is crucial. The most worth considering component is UV protection that may shield artwork from being harmed by light, which over time causes the colour to fade.

Additionally, selecting a low-reflective material ensures that it won’t obstruct your artwork. Art glass must be non-reflective, provides some UV protection, and allows you to see everything that is framed.  The artwork is primarily protected from humidity, heat, and other common atmospheric factors by having quality glass.

Focus On Conservation/Preservation:

Consider conservation of framed art. The right frame and glass will help keep your piece safe, but you can also keep your favourite pieces of art safe by not hanging them near heat sources like radiators and fires. It is absolutely necessary to use quality art glass to safeguard any artwork that will be hung in a room with a working fireplace from any smoke. The same is true for areas where numerous candles are frequently lit.

Avoid hanging your art on wet or freshly plastered walls and try to keep it out of the direct sunlight and electric lighting.

How Do I Choose Frames For Artwork?

Actually, frames for paintings is not always necessary or compulsory as many people won’t go for this option. Although early 20th-century artists completely disregarded frames, paper and other additional works should be sealed and shielded from the environment unless they are on a robust canvas.

If you’re absolutely stumped when choosing a frame and don’t want to go to a professional framer, choose black or white because they always work with the majority of interior design styles. While white frames work well in most contexts and give off a more casual and decent vibe, black frames are wonderful for defining paintings while also providing contrast and a very calming dark effect.

If you want something basic and timeless, a plain wooden frame is a great choice. Wood is a natural material that has a warm, timeless feel and a variety of tones, providing you many alternatives to match your design.

Warmer colours like red, brown, and orange complement darker materials like mahogany and walnut better than cooler colours like blue and green do with lighter materials like oak, ash, and pine.

How Do I Choose the Right Size Art Frame?

The best answer of this question belongs to you, your choice and your preference. Everyone had different intellect and contextual understanding. People see things in different ways and understand the meanings accordingly. Your frame your choice is the ultimate answer. Make a list of your frame requirement, your place look and think of the vibe you are looking for.

Appearance, gap, alignment and decoration according to furniture is a key to place the art frames.

Don’t Rush for the Random Frame!

We suggest to go for a little bit homework based on research and a comprehensive consultancy. Measure the length, width and area for frame and choose after that, don’t just rush for a random frame display. Do check for color combination and art requirement. Even if you are selecting from art gallery keep the wall and place always in your mind. To stand out tall between other elements of decoration, an artwork requires a breathing space. Every frame contains a story and mixture of art at one place can lose the worth. Be sure to choose wisely. Make art frame centre of attention.

Should Every Picture Frame Be The Same?

Framous pictures suggest that it’s not necessary for picture frames to match. Selecting your layouts of frames, and go with one that inspires you and brings a smile to your face each time and you actually vibe from it. Don’t take stress too much about getting specific picture colours to match the colour of the frame. Framous pictures is at your services if looking for framed wall art Australia or art framing near me. Check the overall mood of the image when selecting a frame or framed art prints. Choose a frame that either complements your current decor pretty well or provides just the right amount of contrast. If you’re unsure, choose a lighter frame for simpler or more casual artwork and a darker frame for formal or more complex pieces.

A GUIDE TO HANGING OIL PAINTINGS IN PICTURE FRAMES 150 150 admin

A GUIDE TO HANGING OIL PAINTINGS IN PICTURE FRAMES

Wise People say, a picture is worth a thousand words. It is a depiction of words without even using words. What is the worth when you use an appropriate frame for oil painting? A framed oil painting is a special type of artwork that needs to be framed and displayed with extreme care and cautions. A polished appearance is just one benefit of framing an oil painting. It establishes the bounds of the image and visibility with precautionary measures matter.

With such high caliber and meaningful artwork, the frame should emphasize the beauty and qualities by adding value into your work. And an oil painting can be hung either without a frame or with one that is suitable for the art it contains. Personal preference governs the situation. Keep reading the article with Framous Pictures to get the details about oil paintings.

Guide to Hanging Oil Paintings

Guidance is an ultimate gesture to teach someone about something that is beneficial and according to times requirement. Same rule goes for the one who loves painting and framing. Particularly for oil painting let’s look below:

Utilising a poor frame can detract from an oil painting’s attractiveness, but utilising a good frame can draw attention to and enhance the painting’s best features. Framous Pictures will go through the fundamental techniques for hanging and safeguarding oil paintings in this blog post to assist you in getting the most out of your artwork and preserving it for the long term.

Oil Painting Framing Preservation:

Protection is the most important aspect when we talk about framing pictures. It doesn’t matter if it is an outsider item or your own fine art, keeping your oil painting with frame should be your main and major priority, whether you choose to frame it or hang it.

Coating

The barrier created by varnish application prevents paint from flaking or chipping. It is crucial to understand that not just any varnish will do only rather, it is always advised to consult a skilled artist like Framous Pictures to get the appropriate varnish. Scratches and abrasions can be avoided using varnish. In addition to enhancing the colours in a painting, varnish also serves as a barrier against dust and other foreign objects ruining the paint’s surface. Additionally, it produces a perfect barrier to stop the removal of paint or colour when cleaning.

Breathing 

Giving an oil painting frame room to breathe is crucial to its protection. Typically, oil paintings are not shown with glass in the frame in order to prevent further damage from the glass touching the paint, dust, and humidity. The work will be suffocated by glass, which could also harm the paint. Frame your artwork with a spacer between it and the glass if you like to display it that way.

Providing cover from the sun:

Prolonged exposure to light can have an impact on the colours of oil paintings. Hanging your picture frames for oil paintings far from the sun’s rays and away from any overhead lights in the house will prevent this from happening. Avoid exposing the colors in an oil painting for an extended period of time to light, especially the sun’s UV rays.

Cleaning:

Use a soft duster and lightly dust your oil painting to eliminate any dust. If possible, vacuum the area behind the painting.

Framing Your Oil Painting

Making sure the frame you buy is the right size is essential when framing an oil painting.  There are numerous types of frames being sold, each with a different material, design, price, and colour. To do this, simply measure the height and width of your canvas or framing for oil painting. Standard frame sizes are measured in inches, use this information to determine whether you need a conventional frame or a custom-made one.

Guidance to Hang the Painting with or without the Frame:

How to Hang an Oil Painting in a Frame?

Requirements & Instructions:’

  • Frame
  • Wire and Screw Driver
  • Offset Clips
  • Tape
  • Craft Paper
  • Mounting Ring

Once the canvas’ true size has been determined, the glass and back board of the frame should be removed. Must check the frame has no sharp edges. Place a large oil painting inside the frame. The creation of a dust cover to shield the frame is the next phase. While the canvas is still facing down and the painting or frame is down, place your double-sided frame around the sides of the canvas. Put the craft paper at the back of the artwork after cutting it to suit the frame. Take the tape off. A mounting ring should be fastened to the back of each side of the frame as it has to be wrapped in wire. Look if the hook can withstand the weight of the picture and frame together before hanging.

How to Hang Oil Painting Framed without Frame?

You could decide to hang your oil paint frame without a frame if it is modern art. Oil paintings can be wired to hang without a frame if the stretcher is sturdy and sufficiently thick. However, keep in mind that art is protected and is more likely to live longer and retain its vibrancy with a picture frame.

Requirements & Instructions:

  • Mounting Rings
  • Picture Wire 
  • Screwdriver

Making sure your canvas is on a clean surface when flipping it over along the stretch bars, mark a spot 1/4 of the way down from either side of the back of the canvas. Each point on the stretch bar needs a mounting ring, which you attach with a screwdriver. The wire should then be threaded through the ring and wrapped around itself to secure it. Repeat on the opposite side, being sure to leave a small amount of slack and tie off. Then hang your canvas, making sure it is level on the wall, using a strong hook that can support two times the weight of the canvas.

Conclusion

Picture frames offer an oil painting a more polished appearance, help define the borders of the artwork, and increase its value if you want to sell it since it looks to be a “complete piece.” An oil painting’s beauty can be ruined by using a bad frame, while a good frame can highlight and enhance the painting’s greatest qualities. Oil painting framing, variations with custom picture framing are available on our website so, tap and grab what you want, select and order for the quality work.