How to Build a DIY Mirror Frame in 6 Steps | Easy Tutorial
So, why frame your mirror?
Well, plain, unframed, builder-grade mirrors get the job done.
BUT
Let’s be honest, they’re not exactly eye-catching. Building a DIY frame for a mirror is a simple and super affordable way to jazz up your space visually. You can achieve professional-looking results without spending a lot.
In this easy-to-follow tutorial, we’ll show you how to spice up your home with a DIY mirror frame.
Whether you’re a pro or new to DIY. Framous Pictures will walk you through every step to create a mirror that reflects your style perfectly.
No Tools? No Problem!
How can I make a mirror frame without using any expensive tools?
Well, who says you need a toolbox full of gadgets for a DIY mirror frame project. With a little creativity and the right adhesive. You can transform your plain mirror into a beautiful focal point without ever picking up a hammer or drill.
The beauty of this DIY project lies in its simplicity and convenience. No need for expensive tools or complicated techniques. All you need is a heavy-duty adhesive that can securely adhere to glass surfaces.
Project Snapshot
- Budget-Friendly Cost: $20 to $40.
- Skill Level: Beginner-friendly. No advanced skills required.
- Time Commitment: 1 – 2 hours of active work, spread over 1 – 3 days
Essential Tools & Materials for Your DIY Mirror Frame
Before you start your project, make sure you’ve got all the right tools and materials on hand.
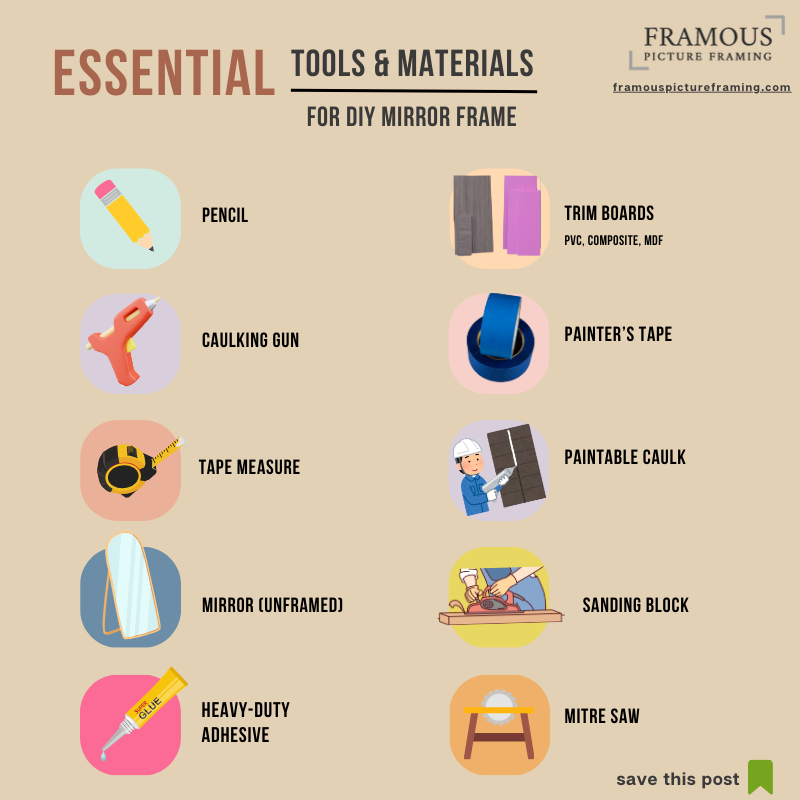
Here’s what you’ll need:
Tools to Get the Job Done
- Pencil
- Caulking gun
- Tape measure
- Mirror (unframed)
- Mitre saw or mitre box and saw
- Trim boards (select to fit your style and space)
- Heavy-duty adhesive (suitable for glass)
- Finishing supplies (Sanding block, Paintable caulk, Painter’s tape)
With these essentials ready to go. You’ll be all set to tackle your DIY mirror frame with ease.

Before You Start: Decide Your Framing Style First
Before you rush to get your supplies. Think about the kind of look you want for your mirror frame.
- Do you want it to feel warm and cozy? Then knotty pine might be the way to go.
- And if you’re going for a timeless, sleek look. Then primed MDF trim pieces are just what you need.
- If you prefer a more relaxed, beachy vibe. Then framing a mirror with wood having fewer knots will be perfect.
With so many options, there’s a material to match every taste. Now that you’ve picked out your materials. It’s time to start making frame for mirror.
Follow these easy steps to put together your DIY mirrors on wall. You can adjust them to fit your space and style perfectly.
Let’s get started!
DIY Mirror Frame Tutorial: 5 Simple Steps
Here’s a step-by-step guide for DIY mirror framing.
Let’s get started!
Step 1: Get Exact Measurements for Your Mirror Frame
To start, grab your tape measure and let’s get measuring your mirror. Place the tape measure against your mirror and note down the dimensions. It’s important to make sure your measurements are exact. So, you know how much trim you’ll need for your frame.
Keep in mind that the inside of your frame should be smaller than the mirror. This way when you attach the frame. There’s enough space for it to fit snugly around the mirror. This ensures a secure hold once the frame is glued in place.
With the measurements noted down. You are ready to move on to the next step of your DIY mirror frame project.Top of Form
Step 2: Choose the Right Trim Boards
The second step in your project is to select the perfect trim boards that suit your style. Consider the width and thickness of the trim boards to match the size and style of your mirror.
Look for boards that are between 2 to 4 inches wide for the best results. You can also find narrower or wider options depending on your choice. Trim boards come in different lengths, so it’s essential to choose carefully to avoid unnecessary waste.
Trim boards are available in a variety of materials. They each have their special features and benefits:
- Wood: Wood trim offers a natural and traditional look. Giving it a timeless and classic look.
- PVC & Composite Materials: If you want something strong and resistant to moisture. PVC or composite trim boards are great choices. They’re perfect for places like bathrooms where there’s a lot of humidity.
- MDF (Medium-Density Fibreboard): MDF boards are made by mixing wood fibres with a special glue. They are sturdy, like wood. But they have a smoother surface and fewer bumps.
Now, let’s talk about the different styles of trim boards:
- Flat, Colonial, Decorative Profiles: These profiles add texture and visual interest to your mirror frame. You can pick the one that matches your home decor best.
And finally, let’s look at the finishes:
- Primed: These boards are ready to be painted. You can get creative and choose any colour you like to make your mirror frame unique.
- Pre-painted or Stained: If you want to save time. You can buy trim boards that already have a colour or finish on them. It’s a quick way to get the look you want without needing to paint or stain them yourself.
- Unfinished: You can also get trim boards that haven’t been painted or stained yet. This gives you the freedom to apply your own stain or paint for a custom look.
Step 3: Cut and Prep Your Trim Boards
Now it’s time to get those trim boards ready for your mirror frame! Here’s what you need to do:
- Measure & Mark Your Trim Boards: First, use a pencil to mark the measurements on the trim boards based on the size of your mirror. Make sure to measure correctly. So, your frame fits perfectly.
- Cut Trim Boards with Mitre Saw: Use either a mitre box and saw or a mitre saw to cut the trim boards. Make 45-degree angled cuts on each end of the boards. This helps them fit together neatly at the corners of the frame. Remember, the cuts on the top and bottom pieces should point in opposite directions.
- Double-check Your Measurements Before Cutting: Cut the top and bottom pieces of the frame to match the length of the mirror. And the side pieces to match its height. Double-check your measurements before cutting to avoid mistakes.
- Smooth Edges with Sanding Block: After cutting, use a sanding block to smooth out any rough edges on the trim boards. This gives your frame a nice, polished look and prevents any splinters.
You can also find helpful tutorials online that show you exactly how to make these cuts and give you tips for getting them just right.
Step 4: Attach Trim Broads to the Mirror Using Heavy-Duty Adhesive
Now, let’s attach the trim boards to your mirror to make the frame. Here’s what you need to do:
1: Glue the Bottom Piece: Put a good amount of adhesive on the outer edge of the bottom trim board. This prevents any glue from showing up in the mirror’s reflection later on.
Carefully place the trim board on the mirror’s bottom edge. Hold it tight for the time mentioned in the adhesive’s instructions. Then use painter’s tape to keep it in place until it dries completely.
2: Glue the Sides and Top: Repeat the process for the side and top trim pieces. Use the edges of the mirror as your guide. If you want extra strength, put adhesive on the angled edges before sticking them together. Be sure to wipe away any excess adhesive to maintain a neat finish.
3: Glue the Top Piece: Once the sides are glued. Put the top trim board in place. Apply adhesive to the back and carefully position it along the mirror’s top edge.
If you’re worried about the frame’s stability. You can also use mirror edging or brackets for extra support.
Expert Tip: Make sure to check how long the adhesive takes to dry. Read the instructions carefully to avoid any problems.
Step 5: Fill in Any Gaps and Make the Frame Pretty
After the adhesive has fully dried and you’ve removed the painter’s tape, it’s time to address any gaps and put the final touches on your mirror frame. Here’s how to do it:
- Fill Any Gaps in the Mitre Joints With Paintable Caulk: Once the glue has dried completely. Carefully peel off the painter’s tape. Inspect the mitre joints of your frame for any gaps. Use paintable caulk to fill them in.
- Wipe Off Excess Caulk: After applying the caulk, wipe away any excess with a damp cloth or sponge.
- Allow The Caulk To Dry Completely: Let the caulk dry completely according to the manufacturer’s instructions. This typically takes around 24 hours. But be sure to check the caulk label for specific drying times.
Step 6: Final Touches | Apply Finish to the Frame to Complete the Look
Now comes the fun part. Applying finish to your frame.
First, decide how you want your frame to look. Whether you prefer the natural beauty of stained wood, a trendy whitewashed effect, or a classic paint job. Consider the overall aesthetic of your space and select a finish that complements your decor style.
- Do you like a rustic style? Then use a special stain with a weathered stain colour to make the frame look aged.
- Want a coastal vibe? Mix white latex paint with water and put it on thinly for a whitewashed look.
- If you like a clean and modern look. Then just paint the frame with your favourite colour of latex paint.
Once you’ve chosen your desired finish. Apply it evenly to the surface of the frame using a brush or sponge applicator. Follow the manufacturer’s instructions for application and drying times to achieve the best results.
If you’re using natural wood that won’t be painted. You can just add a clear sealant to protect it and make it shine.
Bonus Idea: If you want to make your mirror look fancy, then go for decorated mirror frames. Add decorations like fake nails or other pretty items to the frame to make it look nice.
Final Thoughts
And there you have it, “do it yourself mirror frames”. With just a few simple steps, you’ve transformed your plain old mirror into a beautiful statement piece for your space.
So go ahead and get creative!
Custom Frame Your Mirror with Framous Picture Framing
Upgrade your plain, boring mirrors with our custom framing service.
Add a personal touch to your space with frames that match your style perfectly. Choose from a variety of frame styles and sizes.
- Posted In:
- Informative


Leave a Reply