
Posts By :

digital_admin

Guide to Movie Memorabilia Framing in Perth | Frame Movie Poster Without Losing Its Vintage Charm 150 150 digital_admin

Guide to Movie Memorabilia Framing in Perth | Frame Movie Poster Without Losing Its Vintage Charm

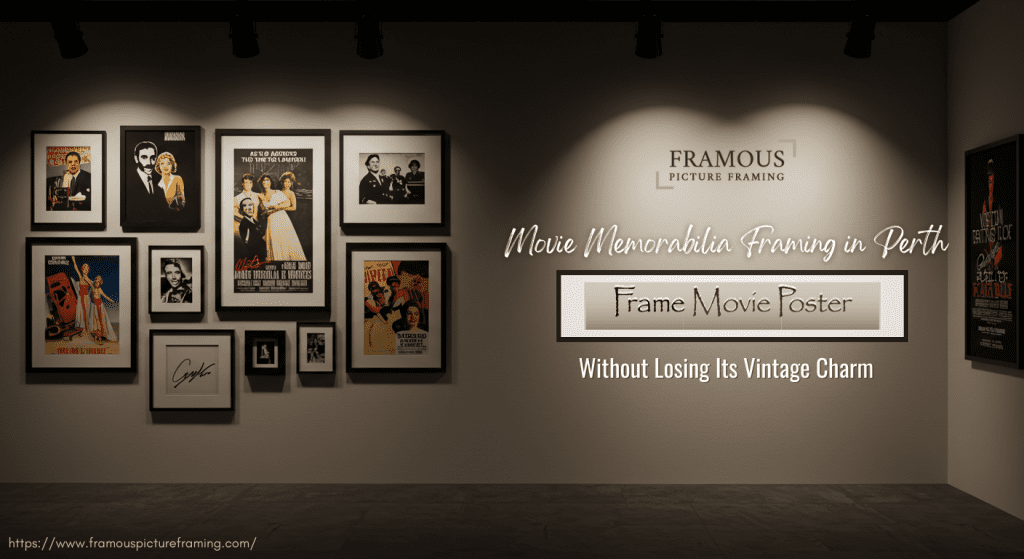
Movie Memorabilia Framing in Perth Frame Movie Poster Without Losing Its Vintage Charm

Worried your vintage poster or signed prop will fade or tear? Proper movie memorabilia framing is the first step to protect these treasures.

Expert framers like Framous Picture Framing in Perth offer archival techniques that keep your pieces looking fresh and valuable.

This guide covers everything; from what counts as memorabilia and conservation materials to step-by-step framing, fixing common issues, pricing, and movie poster display ideas. So, keep reading to learn how to preserve your movie memorabilia and turn them into stunning wall art.

Why Frame Movie Memorabilia: Protect Value & Preserve Vintage Charm

Framing isn’t just about display; it protects your collectible’s value and charm. Vintage posters and props are mostly printed on wood-pulp paper or delicate materials that yellow, fade, or tear over time.

Archival framing uses UV-filtering glass, acid-free mats, and sealed backing to shield these items from sun, humidity, and dust. For example, Museum Glass blocks up to 99% of UV light and virtually eliminates reflections, preserving colour and detail. Even standard glass only stops UVB but allows about 75% of UVA to pass through. So, investing in museum-grade glazing is key.

And more importantly, handing a memorabilia or collectible to a professional and qualified framer also safeguards provenance and gives you peace of mind.

What Items Count as Movie Memorabilia? How They’re Different to Frame?

Movie Memorabilia

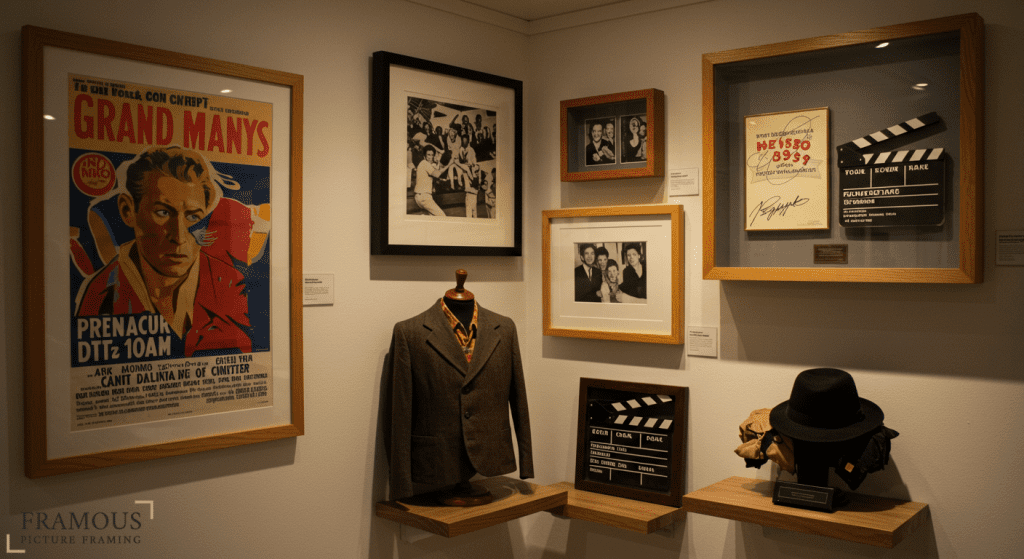
Each type has its own framing challenge – from paper’s sensitivity to textile weight – but the goal is the same: protect and showcase each piece as part of your personal film gallery.

Item typeWhat makes it differentBest frame type
Movie postersThin, fragile paper that can yellow, tear or creaseFlat custom frame with archival mat and UV glazing
Autographs & signed printsInk can smudge or fade from light or contactFlat frame with a mat (or Mylar corners) and UV glazing
Costumes & textilesBulky, heavy, and can be crushed or creasedDeep shadow box or custom box frame with internal supports
Props & 3D objectsRigid shapes and varied thicknessesDeep shadow box / display case sized to the object
Other collectibles (reels, scripts, tickets, awards)Mix of paper and 3D items; each needs a custom approachSmall frames for paper; shadow boxes for 3D

Which Glazing and Mat Should I Choose for Movie Memorabilia Framing?

Custom framing involves specialised materials. Below we’ve listed common options for glass and mat materials to help you choose the best combination:

Glazing Options

1. UV-Protective Glass Framing

    Premium glass designed to block the vast majority of damaging UV light and preserve colour and paper fibres. Ideal for high-value posters and signed items.

    Pros:
    • Blocks up to 99% UV; greatly slows fading
    • Very clear, low reflection (excellent display quality)
    Cons:
    • High cost
    • Heavier and more fragile than acrylic

    2. Museum-Grade Acrylic Framing

    A shatter-resistant acrylic glazing with museum-level UV protection. It’s a great choice for oversized frames or places where glass breakage is a concern.

    Pros:
    • Lightweight & unbreakable (safer for large frames)
    • High UV protection and anti-reflective options
    Cons:
    • Prone to surface scratches
    • Attracts static/dust; slightly different optical feel to glass

    3. Anti-Reflective Glass Framing

    Glass treated to reduce surface reflections. It’s useful where room lighting or spotlights would otherwise cause glare.

    Pros:
    • Cuts visible reflections and improves viewing under light
    Cons:
    • Often lacks full UV protection (check specs)
    • Still heavy and can break

    4. Standard Float Glass Framing

    The basic, inexpensive glazing found in many ready-made frames. It’s suitable for low-value or temporary displays.

    Pros:
    • Low cost and widely available
    • Optically clear for casual use
    Cons:
    • Minimal UV protection (much UVA passes through)
    • High glare and no shatter resistance

    Shadow Boxes (For Costumes, Props and 3D Items)

    Shadow Box Framing

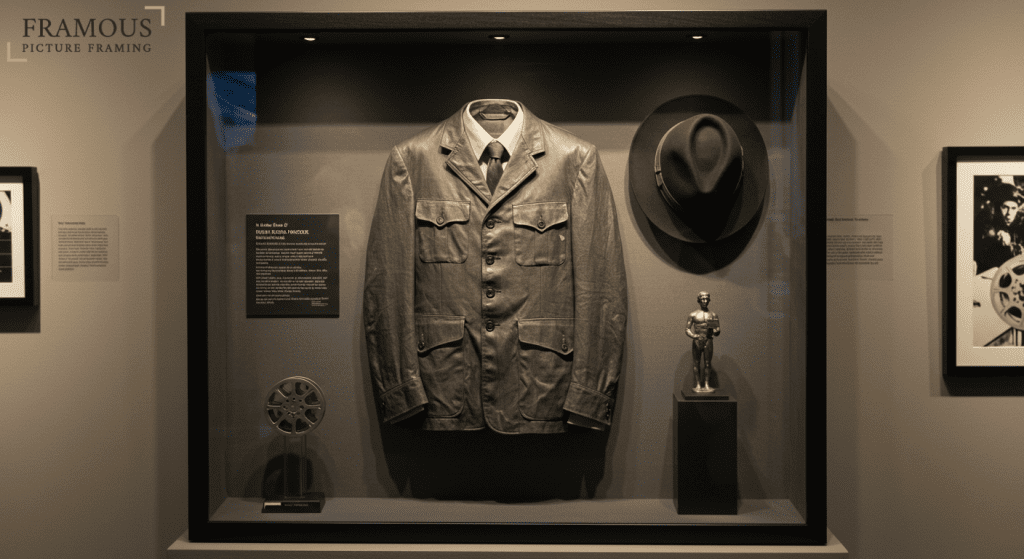
    Shadow boxes are deep frames designed for bulky or three-dimensional memorabilia like costumes, helmets, trophies and props.

    Choose a shadow box with enough internal depth so the item does not touch the glazing. It’s usually 50–100 mm (5–10 cm) for most textiles and 100–150 mm (10–15 cm) or more for bulkier props.

    For the front glazing, museum-grade acrylic is a great choice for large or heavy shadow boxes because it is lightweight and shatter-resistant. Museum glass can be used if you prefer the look of glass and the frame will be safely mounted. Inside the box, use padded supports, sewn loops, pedestals or discreet brackets to hold items securely. Leave an air gap to avoid crushing. Seal the back to keep out dust and pests. But make sure there’s no trapped moisture.

    Speak to your framer about edge sealing vs. ventilated backs for very old textiles.

    Matboard Options

    Matting (the board that sits between your artwork and the frame) does three jobs:

    • creates a visual border
    • keeps the artwork away from the glazing
    • provides an archival buffer that protects paper from acids and moisture

    Good matting is essential for poster preservation framing and for professional custom picture frames Perth, It both improves the look and extends the life of your movie memorabilia.

    So, there are three main matboard options:

    1. Standard (non-archival)
    2. Alpha-cellulose (conservation)
    3. Cotton-rag (100% cotton)
    TypeWhat it isBest for
    Standard (non-archival)An economy matboard made from ordinary wood-pulp paper.Use this only for short-term or low-value displays because it is inexpensive but contains acids that will yellow and can damage artwork over time.
    Alpha-cellulose (conservation)An acid-free matboard made from purified wood pulp or cotton linters.This is a good archival option for most collectors. It offers protection, a wider range of colours and textures, and good value.
    Cotton-rag (100% cotton)A premium, 100% cotton matboard with museum-level preservation and a luxurious finish.Choose this for heirlooms and very high-value pieces because it is pH neutral, resists yellowing for decades, and gives the best long-term protection.

    Tip: whatever mat you choose, pair it with acid-free hinges/tapes and UV protective glazing to maximise poster preservation.

    Mounting Options: Why Avoid Dry-Mounting?

    Use reversible, conservation-grade mounting techniques, so items can be removed later:

    • Hinge mounting (top edge only) or Mylar corners for paper items.
    • Sewn loops, padded supports or cloth ties for textiles.
    • Velcro/straps or fixed mounts for hard props.

    Dry mounting (heat-pressing paper to backing) is avoided for collectibles. It’s because it permanently glues the item and can ruin resale value. Instead, corners or archival hinges are used so your poster or photo can be removed later if needed.

    How to Frame Movie Memorabilia Like A Pro: Step-by-Step Guide

    Custom framing is a careful process. Here’s how a professional framer handles movie collectibles:

    Step#1: Assessment & Authentication:

    Examine the item’s condition (tears, wrinkles, water damage) and authenticity (signatures, COAs). Take photos and measurements. Discuss restoration needs. Minor tears can be mended with archival tape on the back. But severe damage could need a conservator.

    Check if a Certificate of Authenticity should be saved as many framers add a pouch behind the mat. Confirm framing goals like is it a gift, long-term display, or auction item?

    Step#2: Design & Mockup:

    Choose frame style, mat colour, and glazing that match the memorabilia and room. Most shops use software or sketches to preview layouts.

    For example, a black-and-white theater poster might suit a black frame and white window mat for contrast. Whereas, a colourful sci-fi poster could pop with a sleek metallic frame. Size the mat window carefully. It should reveal the artwork fully without hiding any important details. Clients approve the mockup before production.

    Step#3: Materials Selection:

    Order or cut the frame moulding, mat board, backing, and glass/acrylic. For valuable collectibles, select archival supplies; UV-filtering Museum Glass or Optium acrylic, and conservation-grade matboard.

    If the piece is a document or photo, pick 100% cotton rag mats. For less pricey items, a good-quality alpha-cellulose mat still protects well.

    Step#4: Conservation Mounting:

    Mount the item using reversible techniques. For paper posters, affix acid-free linen tape to the top edge only (a “hinge mount”) so gravity holds it flush.

    Use corner-mounts for posters if preferred (little Mylar pockets glued to the mat corners). Never use sticky tape or glue directly on the artwork. For heavier items, position it on the backing board and fasten with cloth ties or Velcro straps at inconspicuous points.

    Seal the back with buffered or plain white backing board and tape.

    Step#5: Glazing & Sealing:

    Place the selected glass/acrylic in the frame. Then insert the mounted item and backing. Framers often use silicone or cloth-backed tape to edge-seal the package, keeping out moisture and pests.

    Attach dustcover paper (acid-free) to the frame’s back for a finished look. Ensure the glass is spotless inside and out, even specks can be magnified later.

    Step#6: Quality Check & Delivery:

    Inspect the framed piece thoroughly. Check for dust, fingerprints, or misalignments. Weigh the frame in hand to ensure safety of hanging hardware. Typical turnaround for custom framing is 2–3 weeks (rush jobs are sometimes available).

    Finally, either carefully wrap the artwork for pickup or schedule an installation.

    Common Poster Problems & Framing Fixes

    • Removing Wrinkles:

    Small folds or ripples can sometimes be gently flattened. Some experts suggest placing the poster image-down on a soft surface, covering it with a slightly damp clean cloth, and using a cool iron on low heat to relax creases.

    Alternatively, stacking the poster under a heavy glass pane for days can slowly flatten it.

    Do not spray water directly or iron at full heat as this risks ink bleed or scorching.

    • Fixing Water Damage & Foxing:

    Water spots and brown “foxing” on paper come from humidity and mould.

    Minor foxing might be lightened by a professional using gentle chemicals. But DIY methods (lemon juice, bleach) will harm the paper.

    At minimum, remove acidic backings and store at stable humidity (40–60%) to prevent further spread. Framers avoid laminates or glues near foxed areas and may recommend leaving stains untouched if treatment is too risky.

    • Will Framing Remove Creases?

    Unfortunately, mounting in a frame cannot erase deep fold lines. But truly creased poster may benefit from professional linen-backing; a process where the artwork is relined onto a canvas, smoothing out wrinkles. Though this is an advanced conservation step usually reserved for high-end restoration.

    Pro Tip: The key is prevention: using poster preservation framing (archival mats and UV glass) will keep new creases and fading at bay. Even with the best care, paper will age, so display your framed memorabilia away from direct light, and consider replacing UV glass every few decades for maximum protection.

    Movie Memorabilia Framing Costs in Perth: A Practical Pricing Guide

    How much does it cost to frame a movie poster in Perth?

    Framing a movie poster in Perth costs between $200 to $500, depending on size, materials, and preservation options like UV glass and archival mats.

    Here’s a quick breakdown of common movie memorabilia framing costs in Perth:

    ServiceApproximate Price (AUD)Notes
    Ready-made Poster Frame (e.g. 24×36)$70 – $80Basic plastic or wood frames from stores. Size and matting vary price.
    Custom Poster Framing (standard)$150 – $400Includes custom-cut frame, mat, UV glass. Size & frame style affect cost.
    Shadow Box (costume/3D item)$600 – $1,200+Larger/deeper case required. Cost rises with size and depth.
    Premium Conservation Framing$700 – $2,000+Museum-grade moldings, UV museum glass or acrylic, cotton mats. High-end service.

    Remember, high-quality framing is an investment: paying more initially protects the poster’s value and saves replacement costs later.

    Movie Memorabilia Display Ideas: Make Cinematic Wall Art That Wows

    Want your movie collection to feel like a mini gallery? These display ideas for movie memorabilia turn your collection into a curated art installation. Here are three smart ideas:

    1. Gallery Walls & Arrangement

      Mix posters, photos, and small props in a themed layout; by era, colour, or genre. Start with a central piece, then build around it using consistent spacing, matching mats, or similar frames. Black or white frames work well to unify eclectic collections.

      2. Lighting & Glare Solutions

      Use adjustable LED picture or track lights to highlight your display. Non-reflective glazing like museum glass or Optium acrylic reduces glare, while UV-blocking shades protect from sunlight. Warm accent LEDs can spotlight signatures or rare posters safely.

      3. Themed Framing Styles

      Match frames to the movie era. Like ornate wood for classics, sleek black or silver for modern sci-fi. Create cohesion with retro tones for vintage films or minimalist black-and-white for Noir. For a bold touch, use coloured mats or frames that nod to the film itself.

      Worried your treasured posters or props might fade away?

      Let Us Preserve and Frame Your Movie Memorabilia for Lasting Protection & Stunning Display

      With custom picture framing in Perth, we use archival materials, UV-filtering glass, and expert mounting techniques to keep your movie memorabilia safe and stunning.

      Visit our Midland shop or contact us today for a free quote, quick design consult, or to upload photos of your pieces for assessment.

      Keep your film history looking like the star it is!

      Call (08) 9274 1453 or Request a Free Quote Now

      How To Create a Mirror Frame? Easy DIY Mirror Framing Guide 150 150 digital_admin

      How To Create a Mirror Frame? Easy DIY Mirror Framing Guide

      Create a Mirror Frame

      A mirror without a frame feels unfinished, like a painting without a border.

      A thoughtfully crafted mirror frame doesn’t just tidy up the edges. But brings warmth, personality, and a sense of completeness to any room.

      Doesn’t matter if your interior is rustic, modern, or somewhere in between. Learning how to create a mirror frame is a chance to bring harmony to your space.

      At Framous Picture Framing, we’re working with creative souls across Midland since 1985. We know how the right frame can complete your artwork, photography, or mirror.

      With the largest range of materials and a team of award-winning framers who understand colour, texture, and design. We can help you turn everyday objects into centrepieces.

      So, let’s guide you on how to frame a mirror.

      What You’ll Need for Your DIY Mirror Frame Project?

      Before you begin your DIY frame for a mirror, gather the right tools and materials. So, your project runs smoothly from start to finish.

      ToolPurpose
      Measuring TapeFor accurate mirror and timber measurements.
      Mitre Saw / Mitre Box with Hand SawFor cutting precise angles on timber.
      ClampsTo hold pieces together while glue dries.
      Drill or ScrewdriverFor attaching hardware.
      Sander or Sandpaper (Medium & Fine Grit)To smooth timber edges.
      Safety GearGloves and safety glasses to protect hands and eyes.
      Wood GlueFor strong joins.
      Paintbrushes / RollersIf painting or staining the frame.

      Materials You’ll Need:

      • Quality timber or moulding strips (wood frames for mirrors are ideal for durability).
      • Backing board (optional for extra support).
      • Mirror clips or clamps for securing the mirror within the frame).
      • Screws, nails, or D-ring hangers for wall mounting.
      • Paint, stain, or clear sealant depending on your design choice.

      Always use quality materials as cheap wood can warp or splinter over time and ruin your beautiful mirror framing DIY project.

      Step-By-Step Instructions for Framing Your Mirror Like a Pro

      Building a do it yourself frame for mirror isn’t difficult, if you pay enough attention to details. Follow these steps with love & patience, and you’ll enjoy the process as much as the final result.

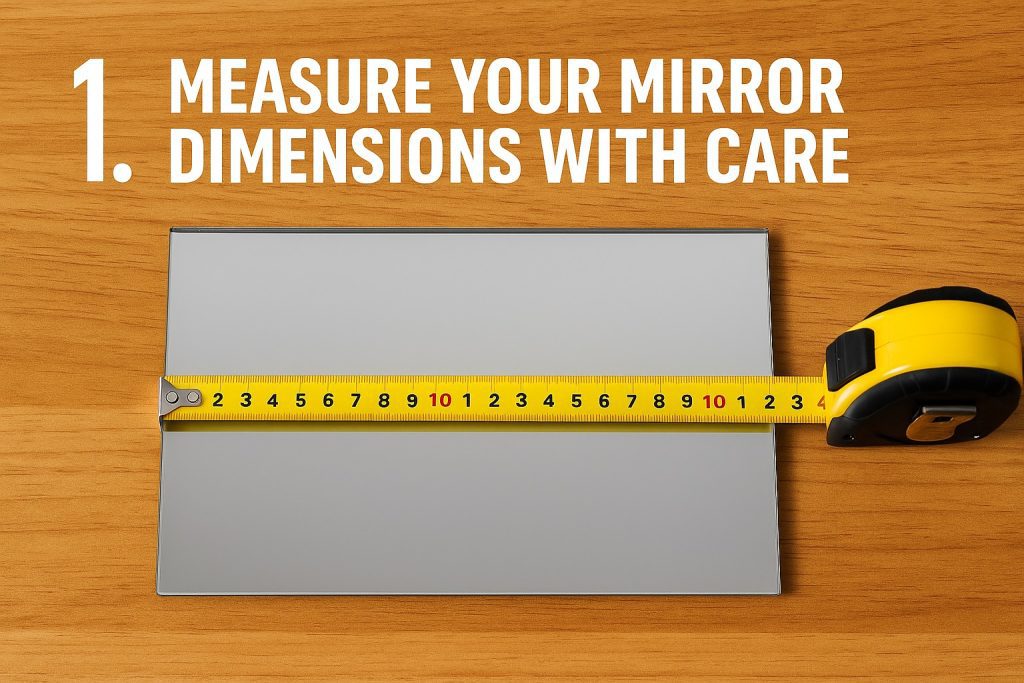
      1. Measure Your Mirror Dimensions with Care

      Step 1

        Begin by laying your mirror flat on a clean & even surface. Use a measuring tape to record the exact width and height. Be precise down to the millimetre. This measurement is the foundation of your DIY mirror framing project.

        If you plan to have the frame overlap the mirror edges, account for this in your final timber measurements. Write the values down clearly.

        Tip: Measure twice, cut once!

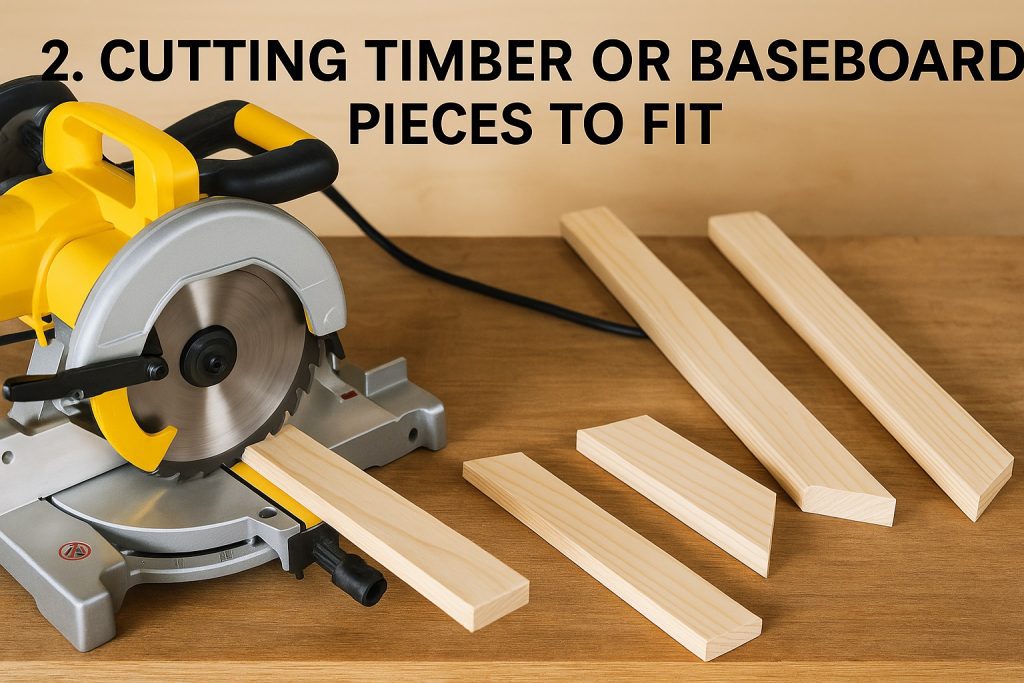
        2. Cutting Timber or Baseboard Pieces to Fit

        Step 2

        Select good-quality timber for your framing a mirror with wood project. Consider styles like oak for a classic look or pine for something softer. Once your measurements are confirmed, transfer them onto your timber.

        Using a mitre saw (or a mitre box if you’re working manually), cut each piece to size at a 45-degree angle at both ends. Cutting mitre corners takes practice. Go slow and steady to get sharp, clean lines.

        For a rectangular mirror, you’ll need:

        • 2 horizontal pieces (width)
        • 2 vertical pieces (height)

        Double-check that your pieces line up nicely before moving on.

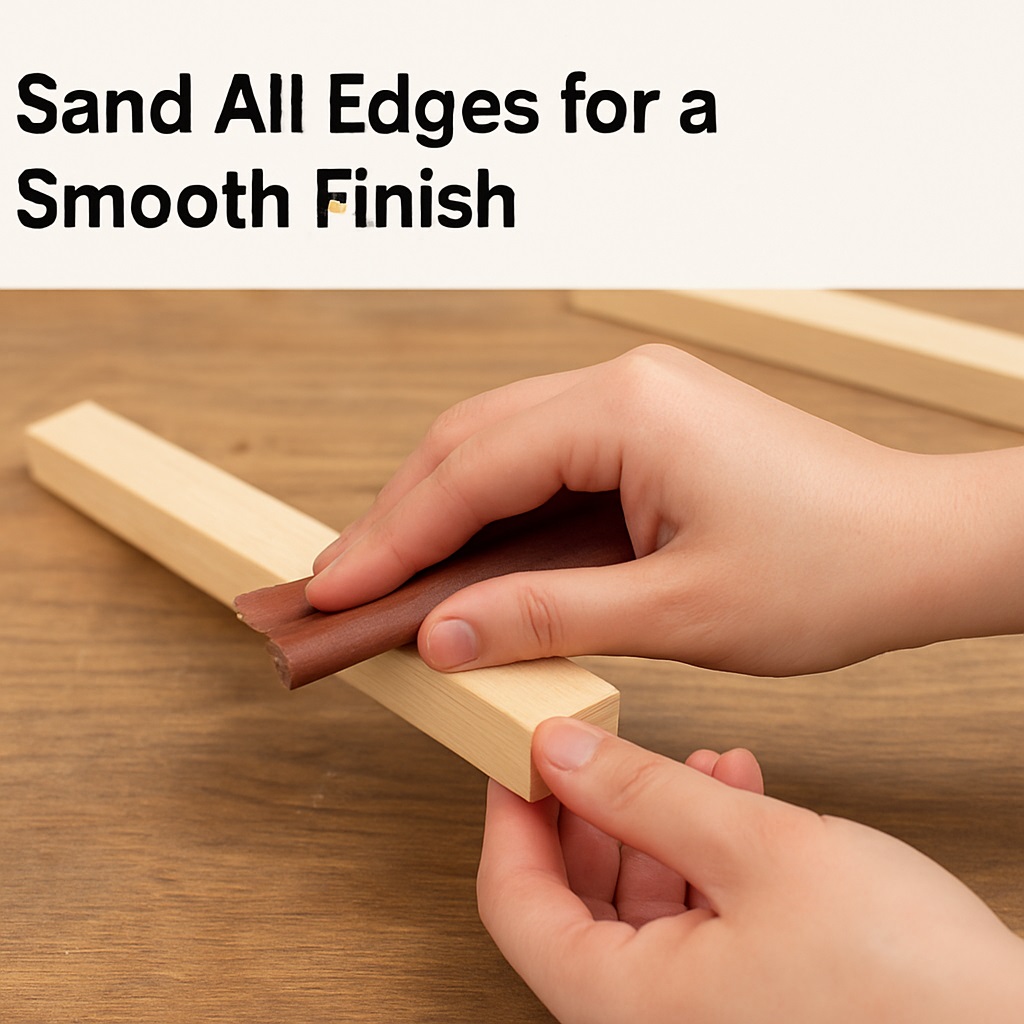
        3. Sand All Edges for a Smooth Finish

        Step 3

        Rough & uneven edges can ruin the look of your mirror frames. Sand all sides, especially the freshly cut ends, using medium-grit sandpaper followed by fine-grit.

        It will make your frame professional & also helps paint or stain adhere evenly. Pay more attention to the corners where cuts were made.

        4. Fine-Tune Angles for Perfect Corners

        Step 5

        Lay your timber pieces on a flat surface and position them together to form your frame shape. Inspect the joins. If the mitred edges aren’t lining up, make minor adjustments with sanding or trimming.

        Proper alignment at this stage keeps your mirror frame polished when complete. A perfect 45-degree angle is required for square or rectangular frames.

        Use clamps to dry-fit the pieces temporarily and check the shape.

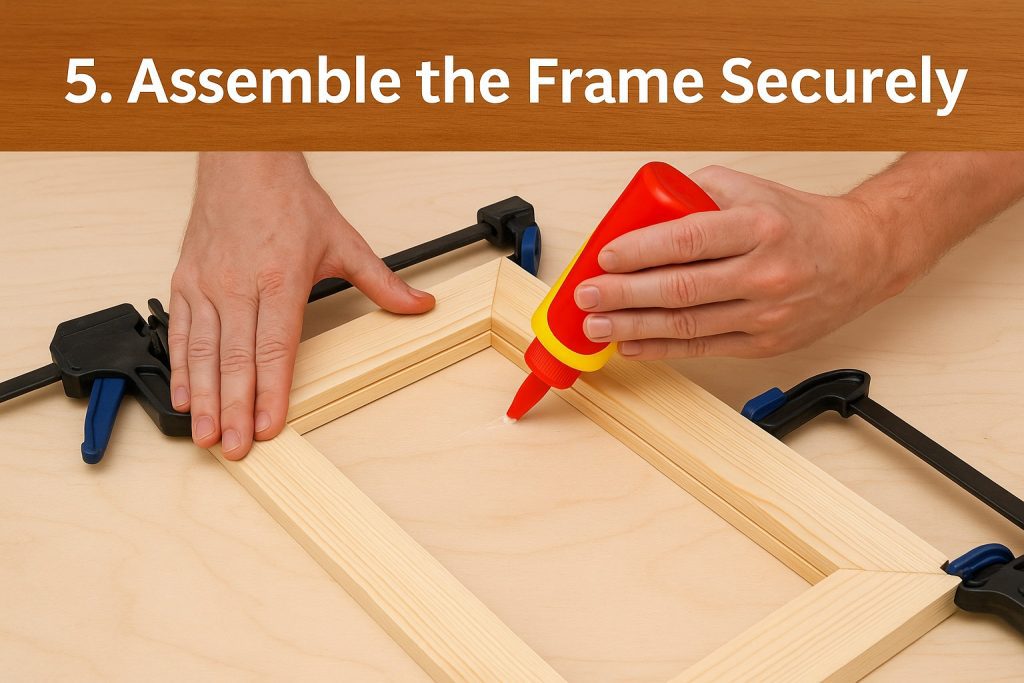
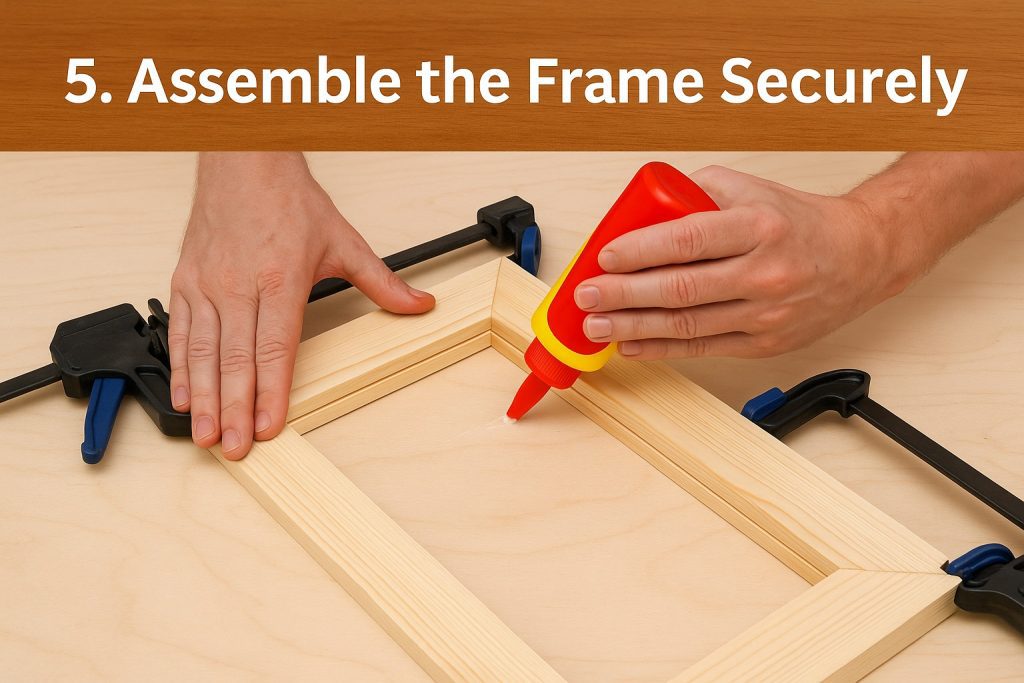
        5. Assemble the Frame Securely

        Step 5

        Apply a high-quality wood glue to the angled ends of your timber pieces. Fit the corners together and use clamps to hold everything while the glue dries. Check alignment with a square tool and make sure that the frame is not skewed.

        Leave the frame clamped for the recommended drying time (usually overnight). It will create a solid base for your frame with mirror. For extra strength, reinforce the corners with small finishing nails or metal brackets after the glue has set.

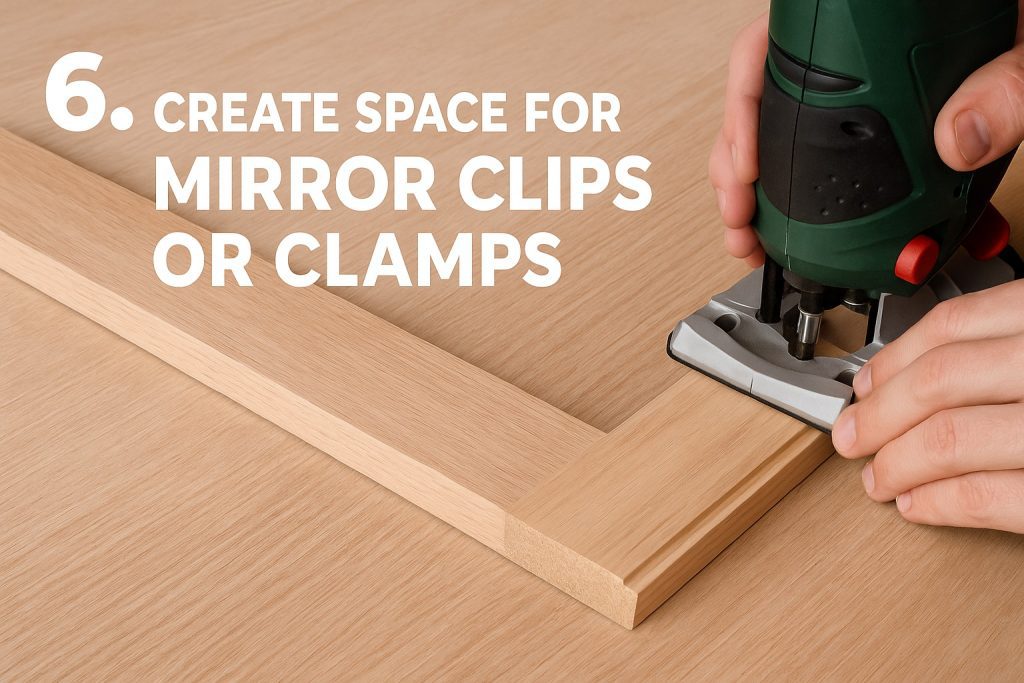
        6. Create Space for Mirror Clips or Clamps

        Step 6

        Before attaching your mirror, check how it will be secured inside the frame. If needed, use a router to create a shallow groove (also called a rebate) along the inner edge of the frame. It will hold the mirror and backing board securely.

        Alternatively, attach small mirror clips to the back of the frame later. Proper planning here prevents surprises in fitting the mirror.

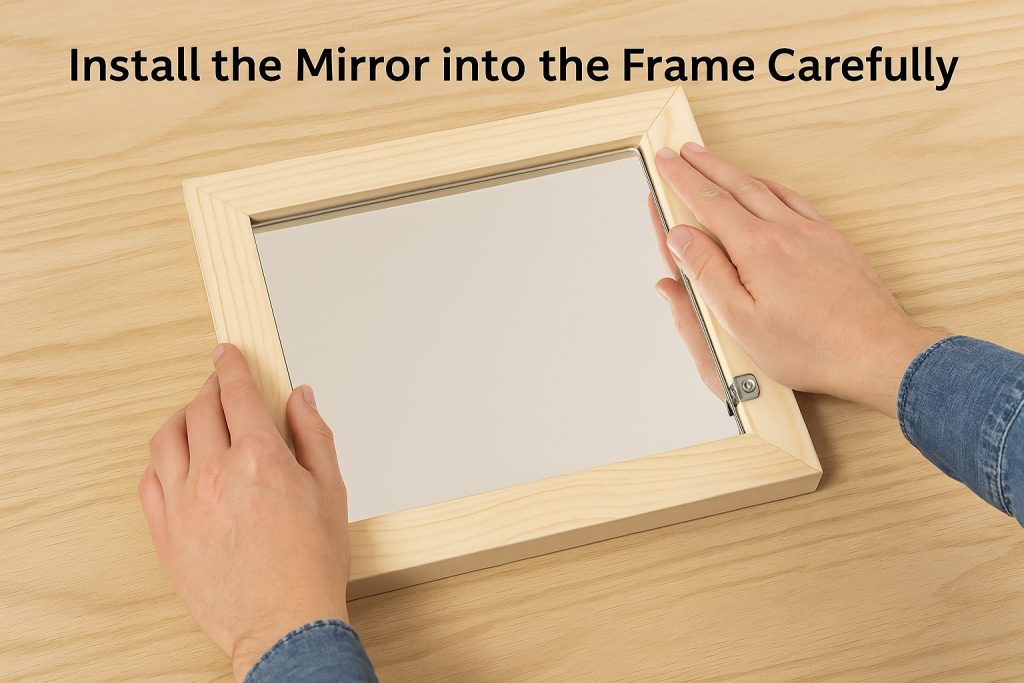
        7. Install the Mirror into the Frame Carefully

        Step 7

        Once your frame is solid and fully dry, place your mirror into the prepared groove or back it with clips. Handle the mirror with extra care to avoid any scratches.

        If you’re using backing board, cut it to match the frame’s inner dimensions. Secure the mirror and backing in place using screws or clips without overtightening. The result should be neat and snug and DIY mirror frame should provide enough support.

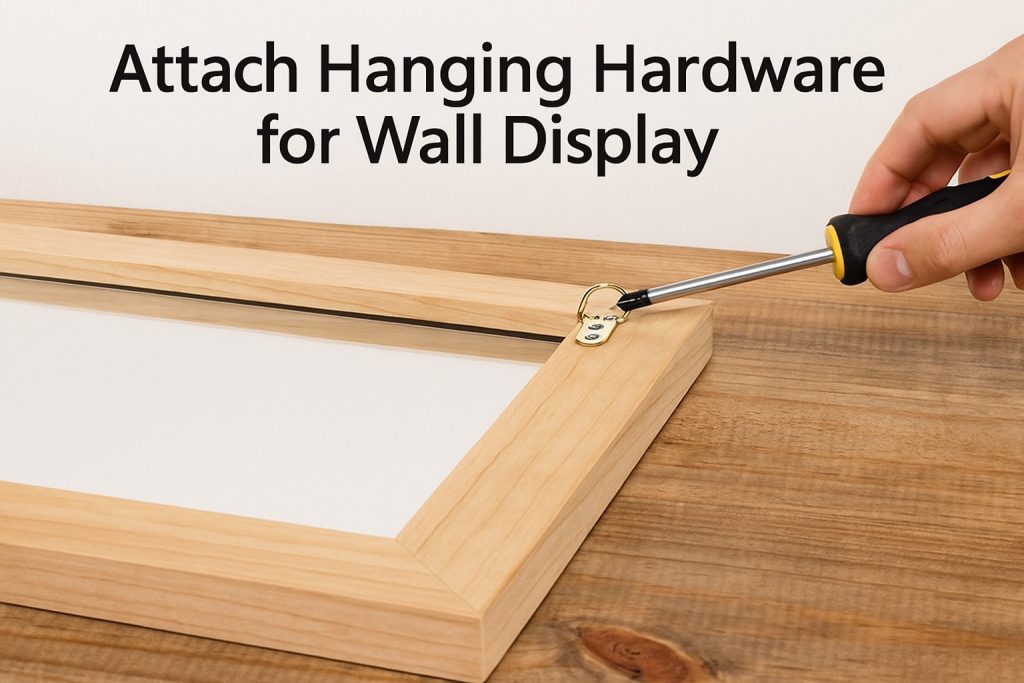
        8. Attach Hanging Hardware for Wall Display

        Step 8

        Decide if you’ll hang your frame with mirror vertically or horizontally. Install D-rings, sawtooth hangers, or wire as appropriate for your wall type.

        Mark the hardware positions accurately so the mirror hangs evenly. Use a spirit level to double-check. This step will keep your new mirror frame straight and secure.

        Read More at: Hanging a Full-Length Mirror | 7 Easy Steps

        Safety Tips for Your DIY Mirror Framing Project

        Safety is the primary concern in any DIY project involving tools and glass. Keep these guidelines in mind:

        • Wear safety gloves when handling glass and timber.
        • Always use protective eyewear when cutting or drilling.
        • Work in a clean & stable area with good lighting.
        • Take your time. Rushing leads to mistakes and injuries.
        • Follow tool safety instructions carefully.

        If any injury is caused during the process, stop it immediately as safety is more important than creativity. Instead, consult the professional frame makers.

        Should You DIY or Ask Pros for Mirror Framing?

        DIY mirror framing allows for creativity, customisation, and a sense of accomplishment. However, it requires patience, precision, and the right tools. If you’re not confident working with timber or glass, professional services can save time and stress.

        At Framous Picture Framing, we see both types of clients. The hands-on DIYers and those who prefer to trust our expertise. Both approaches are valid. If you enjoy crafting and have some know-how of it, it is a fantastic choice.

        Also Read: Creative Ways to Use Custom Framed Mirrors in Your Home

        Common Mistakes to Avoid

        MistakePotential RiskSolution
        Inaccurate measurementsFrame won’t fit properlyMeasure twice, cut once
        Skipping sandingRough edges, poor finishAlways sand before painting
        Weak glue or poor joinsFrame can breakUse clamps and quality glue
        Forgetting to plan mirror clipsDifficult to secure mirror laterPlan clip/groove placement early
        Not using safety gearRisk of cuts or injuryGloves, glasses, caution

        Need a Frame of Your Choice Built by Experts?

        Try Custom Mirror Framing by Framous Picture Framing

        We’ve been transforming mirrors and artwork into show-stopping décor since 1985.

        With the largest collection of wood frames for mirrors in Midland, we help you express your style. If you want advice on colours, finishes, or upkeep of your frame, our friendly & artistic team can guide you.

        Scroll through Our Work

        Get in Touch with Us

        and see how we can help you frame your creativity with confidence.

        • 1
        • 2