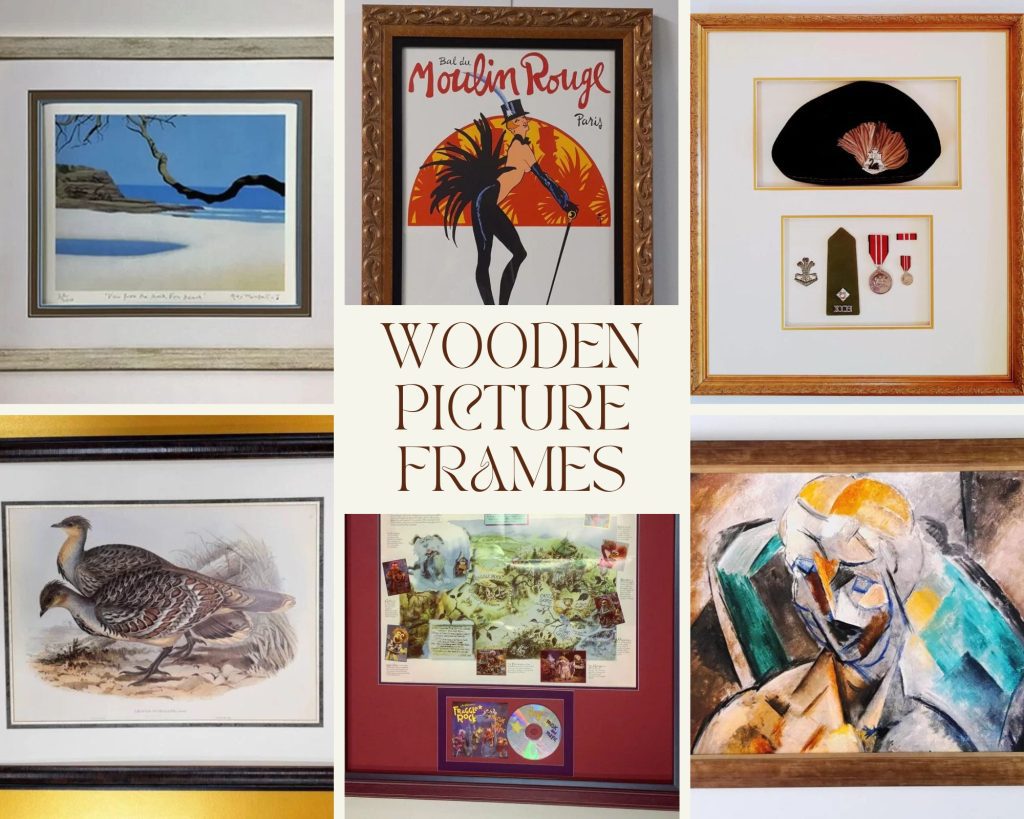
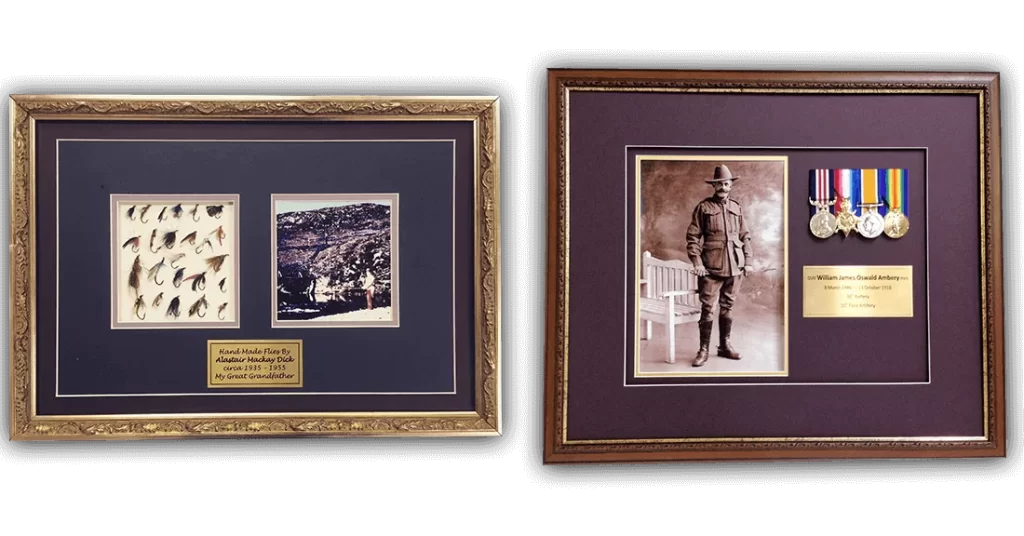
Informative

Detailed Guide to Memorabilia Framing: Preserve Your Precious Memories with Custom Framing in Perth 150 150 admin

Detailed Guide to Memorabilia Framing: Preserve Your Precious Memories with Custom Framing in Perth

Memorabilia Framing Preserve Your Precious Memories with Custom Framing in Perth

Are your cherished memories slowly fading away in a drawer or gathering dust on a shelf?

Without proper protection, valuable memorabilia can easily be damaged by sunlight, moisture, or even simple wear and tear.

Don’t let these priceless treasures slip away. Custom framing in Perth is the solution to preserving their beauty and value for years to come.

In this guide, we’ll show you how memorabilia framingcan protect your most prized possessions, enhance their visual appeal, and ensure they’re displayed in a way that honors their significance.

Keep reading to discover why framing isn’t just an option, it’s essential!

What is Memorabilia Framing?

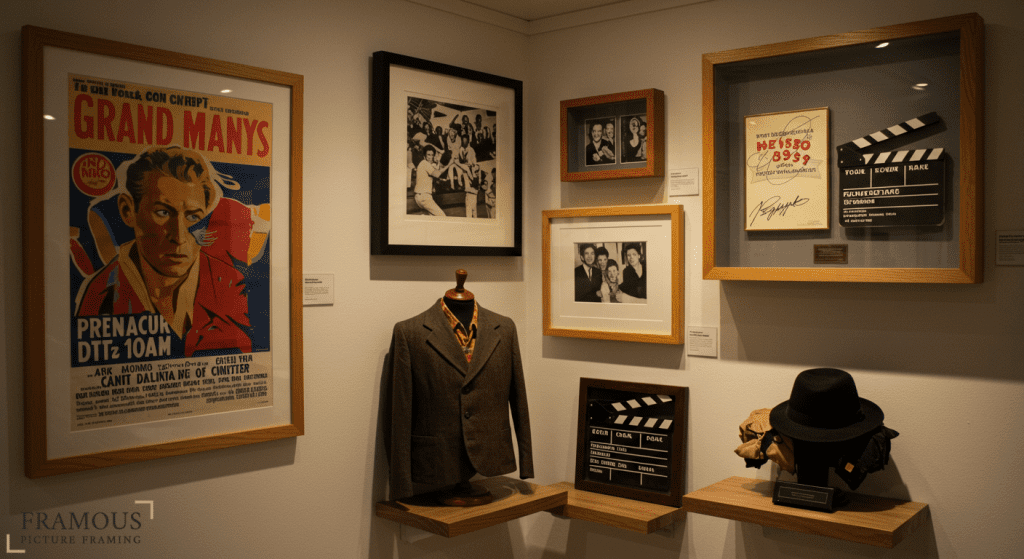
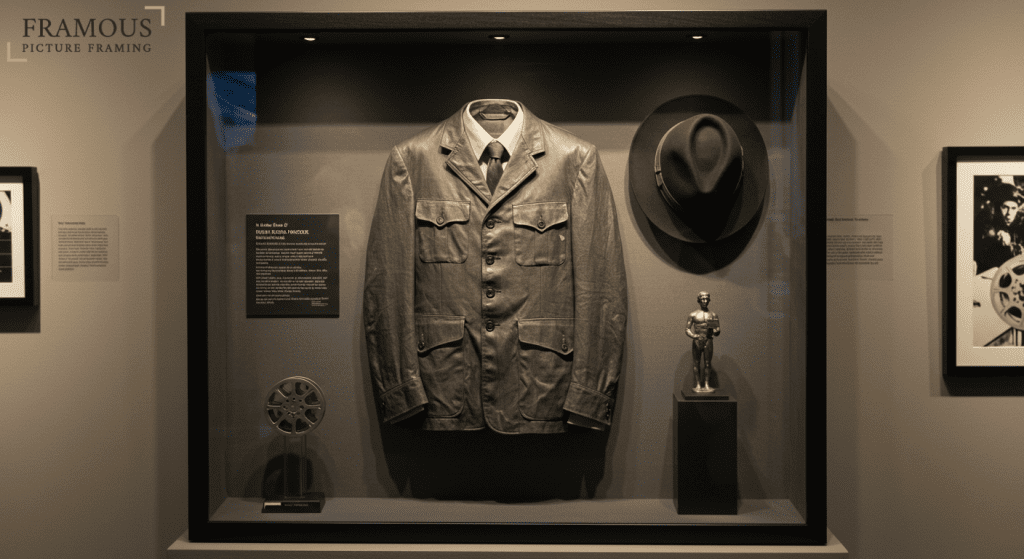
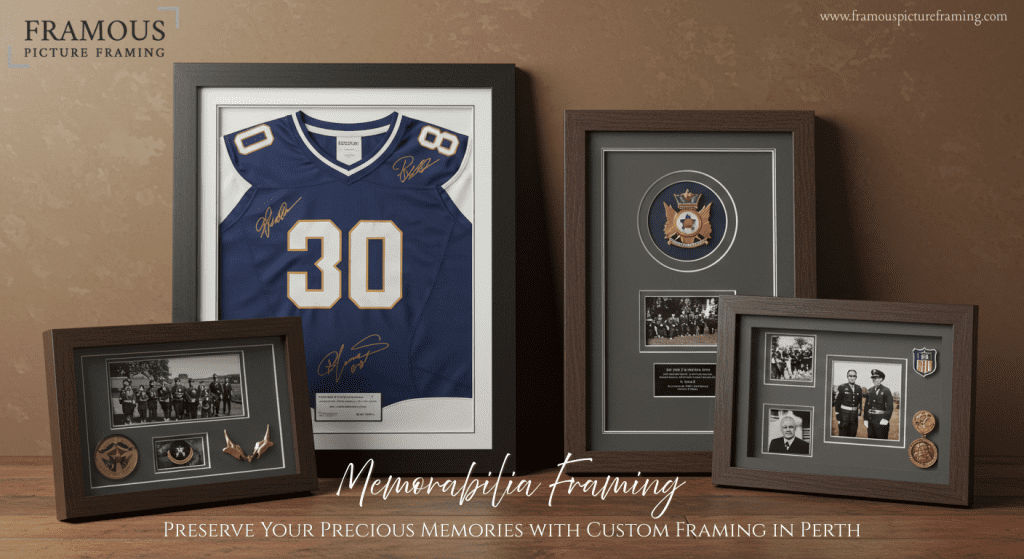
Memorabilia framing is the specialised process of framing items that hold sentimental, historical, or collectible value.

Those valued items can be any of signed sports jerseys, vintage photographs, military medals, autographed items, concert tickets, or artwork.

Unlike regular picture framing, memorabilia framing requires careful consideration of the item’s uniqueness and preservation needs. It’s not just about putting a picture in a frame. It’s about protecting, displaying. It enhances the value of something precious, ensuring it lasts for generations without damage.

So, What Are the Different Types of Memorabilia?

Here’s a list of the most popular types of memorabilia commonly framed:

  • Sporting memorabilia (jerseys, signed items)
  • Military medals, certificates, and awards
  • Autographs
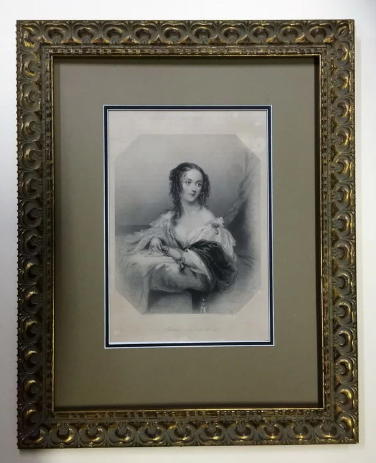
  • Photographs and portraits
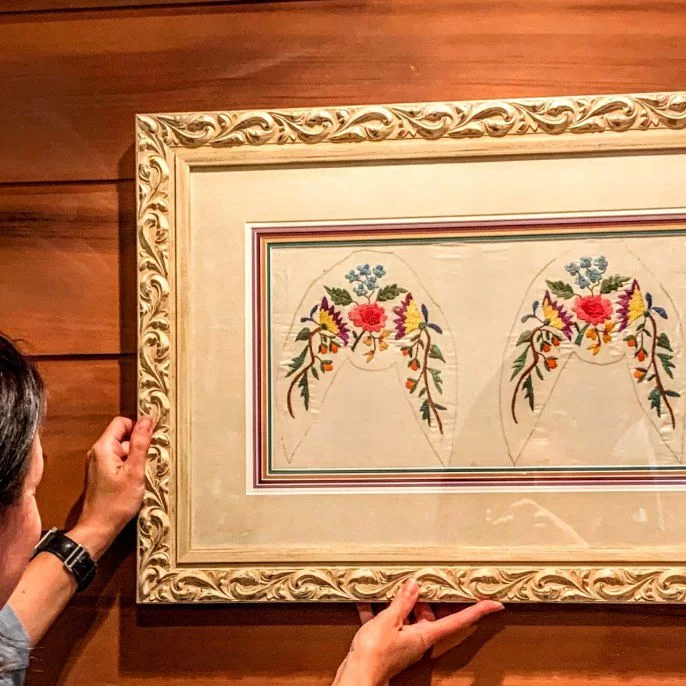
  • Tapestries, textiles, and other fabric items
  • Collectibles (concert tickets, vintage postcards, etc.)

Each of these items requires unique framing techniques, which is why custom framing is essential to preserving their value and visual appeal.

5 Reasons Why Custom Framing is Essential for Your Memorabilia

Untitled design (1)

Custom framing is an essential step to ensure your memories last a lifetime. Here’s why investing in custom memorabilia framing is important to maintain the value and beauty of your keepsakes.

1. Protection from Environmental Damage

    Exposure to everyday elements like sunlight, dust, and moisture can wreak havoc on your cherished memorabilia. Custom framing offers a powerful barrier that protects your items from these environmental threats, helping them stay in pristine condition for years.

    Here’s how:

    • Custom frames mostly come with UV-protective glass or acrylic which shields your items from harmful sunlight that can cause fading and deterioration.
    • Plus, high-quality, acid-free matting and backing prevent discolouration, warping, and degradation. It ensures that your items don’t suffer damage over time.

    2. Ensure Your Memories Live On for Future Generations

    Custom framing is an investment in the future. By protecting your memorabilia with a professional frame, you’re safeguarding those items to be enjoyed by future generations.

    Items like vintage photos, wedding invitations, or baby mementos can be preserved as family heirlooms with custom framing. Thus, transforming them into cherished items that can be passed down.

    Additionally, your memorabilia tell a story and custom framing ensures that story is preserved, giving your legacy a place to shine.

    3. Tailored to Fit Your Mementos Perfectly

    One of the best features of custom framing is that it’s built to your specific needs. Unlike standard frames, which may not fit irregular items or unique sizes, custom frames are designed to enhance your memorabilia and its display.

    With custom framing, you have the flexibility to choose from a wide array of frame styles, colours, and finishes. This means your memorabilia will not only be preserved but also highlighted in a way that complements your home décor and reflects its importance.

    4. Personalisation & Customisation Like No Other

    The level of personalisation available with custom framing allows you to truly make your memorabilia your own. From frame materials to matting and glass choices, you have full control over every aspect of the display.

    Interestingly, you can personalise your frame with engraved plaques, custom matting, or even a meaningful quote to give your memorabilia an extra layer of meaning.

    Get creative with shadow boxes, double matting, or even multi-opening frames to showcase related items together. The possibilities are endless!

    5. Enhance the Value of Your Memorabilia

    Many items you frame carry more than just sentimental value. They have monetary value as well, especially if they’re rare, signed, or limited edition. Custom framing can elevate both the actual and perceived value of your memorabilia, making it a more impressive and marketable piece.

    The right frame doesn’t just protect, it enhances. A well-framed item looks polished, valuable, and worthy of being displayed proudly.

    Thus, by protecting your memorabilia from fading, moisture, and physical damage, custom framing helps preserve its value over time.

    5 Key Elements of Custom Memorabilia Framing that Keep Your Memories Safe for Years

    Untitled design

    Custom framing involves several key elements. Each one is tailored to protect, display, and enhance your item. Let’s break down these crucial components that make custom framing so special.

    1. Frame Types | Choosing the Right Material for Your Memorabilia

      The frame you choose can make a huge difference in both the appearance and protection of your memorabilia. There are various frame materials available, each offering unique benefits.

      Frame TypeDescriptionBest Suited For
      Wooden FramesA classic, versatile choice offering both traditional and modern finishes.Photographs, prints, certificates
      Metal FramesSleek and modern, available in matte or polished finishes. Durable and lightweight.Sports memorabilia, minimalist artwork
      Composite FramesMade from a mix of wood and resin, combining the appearance of wood with added affordability.Diverse memorabilia types

      The best material for your memorabilia largely depends on the item’s aesthetic, weight, and the overall style of your home décor.

      2. Matting Options | Enhancing Both Protection and Presentation

      Matting is more than just a decorative border for your memorabilia. It plays an essential role in both protecting and presenting your items. It keeps your memorabilia from touching the glass which reduces the risk of moisture buildup or potential damage from direct contact.

      There are these three matting options:

      • Single Matting: A simple, elegant border. Ideal for smaller items or minimalist designs.
      • Double Matting: Adds depth and contrast with two layers of matting. Perfect for detailed pieces like photos and certificates.
      • Acid-Free Matting: Essential for preserving valuable memorabilia. Prevents discolouration and deterioration over time. Ideal for vintage items and photographs.

      3. UV-Resistant Glass | Protecting Your Memorabilia from Fading

      UV-resistant glass is a key element of custom framing. Particularly for items that are sensitive to light. If you want to ensure your photos, posters, or artwork stay as beautiful as the day they were framed, investing in UV-resistant glass is essential. It provides a protective shield, ensuring your cherished items stay vibrant and intact for many years.

      UV glass comes in various forms, including standard clear glass, non-reflective glass, and acrylic options. The right choice depends on the type of item being framed and your budget.

      4. Shadow Boxes | Perfect for Framing 3D Memorabilia

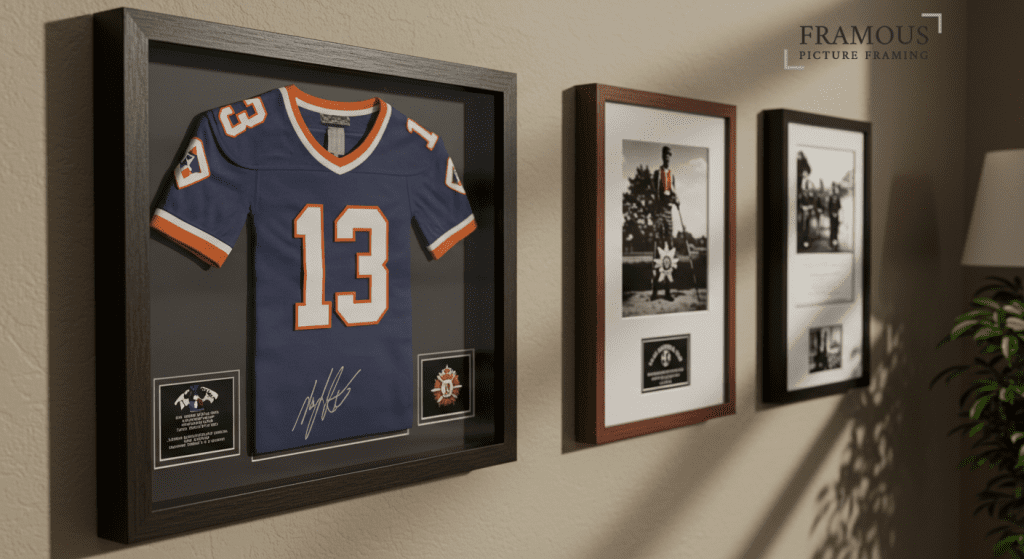
      Some pieces of memorabilia are too special to fit in a standard frame. For items like jerseys, medals, awards, or military keepsakes, a shadow box is the ideal solution.

      What is a Shadow Box? A shadow box is a deep frame that provides extra space for 3D objects. It allows your memorabilia to be displayed in a way that highlights its dimensional qualities while keeping it safe.

      Shadow boxes offer several benefits for 3D memorabilia:

      • give the item room to breathe
      • help prevent damage from squashing or crushing
      • add a dramatic, eye-catching presentation to your display

      Shadow boxes can be fully customised with fabric backgrounds, additional items, or even lighting options to make your display stand out even more.

      5. Mounting & Backing | Keeping Your Memorabilia Secure and Safe

      When it comes to framing, secure mounting is a must. Proper mounting techniques keep your memorabilia in place while preventing it from shifting, warping, or sustaining damage over time.

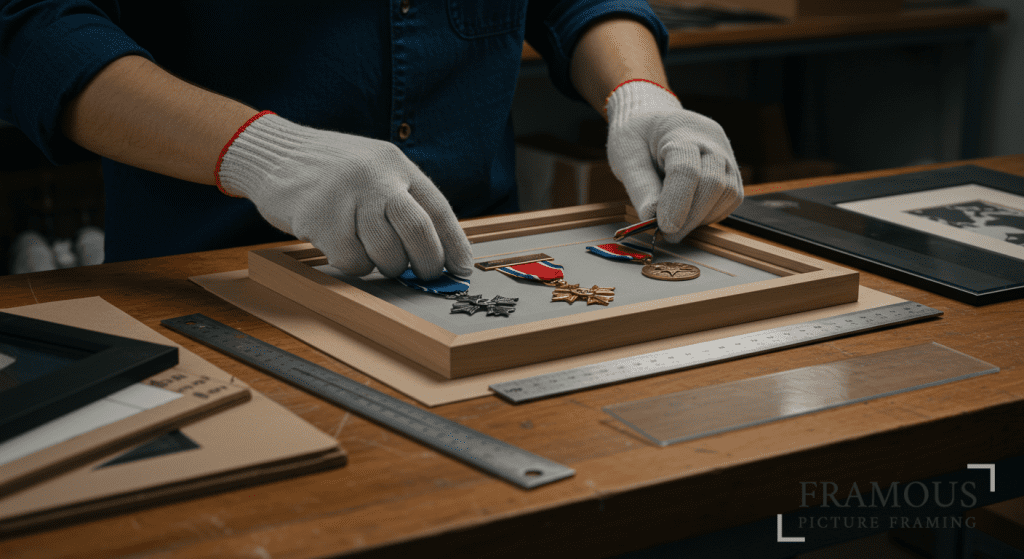
      • Non-Invasive Mounting: For valuable or fragile items, non-invasive mounting techniques are used to hold the piece in place without causing any damage. This could involve the use of acid-free mounting corners, clear mounting strips, or other archival materials.
      • Backing Materials: The backing of your frame is equally important. Acid-free foam board or cardboard is commonly used to provide a sturdy base for the item. This backing helps support the item’s structure. It also prevents it from bending, sagging, or deteriorating over time.
      • Proper Support for 3D Items: When framing 3D objects like a medal or jersey, additional mounting methods are used to secure the item in place. Such as pins, tacks, or special mounts that keep it safe without damaging the object.

      Common Mistakes to Avoid When Framing Your Memorabilia

      It’s easy to make mistakes during the framing process that can lead to irreversible damage or poor presentation. To help ensure your items remain in perfect condition, here are some common mistakes to avoid:

      • Improper Mounting: Using tape, glue, or non-archival materials that can cause irreversible damage to the item.
      • Using Low-Quality Materials: Opting for cheap frames, glass, or mats that can deteriorate over time and harm your memorabilia.
      • Choosing the Wrong Style: Selecting a frame that doesn’t complement the item, detracting from its visual appeal.
      • Underestimating the Importance of Professional Framing: Attempting DIY framing without the proper expertise, which can lead to poor mounting, material damage, and potential harm to valuable items.

      Are your cherished memories safe and well-displayed?

      Protect, Preserve, and Display Your Memorabilia with Framous Picture Framing

      Your valuable keepsakes deserve to be treated with the utmost care and displayed in a way that highlights their significance.

      At Framous Picture Framing, we specialize in custom framing solutions that not only protect your memorabilia but also enhance its beauty. From UV-resistant glass to personalized frame designs, we ensure that your items stay safe for generations to come.

      Let us help you preserve the memories that matter most to you.

      Get Your Custom Framing Consultation Today

      FAQs About Memorabilia Framing Perth

      Q1: What is the meaning of memorabilia?

      Memorabilia refers to objects or items that are collected because of their historical, cultural, or sentimental value. These can include sports items, signed merchandise, photographs, medals, or any keepsake that holds significance.

      Q2: How much does memorabilia framing cost in Perth?

      Framing memorabilia in Perth can cost anywhere from $200 to $600 or more, depending on the complexity of the design, materials used, and size.

      Q3: How long does the framing process take?

      Typically, the framing process takes between 2 to 4 weeks, depending on the complexity of the framing, availability of materials, and the specific design. Custom frames with special features like UV-resistant glass or shadow boxes may take a bit longer.

      Q4: Can you frame oversized items like jerseys or sports equipment?

      Yes. Custom framing is perfect for oversized items like jerseys, sports equipment, or large posters. Frames can be tailored to fit the exact size and shape of your memorabilia, including 3D items like sports jerseys and helmets.

      Q5: Can I frame fragile or antique items?

      Yes! Fragile or antique items require extra care and attention. Professional framers in Perth use specialised mounting techniques and archival-quality materials to ensure that your delicate memorabilia is safely framed and preserved without causing any damage.

      Q6: Is memorabilia worth the investment?

      Yes, memorabilia can be a valuable investment, especially when it holds historical, cultural, or personal significance. Items like autographed sports gear, rare collectibles, or family heirlooms not only have sentimental value but can appreciate over time.

      Q7: Does framing memorabilia increase the value?

      Framing memorabilia can enhance both its perceived and actual value. A professionally framed item not only preserves its condition but also presents it in a way that increases its visual appeal.

      Art Framing Trends Perth: How to Frame Like Gallery Experts 150 150 admin

      Art Framing Trends Perth: How to Frame Like Gallery Experts

      Art Framing

      Do you know when you get mesmerised by an art display, not all credit goes to artwork itself. It depends mostly on how perfectly it’s presented via art framing.

      It’s the truth most people don’t realise: framing makes or breaks your art. You can have a Picasso level masterpiece. But stick it in a cheap, poorly chosen frame & only a garage sale will accept it. While, a simple print can be a million-dollar seller if framed correctly.

      It works just like wearing pyjamas to a job interview. No one will hire you, right?

      In Perth’s booming art scene, from the creative laneways of Fremantle to the emerging galleries in Subiaco. We’ve seen firsthand how the right frame can completely revolutionize a piece. The serious collectors & veteran artists know this secret, so you should too.

      Let Framous Picture Framing guide you some simple tips & tricks of artful framing. That can transform your artwork from “nice” to “wow”. Just follow them and let your creativity shine, you’ll be amazed to see what framing can do for your art.

      It’s not magic, but it sure comes close.

      Perth’s Art Framing Scene: Current Trends and Gallery Standards

      Perth's art framing trends

      Perth’s art galleries are embracing exciting new approaches to framing visual technique. In 2025, shadow boxes will continue to be used in increasingly creative ways. While soft pastel hues, warm earth tones, and rich jewel tones are common choices in art frame shops.

      Some current Perth gallery trends include:

      • Floating frames: Create depth and dimension
      • Mixed material combinations: Wood and metal hybrids
      • Sustainable materials: Eco-conscious framing choices
      • Bold colour statements: Moving beyond traditional neutrals

      There has been a notable shift toward framing wall art with metal and wood. Because they align with eco-conscious trends & add a premium feel to art pieces. Local galleries welcome these innovative approaches & setting new standards for framed art wall displays throughout WA.

      Understand Your Artwork’s Framing Needs

      Every expert framer will demand to see your art before starting the framing process. Because you can’t just attach a neutral wood piece to every art. Each medium has unique requirements that affect both preservation and presentation. E.g.

      1. Paintings: Oil, Acrylic, and Watercolour

      paintings art framing

        If you are going for a hand- made drawing with frame, keep the following in mind.

        Oil paintings need breathing room. They should never be pressed against glass, as they can stick and damage the surface. Instead, use deep frames with spacers or go for open-air display in controlled environments.

        Acrylic paintings are more forgiving but they need UV protection. They dry completely and don’t stick to glass, so, they are easier to frame than oils. On the other hand, watercolours are delicate souls. They require acid-free matting, UV-protective glass, and sealed backing to prevent moisture damage in Perth’s variable humidity.

        2. Photography and Print Materials

        photography art framing

        If your artwork is digital, its framing needs will be totally different. Different print types from traditional silver halide to modern giclée have varying lifespans and protection needs. Framing techniques for photography focus on:

        • Archival mounting: Prevent print deterioration
        • UV filtration: For color longevity
        • Moisture barriers: Protect against Perth’s coastal humidity

        Keep Climate in Mind for Frame Materials

        You’ll have to decide the framing material wisely too. Because seasoned collectors detect these flaws & value of your art drops dramatically.

        Perth’s Mediterranean climate comes with hot, dry summers and mild, wet winters. So, your frame material needs to survive all that. Your framed wall art is beautiful as long as it can withstand temperature and humidity.

        MaterialBenefitsPerth Climate Suitability
        HardwoodDurable, traditional appealExcellent with proper sealing
        AluminumLightweight, moisture-resistantPerfect for coastal areas
        CompositeCost-effective, stableGood for indoor use
        SteelModern look, very durableExcellent but requires rust protection

        Pro Tip: Avoid softwoods like pine for valuable pieces. They’re prone to warping in Perth’s climate variations.

        Get Benefit from Professional Matting and Mounting Techniques

        The mat is your artwork’s best friend. It provides breathing space, adds visual weight, and protects the piece from touching the glass. Perth framers use several advanced techniques:

        (✔) Acid-Free Materials

        Acidic materials will yellow and damage your artwork over time. Always insist on museum-quality, acid-free matting.

        (✔) Float Mounting

        Go for it when there are interesting edges or signatures you want to show. The artwork will appear to “float” in the frame, & create a dramatic visual impact.

        (✔) Hinging Methods

        It mounts the artwork by suspending it with tabs of tape.

        • Pendant hinges: For lightweight pieces
        • T-hinges: For heavier works
        • Tab hinges: For maximum security

        Glass vs. Acrylic Protection for Your Artwork

        So, let’s move toward the material reflect your artwork. The decision will impact both appearance and longevity of art, so decide wisely.

        GlassAcrylic
        Crystal clear clarityScratch resistantNo static electricityLower cost50% lighter weightShatter-resistant (safer)Better UV protection optionsWon’t break during transport  

        For Perth homes, we recommend acrylic. As its UV protection is needed for our intense Australian sun. Plus, it wins for larger pieces or homes with children too.

        Colour Theory in Frame Selection: Enhancing Visual Impact

        framing visual technique & colour choice

        This is where the art of framing truly shines. Because the colour choice decides if your frame is the part of artwork or just holding it. First of all, note the colour theme your artwork is following. The frames of art should enhance, not compete with, your framing choice.

        You can choose:

        • Complementary Colours: Choose frame colours opposite your artwork’s dominant hue on the colour wheel. It will create vibrant contrast and makes colours pop.
        • Analogous Colours: Select frames in similar colour palette for harmonious & soothing display. Choose this approach if you want to draw attention to centre of art.
        • Neutral Colours: When in doubt, go for neutral. Black, white, silver, and natural wood. They work with virtually everything.

        If you want to display art in your own collection, consider your studio palette too. Otherwise, match it to homes of your customers. Perth’s love affair with coastal whites, warm timber tones, and soft blues influences frame selection for home integration.

        Sizing and Proportion Guidelines for Perfect Presentation

        Hanging framed art height

        Apart from artistic details, solid decisions like sizing & proportion also matters. Without them, professional-looking displays aren’t possible. Follow these golden rules:

        (✔) The 60-70% Rule

        Your frame should be 60-70% the width of the furniture beneath it. It will create a visual balance without overwhelming the space.

        (✔) Height Placement

        Hang artwork so the centre sits at 57-60 inches from the floor. It is the standard gallery height that works for most viewers.

        (✔) Multiple Piece Displays:

        Multiple pieces of art hung together compliments each other.

        • Keep consistent spacing (2-3 inches between frames)
        • Align pieces by their centre points
        • Create visual flow with similar frame styles or colours

        Balancing Budget and Quality: Smart Framing Investment Strategies

        Investing in quality frame sure gives you long term benefits and enhance your artwork. But you need to remember that not every piece need museum-quality framing. Always spend on frame according to the worth of your piece.

        Get a high-quality professional frame with proper backing if:

        • The artwork has monetary value
        • It’s irreplaceable (family photos, original art)
        • It’s prominently displayed
        • You plan long-term display

        Otherwise, if it’s temporary or seasonal décor, get a budget efficient frame for it. Also, if monetary value of your gallery is low or it’s a practice display, no need to spend much.

        Cost-Effective Tips:

        • Buy standard sizes when possible
        • Choose simple profiles over ornate designs
        • Consider DIY for low-value pieces
        • Group orders to save on labour costs

        Pro Tip: Always buy from trusted sources to get honest value of your money.

        Psychology of Viewers: How Presentation Affects Perception

        art framing & psychology of viewers

        Never underestimate what a framing can do psychologically to perception of viewer.

        A properly framed artwork looks visually complete & in-depth. Hence, it is perceived as more valuable, important, and professional. The frame creates a boundary that separates the artwork from its surroundings, commanding focused attention.

        Proper art framing results in:

        • Authority: Well-framed pieces appear more credible
        • Value: Professional presentation suggests higher worth
        • Focus: Frames direct viewer attention inward
        • Emotional Response: Quality framing enhances emotional connection

        So, you can make a better impression & enjoy enhanced professional reputation.

        Creating Stunning Gallery Walls: Design Tips and Techniques

        Framed your artwork & going to display it? We have some pro tips for that too. Let’s teach you how to create a framed canvas wall art.

        Plan Your Layout

        1. Cut paper templates of each frame
        2. Arrange on the floor first
        3. Use a level and measuring tape
        4. Start with the largest piece as your anchor

        Professional Spacing

        Maintain 2-3 inches between frames for most arrangements. Closer spacing creates intimacy while wider spacing feels more formal.

        Visual Flow

        Create movement by varying frame sizes while maintaining consistent style or colour themes.

        Working with Perth Framing Professionals

        You’ve become a pro in framing up till now, but still, some projects demand professional expertise. Consider professional services for:

        • Valuable artwork: Insurance require professional framing
        • Complex installations: Multi-piece walls or unusual shapes
        • Conservation needs: Antique or deteriorating pieces
        • Custom solutions: Non-standard sizes or special requirements

        Never leave your valuable pieces on the mercy of DIY and get expert services to get professional level results.

        Ready to transform your artwork?

        Get Professional Art Framing with Framous Picture Framing

        Our award-winning team has been creating exceptional frame creations since 1985.

        From tiny treasures to enormous installations, we guarantee satisfaction and “wow factor.” Because we know the importance of art & how to make it eternal.

        Our qualified colour theorist and character assessor will decide what your artwork exactly needs. And then with Perth’s largest selection of frame mouldings and materials, we create frames that match your vision and budget.

        Contact us today for professional direction on character. Because your art deserves nothing less than extraordinary presentation.

        Explore Our Gallery of Framed Art

        Contact Us for Professional Art Framing

        Your artwork will thank you.

        How To Create a Mirror Frame? Easy DIY Mirror Framing Guide 150 150 digital_admin

        How To Create a Mirror Frame? Easy DIY Mirror Framing Guide

        Create a Mirror Frame

        A mirror without a frame feels unfinished, like a painting without a border.

        A thoughtfully crafted mirror frame doesn’t just tidy up the edges. But brings warmth, personality, and a sense of completeness to any room.

        Doesn’t matter if your interior is rustic, modern, or somewhere in between. Learning how to create a mirror frame is a chance to bring harmony to your space.

        At Framous Picture Framing, we’re working with creative souls across Midland since 1985. We know how the right frame can complete your artwork, photography, or mirror.

        With the largest range of materials and a team of award-winning framers who understand colour, texture, and design. We can help you turn everyday objects into centrepieces.

        So, let’s guide you on how to frame a mirror.

        What You’ll Need for Your DIY Mirror Frame Project?

        Before you begin your DIY frame for a mirror, gather the right tools and materials. So, your project runs smoothly from start to finish.

        ToolPurpose
        Measuring TapeFor accurate mirror and timber measurements.
        Mitre Saw / Mitre Box with Hand SawFor cutting precise angles on timber.
        ClampsTo hold pieces together while glue dries.
        Drill or ScrewdriverFor attaching hardware.
        Sander or Sandpaper (Medium & Fine Grit)To smooth timber edges.
        Safety GearGloves and safety glasses to protect hands and eyes.
        Wood GlueFor strong joins.
        Paintbrushes / RollersIf painting or staining the frame.

        Materials You’ll Need:

        • Quality timber or moulding strips (wood frames for mirrors are ideal for durability).
        • Backing board (optional for extra support).
        • Mirror clips or clamps for securing the mirror within the frame).
        • Screws, nails, or D-ring hangers for wall mounting.
        • Paint, stain, or clear sealant depending on your design choice.

        Always use quality materials as cheap wood can warp or splinter over time and ruin your beautiful mirror framing DIY project.

        Step-By-Step Instructions for Framing Your Mirror Like a Pro

        Building a do it yourself frame for mirror isn’t difficult, if you pay enough attention to details. Follow these steps with love & patience, and you’ll enjoy the process as much as the final result.

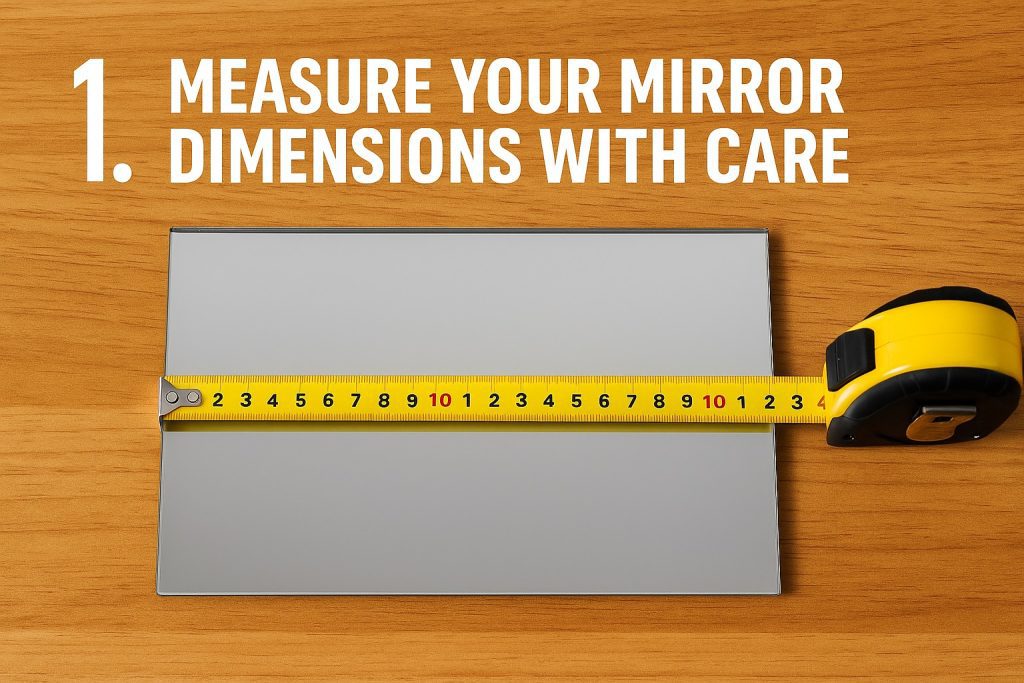
        1. Measure Your Mirror Dimensions with Care

        Step 1

          Begin by laying your mirror flat on a clean & even surface. Use a measuring tape to record the exact width and height. Be precise down to the millimetre. This measurement is the foundation of your DIY mirror framing project.

          If you plan to have the frame overlap the mirror edges, account for this in your final timber measurements. Write the values down clearly.

          Tip: Measure twice, cut once!

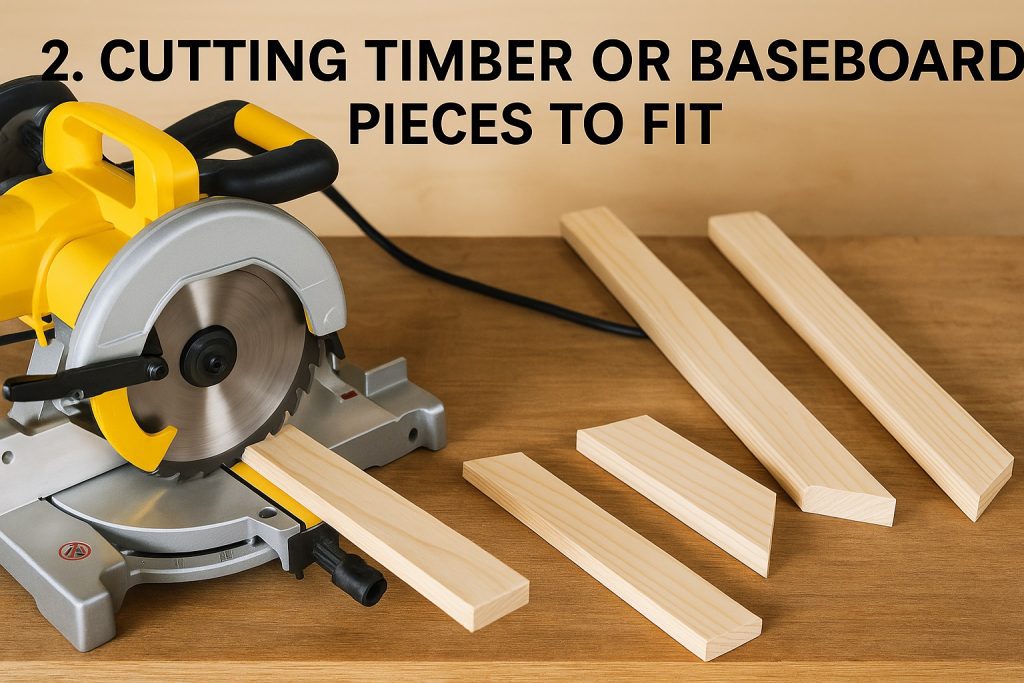
          2. Cutting Timber or Baseboard Pieces to Fit

          Step 2

          Select good-quality timber for your framing a mirror with wood project. Consider styles like oak for a classic look or pine for something softer. Once your measurements are confirmed, transfer them onto your timber.

          Using a mitre saw (or a mitre box if you’re working manually), cut each piece to size at a 45-degree angle at both ends. Cutting mitre corners takes practice. Go slow and steady to get sharp, clean lines.

          For a rectangular mirror, you’ll need:

          • 2 horizontal pieces (width)
          • 2 vertical pieces (height)

          Double-check that your pieces line up nicely before moving on.

          3. Sand All Edges for a Smooth Finish

          Step 3

          Rough & uneven edges can ruin the look of your mirror frames. Sand all sides, especially the freshly cut ends, using medium-grit sandpaper followed by fine-grit.

          It will make your frame professional & also helps paint or stain adhere evenly. Pay more attention to the corners where cuts were made.

          4. Fine-Tune Angles for Perfect Corners

          Step 5

          Lay your timber pieces on a flat surface and position them together to form your frame shape. Inspect the joins. If the mitred edges aren’t lining up, make minor adjustments with sanding or trimming.

          Proper alignment at this stage keeps your mirror frame polished when complete. A perfect 45-degree angle is required for square or rectangular frames.

          Use clamps to dry-fit the pieces temporarily and check the shape.

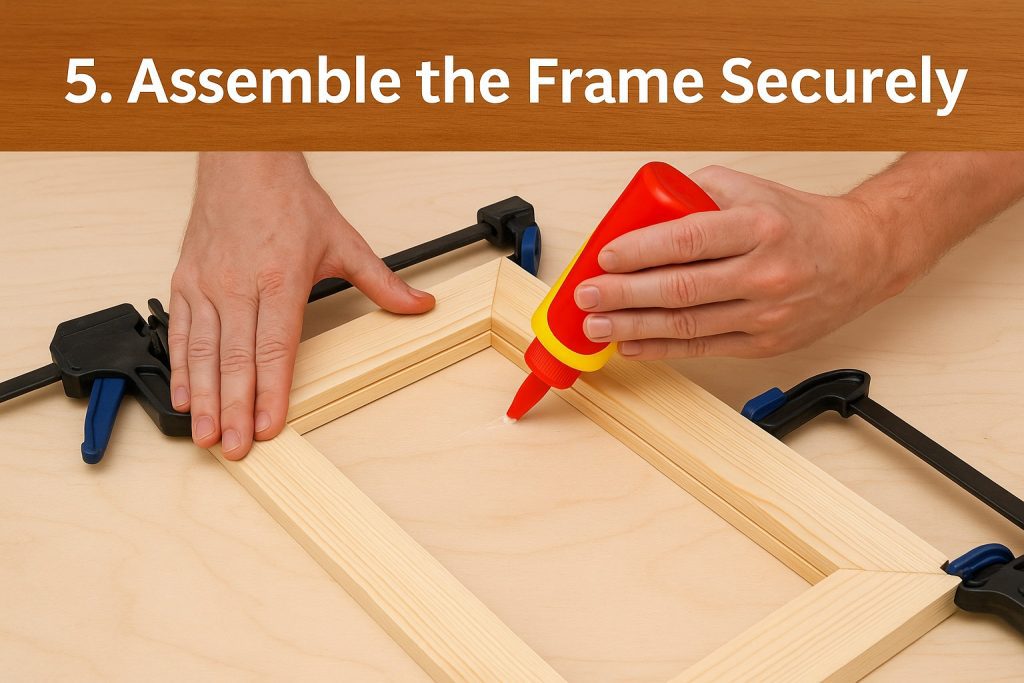
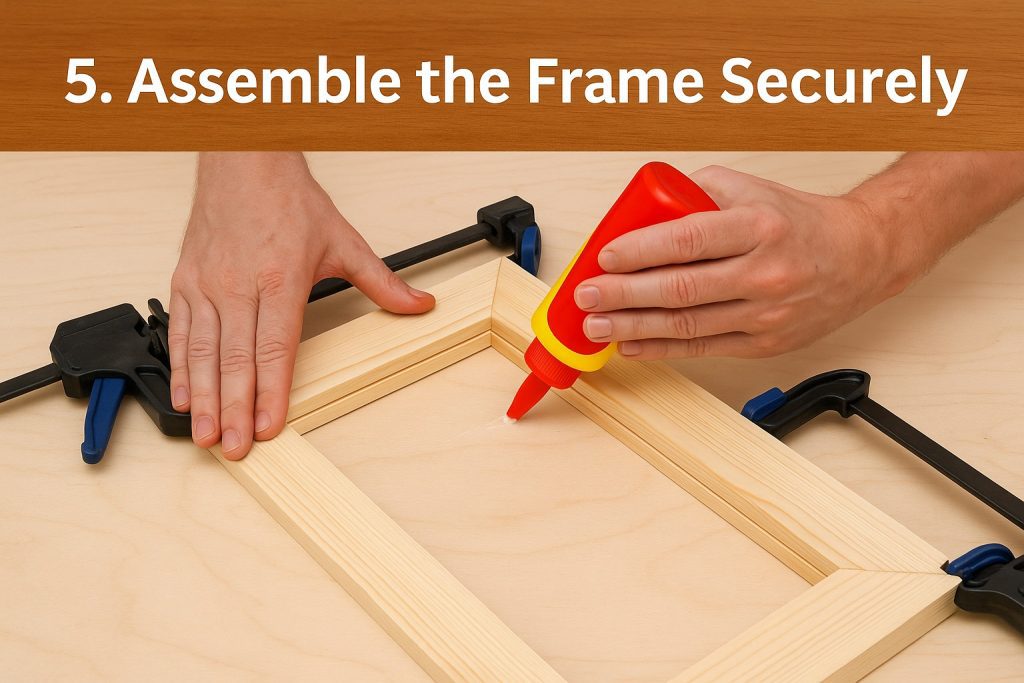
          5. Assemble the Frame Securely

          Step 5

          Apply a high-quality wood glue to the angled ends of your timber pieces. Fit the corners together and use clamps to hold everything while the glue dries. Check alignment with a square tool and make sure that the frame is not skewed.

          Leave the frame clamped for the recommended drying time (usually overnight). It will create a solid base for your frame with mirror. For extra strength, reinforce the corners with small finishing nails or metal brackets after the glue has set.

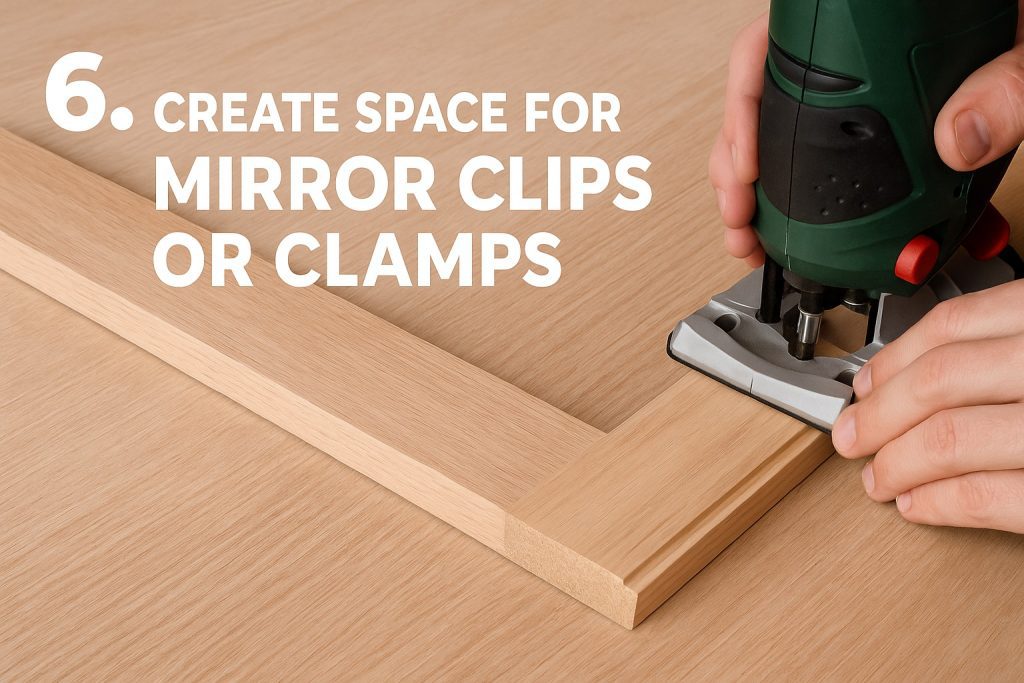
          6. Create Space for Mirror Clips or Clamps

          Step 6

          Before attaching your mirror, check how it will be secured inside the frame. If needed, use a router to create a shallow groove (also called a rebate) along the inner edge of the frame. It will hold the mirror and backing board securely.

          Alternatively, attach small mirror clips to the back of the frame later. Proper planning here prevents surprises in fitting the mirror.

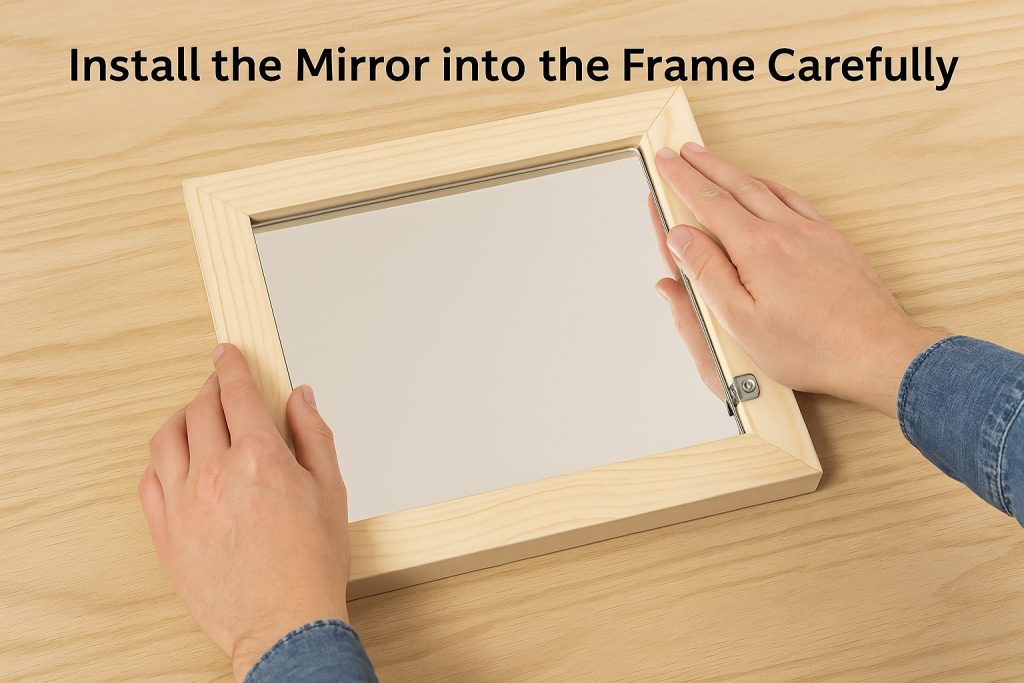
          7. Install the Mirror into the Frame Carefully

          Step 7

          Once your frame is solid and fully dry, place your mirror into the prepared groove or back it with clips. Handle the mirror with extra care to avoid any scratches.

          If you’re using backing board, cut it to match the frame’s inner dimensions. Secure the mirror and backing in place using screws or clips without overtightening. The result should be neat and snug and DIY mirror frame should provide enough support.

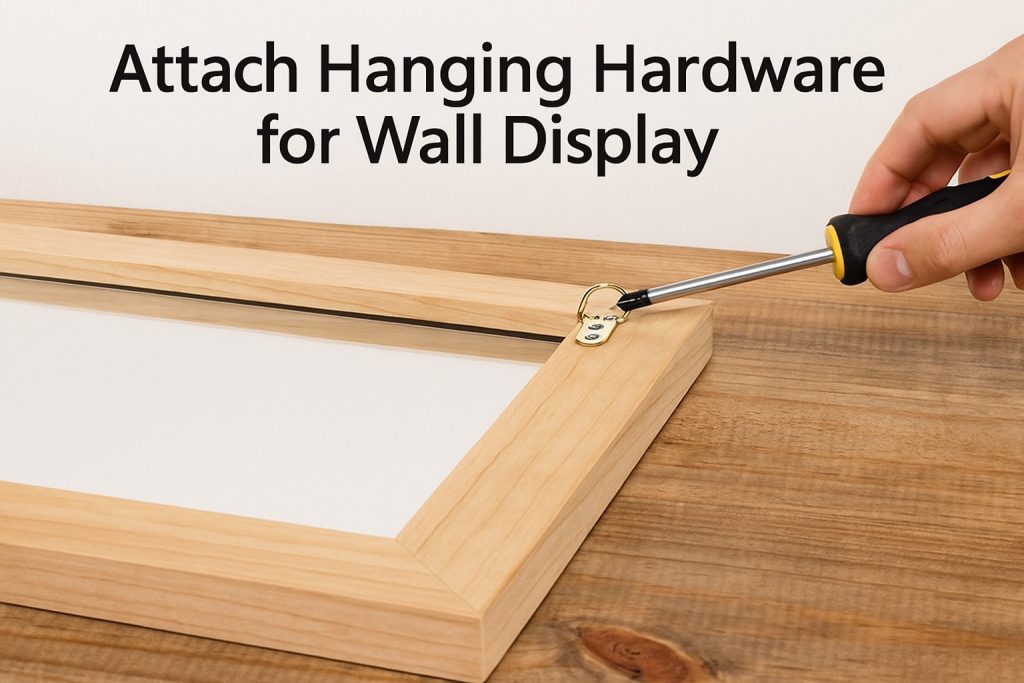
          8. Attach Hanging Hardware for Wall Display

          Step 8

          Decide if you’ll hang your frame with mirror vertically or horizontally. Install D-rings, sawtooth hangers, or wire as appropriate for your wall type.

          Mark the hardware positions accurately so the mirror hangs evenly. Use a spirit level to double-check. This step will keep your new mirror frame straight and secure.

          Read More at: Hanging a Full-Length Mirror | 7 Easy Steps

          Safety Tips for Your DIY Mirror Framing Project

          Safety is the primary concern in any DIY project involving tools and glass. Keep these guidelines in mind:

          • Wear safety gloves when handling glass and timber.
          • Always use protective eyewear when cutting or drilling.
          • Work in a clean & stable area with good lighting.
          • Take your time. Rushing leads to mistakes and injuries.
          • Follow tool safety instructions carefully.

          If any injury is caused during the process, stop it immediately as safety is more important than creativity. Instead, consult the professional frame makers.

          Should You DIY or Ask Pros for Mirror Framing?

          DIY mirror framing allows for creativity, customisation, and a sense of accomplishment. However, it requires patience, precision, and the right tools. If you’re not confident working with timber or glass, professional services can save time and stress.

          At Framous Picture Framing, we see both types of clients. The hands-on DIYers and those who prefer to trust our expertise. Both approaches are valid. If you enjoy crafting and have some know-how of it, it is a fantastic choice.

          Also Read: Creative Ways to Use Custom Framed Mirrors in Your Home

          Common Mistakes to Avoid

          MistakePotential RiskSolution
          Inaccurate measurementsFrame won’t fit properlyMeasure twice, cut once
          Skipping sandingRough edges, poor finishAlways sand before painting
          Weak glue or poor joinsFrame can breakUse clamps and quality glue
          Forgetting to plan mirror clipsDifficult to secure mirror laterPlan clip/groove placement early
          Not using safety gearRisk of cuts or injuryGloves, glasses, caution

          Need a Frame of Your Choice Built by Experts?

          Try Custom Mirror Framing by Framous Picture Framing

          We’ve been transforming mirrors and artwork into show-stopping décor since 1985.

          With the largest collection of wood frames for mirrors in Midland, we help you express your style. If you want advice on colours, finishes, or upkeep of your frame, our friendly & artistic team can guide you.

          Scroll through Our Work

          Get in Touch with Us

          and see how we can help you frame your creativity with confidence.

          Creative Ways to Use Custom Framed Mirrors in Your Home 150 150 admin

          Creative Ways to Use Custom Framed Mirrors in Your Home

          Gold,Antique,Picture,Frames.,Isolated,On,White,Background

          Every space tells a story. But sometimes, it needs a little help finding its voice.

          It can be a bare hallway that feels too empty, or the bathroom that lacks a spark. The custom framed mirrors, when chosen with care, can provide that voice. They open up a room, bounce around light, add a layer of elegance & completes the look of the space.

          And Framous Picture Framing can help you create that perfect piece. Based in the heart of Midland and serving Perth since 1985. We’ve helped thousands of clients turn empty walls into beautiful statements.

          Do you know what you need? Or are you in search of some creative guidance?

          No worries either way. With the largest selection of frame mouldings and a passionate eye for detail. We’ll craft a mirror that suits your space and soul.

          Let’s start.

          What Exactly Are Custom Framed Mirrors?

          At their core, they are mirrors designed uniquely for you, your size, your style, your purpose. Unlike generic store-bought options. Custom framed mirrors fit your space precisely and framed with your chosen materials, colours, and dimensions.

          Think of them as a canvas. You bring the vision, and our framers bring it to life.

          FeatureDescription
          Personalised DimensionsFrom tiny powder rooms to grand living walls, the mirror will fit like a glove.
          High-quality CraftingMass produced mirrors lack the quality or attention to details that custom ones can offer.
          Unlimited Framing ChoicesChoose from traditional timber, sleek metals, or ornate vintage designs.
          Space & LighteningThey give the illusion of widened space & spread the light into every corner.
          Functional DesignIf you want it for daily grooming, decoration, or just matching the room’s aesthetic. the mirror serves your intent.

          Custom mirrors Perth go beyond decoration. They solve design problems, add elegance, and offer an unmatched level of personalisation.

          Read More at: Benefits of Using Mirrors in Interior Design

          Choosing Your Mirror Style: Bevelled or Plain?

          The edge detail of your mirror can drastically influence its visual impact. Among trends of mirror framing Perth, you’ll come across two styles, plain and bevelled.

          1. Plain Edges

            A plain edge mirror has a clean, sharp-cut edge without any slant or decoration. It’s perfect for modern & minimalist homes.

            Best for:

            • Contemporary bathrooms
            • Scandinavian and industrial interiors
            • Professional & simple décors

            Why You Should Choose Them?

            • Cost-effective
            • Clean & understated look
            • Styled with bold or intricate frames for balance

            2. Bevelled Edges

            Bevelled mirrors feature angled, polished edges that taper off around the frame. They reflect light at different angles & add a sparkle and dimension.

            Best for:

            • Traditional and classic decors
            • Entryways or formal living rooms
            • Mirror-on-mirror designs or layering effects

            Why You Should Choose Them?

            • Adds depth and light play
            • Creates an upscale, artistic look
            • Standalone pieces without heavy framing

            Choose between the two based on your interior goals and taste. So, your framed mirror can become the highlight of your space.

            Creative Ideas for Custom Sized Framed Mirrors

            Custom sizes mean your mirror fits perfectly, no compromise. But what can you do with that flexibility?

            Here are some popular placement ideas of mirror framing Perth for you.

            PlacementCustom Mirror IdeasBenefit
            HallwaysLong & narrow mirrors framed in a soft timberVisually stretch the space.
            BathroomsFull-height custom mirrorsEnhance the functionality of double vanities or tight corners.
            BedroomsHorizontal over a bedhead or dressing mirrorAdd the elegance especially with a luxurious bevelled edge.
            Living RoomsLarge mirrors framed in antique gold or blackServe as a focal wall.
            Dining AreasGroupings of smaller mirrors in different shapes within matching framesPortray a gallery like look.

            Other customisation ideas include:

            • Layered Framing: Use double frames, inner and outer, for a sculptural effect.
            • Custom Shapes: Beyond rectangles, you can get circles, ovals, or organic curves.
            • Mix Materials: Blend metal and wood for a contemporary contrast.

            There’s literally no limit of ideas with custom framed mirrors. You dream it, we frame it.

            Want to Skip the Frame at All? Frameless Mirror Options

            Sometimes, simplicity makes the boldest statement. And modern trends resonate with this thought more than ever. That’s why, frameless mirrors are making their way in modern homes across Perth.

            They are used:

            • In small bathrooms where wall space is limited
            • In minimalist homes with clean architectural lines
            • Behind vanities where tiles already frame the space

            Design benefits:

            • Seamless and subtle
            • Works well in tiled spaces
            • Easier to clean and maintain

            To make it even more functional, you can choose features like bevelled edges, rounded corners, or sandblasted designs. So that even without a traditional frame, your mirror can still reflect thoughtful look.

            Installing It Right with Your Choice of Hanging Systems

            Even the most beautiful mirror loses charm if it’s poorly hung. A solid hanging system can give you safety, symmetry, and longevity.

            You can choose from:

            Hanging SystemBest ForKey Features
            D-Rings + WireMedium to large mirrorsAllows flexibility, easy to adjust
            French CleatsHeavy mirrorsClean & secure fit for wall flush
            Z-ClipsFrameless or slim-framed mirrorsHidden support, strong hold

            Our professionals handle every type of hanging system with care, precision, and balance. So, your masterpiece looks exactly as envisioned.

            Also Read: DIY Guide to Hanging a Mirror

            Protective Backing | Why It is a Must?

            You might not see the back of your mirror, but what goes behind the glass plays a crucial role in its durability. Protective backing is a specially coated material or board affixed behind the mirror to protect it from:

            • Moisture: Especially important in humid rooms like bathrooms or kitchens
            • Impact Damage: Adds a layer of security against breakage
            • Wall Stains: Prevents mirror marks or streaks from wall residue

            We offer expert-level backing with every custom framed mirror tailored to its environment. It will protect your mirror from accidents & keep it beautiful for years.

            How to Create the Perfect Custom Mirror? Expert Tips & Tricks

            Custom framed mirrors can solve almost any design dilemma in your décor. Because they can be any style, size, colour of your choice. We’ve complied some friendly tips from our in-house experts to get the most out of your custom framed mirrors.

            1. Start with the purpose of your mirror. Is it decorative, functional, or both? Then choose the size and placement accordingly.
            2. Only install one large mirror if the space is narrow. Too many reflections can look abrupt.
            3. Use tape to mark out the mirror area and get a sense of scale.
            4. Pick your framebased on existing room finishes, wood, chrome, matte black, etc.
            5. Mirror should not exceed from half of the viewable wall space.
            6. Don’t overthink and go bold with shapes. Rectangle is safe, but round and arched mirrors add softness and flow.
            7. Select the height to allow the optimal reach & intended functionality.
            8. Ask for advice from experts.Our team includes colour theorist and character assessor who helps you balance creativity and harmony.

            Looking for Custom Mirrors Perth That Reflect You?

            Design Custom Framed Mirrors with Framous Picture Framing

            At Framous Picture Framing, we turn ordinary mirrors into personalised design statements.

            With the most extensive range of frames in Midland and a flair for artistic customisation. We can craft any personalised mirror frame for you. Be it a minimal frameless style or a grand feature mirror, we’ll work with your ideas or even help you discover them.

            Let’s frame something unforgettable.

            Get in Touch with Us

            Explore Our Framing Samples

            Master the Art of Canvas Stretching – An Easy DIY Guide 150 150 admin

            Master the Art of Canvas Stretching – An Easy DIY Guide

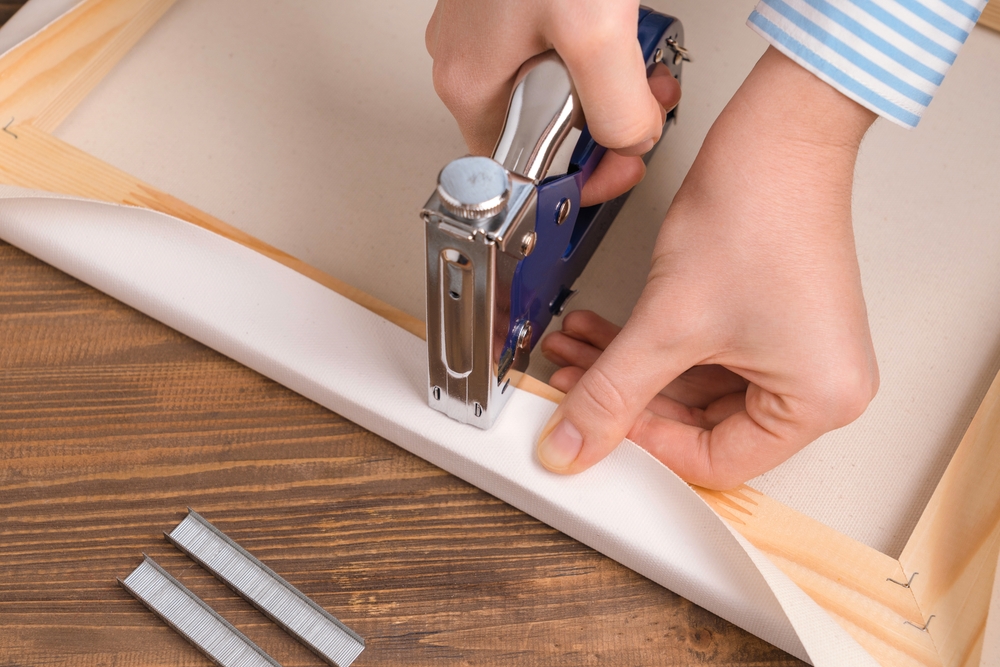
            The,Artist,Stretches,The,Canvas,On,A,Wooden,Frame,With

            If you’ve ever bought a rolled canvas print or created a painting on loose canvas. You know it’s not display-ready. That’s where canvas stretching comes in.

            Stretching your canvas over a sturdy wooden frame not only gives it a smooth, professional look but also protects it from sagging and damage over time. If you need a specific size or a high-quality canvas that’s not available in ready-made options, custom canvas stretching is the perfect solution.

            At Framous Picture Framing, we offer a reasonably priced bespoke canvas stretching & framing service to make your artwork hang-ready with flawless precision. Whether you’re a DIY enthusiast or want a professional canvas stretching solution, this guide will show you how to stretch a canvas the right way.

            Canvas Stretching Equipment | Tools & Materials You’ll Need to Stretch a Canvas

            Before we begin, gather these essential tools:

            ToolPurpose
            Stretcher BarsForm the frame; choose sturdy wooden or metal bars to prevent warping.
            Canvas MaterialThe painting surface; options include cotton, linen, or synthetic canvas.
            Mallet or HammerUsed to assemble the stretcher frame securely.
            Tape Measure & PencilEnsures precise measurements before cutting and assembling.
            Scissors or Utility KnifeCuts the canvas to the correct size.
            Canvas PliersHelps grip and pull the canvas tight for even stretching.
            Staple Gun & StaplesSecures the canvas to the stretcher bars.
            Staple LifterRemoves or adjusts staples if needed.
            Wedges (Corner Keys)Adjusts the canvas tension after stretching by expanding the frame.

            How to Stretch a Canvas Like a Pro | 8 Easy Steps – DIY Guide

            Stretching a canvas might seem tricky. But once you get the hang of it, it’s a rewarding and cost-effective way to prepare a perfect surface for painting. Follow these simple steps to create a durable, professional-looking canvas right at home.

            Step #1: Choose Your Stretcher Bars or Build a Custom Frame

            Estimated Time: 5 minutes

            Before you begin, you’ll need a sturdy frame. You can either purchase pre-made stretcher bars or build a custom frame using wooden slats. Stretcher bars are the easiest option since they come with interlocking joints which makes assembly quick and hassle-free. If you’re building your own frame, make sure to use high-quality, warp-resistant wood to ensure durability.

            Tip: Stretching a large canvas? Opt for reinforced stretcher bars or cross braces to prevent sagging.

            Step #2: Assemble the Stretcher Bars

            Estimated Time: 5-10 minutes

            Once you have your stretcher bars, it’s time to put them together.

            • Lay out the bars on a flat surface, forming a square or rectangle.
            • Slot the corners together. Most stretcher bars come with pre-cut grooves that easily slide into place.
            • Gently tap the corners using a mallet to ensure they’re firmly connected.
            • Check the alignment by measuring diagonally across the frame. Both diagonals should be equal. If not, adjust the frame until it’s perfectly square.

            Tip: Frame feels a little loose? Apply a small amount of wood glue at joints for extra stability.

            Step #3: Cut the Canvas to Size

            Estimated Time: 5 minutes

            Now that your frame is ready, it’s time to prepare the canvas.

            • Roll out the canvas on a clean, flat surface. Make sure it’s free from wrinkles and dust.
            • Place the frame on top and mark an outline around it.
            • Leave extra fabric for stretching. Add at least 8-10 cm (3-4 inches) on each side. This excess will wrap around the frame for secure stapling.
            • Cut the canvas carefully using sharp scissors or a utility knife, ensuring smooth, even edges.

            Tip: Use a ruler or straightedge when cutting to prevent uneven sides.

            Step #4: Position the Frame on the Canvas

            Estimated Time: 2 minutes

            Now, it’s time to center the frame before you start stretching.

            • Lay the cut canvas flat on your work surface.
            • Place the frame on top. Make sure it’s perfectly centered.
            • Align the grain of the canvas with the stretcher bars. This will prevent twisting and warping later on.
            • Smooth out any wrinkles before securing the canvas.

            Tip: Double-check that the frame sits evenly on all sides before moving to the stretching step.

            Step #5: Stretch the Canvas, Fold & Start Stapling

            Estimated Time: 30 minutes

            The key to a well-stretched canvas is pulling evenly and gradually from the center outward. Follow these steps carefully:

            1. Start with the Longest Sides

              Pull the canvas over the frame and insert three staples in the center of one long side. Move to the opposite long side. Pull the canvas tight, fold it over, and insert three more staples in the center. Work from the middle toward the corners. Never start at the corners, as this can cause twisting.

              Tip: If your canvas is ungessoed, lightly mist it with water using a spray bottle. This will help it tighten as it dries.

              2. Stretch and Staple the Shorter Sides

              Move to one of the unstapled short sides and pull the canvas firmly. Fold it over the frame and insert two staples in the center. Repeat this on the opposite short side.

              Tip: Use canvas pliers to grip and pull for a more even stretch.

              3. Work Toward the Corners

              Go back to the first long side you started with and begin stretching from the center outward. Pull a small section, staple, then move to the opposite side and repeat. Continue working around the canvas in the same order, keeping tension even.

              Tip: Keep about 4 inches of unstapled space near the corners for now.

              4. Fold and Staple the Corners

              Tuck one side under the other to create a neat fold. Pull it firmly and evenly, then staple securely in place. If needed, cut a small diagonal slit in the excess fabric to help it lie flat. The corners are the final tightening point—pull them as tight as possible.

              5. Secure the Staples and Final Touches

              Go around the frame and hammer down all staples to ensure they sit flush. If you notice any loose areas, add extra staples where needed. If your canvas still feels loose, you can restretch certain areas before moving on.

              Step #6: Adjusting the Tension with Corner Wedges

              Estimated Time: 5 minutes

              Now that the canvas is stapled, it’s time for the final tension adjustments.

              • Flip the canvas over and tap the surface. It should have a drum-like sound.
              • If there are sagging areas, insert corner wedges (keys) into the slots at the back of the stretcher bars.
              • Tap them gently with a hammer to expand the frame slightly, increasing tension.

              Step #7: Prime Your Canvas

              Before painting, the canvas needs priming with gesso. This seals the fabric, prevents paint from soaking through, and improves adhesion.

              • Apply one even coat of gesso using a wide brush, painting in one direction.
              • Allow it to dry completely, then sand it lightly with fine-grain sandpaper.
              • Apply a second coat, let it dry, and sand again.
              • Repeat for a third coat for a smooth, professional surface.

              Tip: Sanding between coats helps remove texture and creates a perfect painting surface.

              Step #8: Final Quality Check

              Before calling it done, inspect your canvas carefully:

              • No wrinkles, sagging, or loose areas.
              • Tension feels just right; tap the canvas. It should sound slightly hollow.
              • Staples are evenly spaced and secure. No rough edges.
              • Corners are neat and folded tightly.

              You’re Done!

              Your canvas is now stretched, primed, and ready for painting. Whether you’re working with oils or acrylics, this DIY method ensures a sturdy and professional surface for your artwork.

              Read more about > Common Canvas Stretching Issues and their Solutions

              Stretch Your Canvas the Right Way with Framous Picture Framing

              Whether you’re a DIY enthusiast or prefer expert help, canvas stretching is essential for preserving and displaying your artwork.

              Don’t let a loose canvas ruin your masterpiece.

              Visit Framous Picture Framing in Perth for expert canvas stretching & framing service.

              Call us today or drop by our framing store in Perth to get started.

              Everything About Wooden Picture Frames | Our Top Picks, Pros & Cons, and Expert Tips 150 150 admin

              Everything About Wooden Picture Frames | Our Top Picks, Pros & Cons, and Expert Tips

              Empty,Wooden,Picture,Frame,Mockup,Hanging,On,Beige,Wall,Background.

              For as long as we can remember, wooden picture frames have been a timeless favourite for displaying artwork, photos, and cherished mementos. Their natural beauty and classic designs have stood the test of time and continue to be in high demand.

              So, why are wooden picture frames still so popular? What makes them such a timeless and favourite for many Australians?

              In this guide, we’ll explore everything you need to know about wooden picture frames. From top design options and their source of wood to the pros and cons of choosing wooden frames, we’ll cover everything. We’ll also share some expert tips on how to care for your wood picture frames so they stay looking beautiful for years to come.

              If you want latest designs of wooden photo frame, Framous Picture Framing is your go-to framing store in Perth, since 1985.

              Now, let’s discover the high-quality wooden photo frames for sale and explore why they prove to be a popular choice for so many.

              Exploring the Best Wooden Picture Frames at Framous Picture Framing

              Our wooden frames are available in a variety of finishes, from rich dark woods to light, natural hues. We make sure your framed pieces stand out beautifully. Each frame is handcrafted with attention to detail, ensuring durability and a perfect fit for your artwork.

              Explore our top wooden frame options, handpicked by our expert framers to bring out the best in your cherished memories and art pieces. No matter your style or budget, we’re here to help you find the perfect frame to showcase your artwork beautifully

              Wooden Picture Frames

              Find out more quality picture frames from our GALLERY

              Sources of Wood for Picture Frames | Understand Your Options First

              The type of wood plays an important role in the overall look and feel of the picture frame. Different woods offer unique characteristics in terms of texture, colour, durability, and cost. That’s why understanding the options available helps you make an informed decision that complements both your artwork and the space it’s displayed in.

              Here are some of the most popular types of wood used in picture frames and what makes each of them unique:

              Wood TypeKey CharacteristicsUnique Features (Pros)Considerations (Cons)Best For
              OakStrong and durableDistinctUneven texture with prominent grainCan be heavyExpensive than other woodsTraditional or vintage look
              PineAffordable and lightweightLight & natural colourEasy to stain or paintProne to dents and scratches Not ideal for high-traffic areasCustom framing projects, budget-friendly options
              MapleSmooth and sleekFine grain Smooth textureExpensive than pineNeeds proper care to avoid scratchesModern and clean look for contemporary art
              WalnutRich and luxuriousDeep, dark colour Tight, even grainExpensiveMay not be suitable for all budgetsHigh-end, luxurious framing for artwork
              TeakDurable and weather-resistantWarm golden-brown hueMore costly than other woods due to durabilityFraming artwork exposed to changing temperatures or moisture

              Why Wooden Picture Frames Are a Popular Choice for Artwork Display | 6 Reasons to Know

              sl1

              Even with the rise of composite, plastic, and metal frames, wooden picture frames continue to be the top choice for many when displaying artwork. Here are some reasons why wooden frames have such lasting popularity:

              • Natural Beauty

              Wood brings a unique warmth and texture to your space. Other materials literally struggle to replicate it. It introduces an organic, natural element into your home décor; something that’s increasingly appreciated in today’s interior design trends. Be it for a classic artwork or any modern photography.

              • Durability & Strength

              One of the standout features of wooden picture frames is their durability. Wood is a strong, reliable material. It assures your artwork stays securely framed for years. With proper care, wooden frames can withstand daily use. Thus, you can make a smart, long-term investment for your cherished photos or art collections.

              • Range of Frame Designs

              Wooden frames are incredibly versatile. They can easily fit into any room, whether it’s a minimalist, modern home or a cozy, rustic space. The variety of wood finishes available, like oak, walnut, or maple (mentioned above) ensures that you can find the perfect frame to match your décor.

              • Eco-friendly & Sustainable Framing

              In a time when sustainability is a growing concern, wooden frames are a more eco-conscious choice compared to synthetic frames. Many wooden frames are made from responsibly sourced wood. Thus, it makes them a better option for environmentally aware consumers.

              • Custom Framing Options

              One of the most exciting things about wooden picture frames is how customisable they are. Each piece of wood has its own texture and grain pattern. This means no two frames are ever exactly same. This uniqueness allows for a personal touch, making it easier to create a frame that perfectly suits your artwork.

              • Timeless Appeal

              Wooden picture frames have a timeless, classic look that never goes out of style. Unlike trends that come and go, wood remains a reliable, stylish option for framing artwork. Its enduring appeal ensures that wooden frames will continue to fit seamlessly into any home or gallery.

              Pros and Cons of Wooden Picture Frames | What You Need to Know

              Pros of Wooden Picture Frames

              • Built to Last: Wooden frames are sturdy and durable, offering decades of reliable protection for your artwork.
              • Natural Aesthetics: They add warmth and timeless charm to any décor, complementing both classic and modern styles.
              • Versatility: Wood can be painted, stained, or carved, making it easy to match any design or color palette.
              • Endless Customization: Wooden frames provide endless options to personalize your frame for your space.
              • Eco-Friendly Choice: Responsibly sourced wood is sustainable and reduces environmental impact, ideal for eco-conscious buyers.

              Cons of Wooden Picture Frames

              • Sensitive to the Elements: Wood may warp or crack with temperature and humidity changes.
              • Requires Maintenance: Needs occasional polishing or buffing to retain its shine.
              • Can Be Pricier: High-quality wooden frames mostly cost more than plastic or metal options.

              Explore: How to Choose the Perfect Picture Frame for Your Artwork

              Expert Tips to Care for Your Wooden Picture Frames

              • Avoid Direct Sunlight

              Prolonged exposure to direct sunlight can fade the colour of your wooden frame and dry out the wood, potentially causing cracks. Hang your frames in areas with indirect light or use UV-protective glass to protect them.

              • Control Humidity Levels

              Wood is sensitive to humidity. Try to maintain a stable humidity level to prevent warping. Avoid placing frames in bathrooms or other high-moisture areas, where wood is more likely to swell or crack.

              • Dust Regularly

              To keep your frame looking fresh, dust it regularly using a soft microfiber cloth. This helps prevent scratching while keeping the frame free of dirt and debris.

              • Apply Furniture Polish

              If needed, apply furniture polish to enhance the wood’s natural luster. This will also help protect the wood from drying out, keeping it looking vibrant and well-maintained.

              • Polish Occasionally

              To keep the wood shiny and smooth, use a wood polish or wax every few months. Apply a small amount to a soft cloth and gently buff the frame to highlight the natural grain.

              • Avoid Harsh Chemicals

              Never use harsh chemicals or cleaners on your wooden frame, as they can damage the finish. Stick to wood-specific cleaners to maintain the frame’s appearance.

              • Check for Loose Parts

              Over time, wooden frames may loosen due to temperature and humidity changes. Check the corners and backing of your frame regularly, tightening screws or nails as necessary.

              • Use a Protective Coating

              Consider applying a protective clear finish to your frame to shield it from dirt, dust, and moisture, while maintaining the natural look of the wood.

              • Repair Small Damages Quickly

              If your frame gets a small scratch or dent, address it quickly before it worsens. Use a wood repair kit to fill any imperfections or consider refinishing the frame if necessary.

              Are you looking for a picture frame that enhances your display and lasts for years?

              Shop the Best Wooden Picture Frames at Framous Picture Framing Today

              We specialise in providing top-notch, high-quality wooden and metal picture frames that bring your artwork to life. Our custom framing services make sure to suit your needs perfectly.

              We offer a variety of frame styles, colours, and finishes that will enhance any piece, ensuring it stands out while offering long-lasting protection.

              So, why wait?

              Request a Framing Consultation Today

              Buy Quality Wooden Picture Frames Online Now

              Guide to Football Jersey Framing | Protect Your Memories 150 150 admin

              Guide to Football Jersey Framing | Protect Your Memories

              5

              So, you got a killer football jersey that’s just begging to be displayed. Maybe it’s a signed piece from your favourite player. A throwback from your own glory days. Or a beloved family heirloom.

              Whatever the story, don’t let it sit forgotten in a drawer. Try Football jersey framing to show off and protect your beloved possession. Don’t know how to do it? We will show you the steps.

              At Framous Picture Framing. We know the sentiments of sports memorabilia. & our framing services can keep it alive for you. Since 1985, we’ve been crafting custom framing to capture the essence of your keepsakes.

              Let our experience guide you to frame your favourite sports shirt.

              Required Materials for Football Jersey Framing

              The right material and techniques will transform your jersey into a stunning visual story. Here are some important things to gather first before framing your sports jersey.

              • High-Quality Frame: A strong frame that suits the jersey’s size.
              • Matting: To keep the jersey in place and add style to the frame.
              • Acid-Free Foam Board: To prevent damage to the fabric over time.
              • Pins or Stitching Needles: To secure and fix the jersey without damaging it.
              • Glass or Acrylic Covering: To protect your jersey from dust and humidity.
              • Spacer: To keep the glass or acrylic distanced from the jersey.
              • Measuring tape: For measurements.
              • Needle & Thread: To stitch the jersey to foam board

              How Experts Do it? Key Steps to Frame a Jersey Properly

              Extreme attention level & precise measurements are required for framing a sports jersey. Here is how it is done.

              1. Select the Frame Size and Matting

                The first step to start your jersey framing is choosing the right frame. Measuring your jersey first. And make sure that your frame can accommodate its dimensions. & allow enough room for matting without overwhelming the piece. General frame size used for the football jersey is:

                • 23″ L
                • 1.5″ W
                • 31″ H

                Don’t forget to check the fitting of the frame with your jersey before finalising it.

                2. Wrinkle Out & Place the Jersey

                You should get a pre-look of the jersey within the frame before actually doing it.

                Iron your jersey thoroughly to get a smooth and wrinkle-free appearance. Choose whether you want the front or back on display. Lay the jersey on a clean and flat surface to note all the parts that should be displayed. Like:

                • Team name
                • Number
                • Logo
                • Any significant signatures
                • Pinstripes
                • Championship patches

                This step will show you how crisp and professional your jersey will look when framed.

                3. Measure the Main Jersey Insert

                Now prepare your main insert of the jersey. Start measuring your jersey with the tape. (height and width).

                • Height: Measure from the top of the collar to the bottom edge.
                • Width: Measure from one side edge to the other under the sleeves.

                Cut the mat board according to your height and width measurements. Cut the section from where the shoulder of the sleeves slope down. Also, cut the section where collar dips down. Your cutout for the main insert is ready.

                Test it with the board & frame.

                4. Measure the Sleeves Insert

                If you plan to include the sleeves. Take measurements that allow them to be positioned naturally without creasing. 3 main measurements will be required.

                1. Width of the bottom edge of the sleeve
                2. Height of the sleeve
                3. Height of the bottom rectangle of the sleeve.

                Trace the shape of the sleeves on matboard & make the cutouts. Test your sleeve inserts with the frame.

                5. Pin the Jersey to Backboard or Foam

                Once the inserts are ready. Use acid-free pins or sewing to secure the jersey with matboard. Insert the pins at 10-degree angle toward the centre. Pinning should be minimal to avoid damaging the fabric while keeping it securely in place. Secure at following positions:

                • About three pins under the collar area should be enough.
                • Three straight pins on each side of main insert (Fold the sleeve to reach it properly).
                • Three straight pins across the bottom of the sleeves.
                • One pin at each top corner of the sleeves.

                At Framous Picture Framing. We use special techniques to secure the jerseys without any impact on the fabric’s quality.

                6. Add Customisations to Matting

                If you want to customize the matting with accessories of your choice. Do it at this step. It will make it more personal and add to the memory. You can include:

                • Inscriptions of the names of team, tournament, or player
                • Ticket stubs
                • Pictures of the special moments
                • Autographs
                • Anything else of your choice

                Position the photos/engraving plates on the double matting. And tape the edges with masking tape. An extra mat board can also be used as a backing for your accessories. Cut these backings a little larger than your photos.

                7. Add the Spacer

                Spacers prevent the glass or acrylic from touching the jersey. So, it can stay in a pristine condition. Cut some pieces of foam and glue them to the edges of your frame.

                It will create a shallow box within the frame. Which maintains airflow and prevents any fabric distortion.

                8. Seal the Display Case

                Clean any dust or debris from your frame. Double check all the details. And your frame is ready to be sealed. Seal it with glass or acrylic to protect the jersey from dust, UV light, and colour fading.

                Acrylic is a popular choice for sports framing. Because it is lighter and more shatter-resistant than glass. So, it is ideal to protect your valuable jerseys.

                Additional Tips for Creating the Perfect Jersey Frame

                Here are some extra touches to make your framed jersey truly unique:

                • Choose Colour-Enhanced Matting: Use team colours or complementary shades to your jersey.
                • Add a Plaque or Engraving: Consider a small plaque at the bottom with the player’s name, team, or any special text.
                • Include Small Memorabilia: If space allows. Decorate the frame with additional tickets, photos, or autographs.

                Benefits of Proper Jersey Framing

                Framing a jersey is not just about appearance. It safeguards the memorabilia and gives it lasting value. Sports Jersey Framing will benefit you in following ways.

                • Protection Against Damage

                Proper framing materials will protect your jersey from deteriorating. E.g. acid-free foam and UV-protective acrylic. Shield from light, dust, and humidity means that your jersey can stay in top condition for years.

                • Collection Display

                A framed jersey is a stunning piece to display. Hang it in a living room, office, or the man cave. Show it off to your friends and visitors and relive the memory associated with it.

                • Decorative Appeal

                Jerseys framed with elegant matting and complementary mouldings can add beauty to any space. Each jersey frame is a custom piece of art that combines personal history with visual interest.

                • Increased Value

                A well-framed jersey is the most valued piece for collectors. You can also choose a professional framing to give it a premium look. Adding to its market value.

                Why Professional Framing is Worth It

                DIY framing is easy and money-saving. But if you want more precise jersey frames and guaranteed protection. You should consider professional framing services.

                Experts understand how to handle delicate fabrics. Seal it airtight. And achieve a polished look to do justice to your sentiments. Professionally framed pieces have more market value and also last for a longer time.

                Looking for Custom Framing Jerseys in Perth?

                Bring Your Football Memories to Life with Framous Picture Framing

                At Framous Picture Framing. We create beautiful and long-lasting frames to save your beloved possessions.

                With over 35 years of experience and countless satisfied clients. We offer the largest selection of framing materials. & our team is always ready to guide you in selecting the style, colour, and design. You can trust Framous Picture Framing to convert your sport memorabilia into art.

                Contact Us Now

                Explore Our Collection

                What to Expect During Your Framing Consultation? 150 150 admin

                What to Expect During Your Framing Consultation?

                Mockup,Frame,Canvas,In,Wooden,Black,Office,Room,With,Minimalist

                Looking to display your precious memories in a beautiful custom frame?

                Whether you’re framing a family photo or any piece of art, understanding the whole framing process is key to get the perfect result.

                It all begins withframing consultation.

                Where you’ll work with expert framers to choose the ideal materials, colours, and design for your art frame.

                At Framous Picture Framing, we know how important your memories are. That’s why we offer in-store framing consultation to guide you through every step of your framing project. Our team of friendly picture framers Midland delivers a wide variety of framing options and expert advice to make your artwork or photos stand out.

                Let’s have a closer look at what you can expect when you visit us for a custom framing.

                Top of Form

                Bottom of Form

                What to Expect During Your Framing Consultation?

                Your framing consultation is a collaborative and creative experience. Here’s what you can expect:

                1. A Warm Welcome

                  We believe that the framing experience should begin with a warm and inviting atmosphere. The moment you step into our framing store, you’ll be greeted by one of our friendly team members with a genuine smile.

                  We want you to feel like part of our Framous Picture Framing family from the very first moment you walk through our doors.

                  2. Discussing Your Vision and Goals

                  The next step of the consultation is all about understanding your vision.

                  Whether you’re searching for the perfect frame design to preserve and display a vintage poster or a cherished piece of memorabilia. Whatever your needs, this initial discussion allows our expert framers to get a sense of your style and preferences.

                  You can expect our team to ask you some questions such as:

                  • What kind of art or item are you framing?
                  • Where do you plan to display it?
                  • Do you have a specific style in mind?
                  • Do you need any special materials, such as UV glass for protection?

                  This part of the framing process is important. As it sets the foundation for the rest of your project. We take the time to learn about your unique project needs. And we make sure to deliver exactly what you envision.

                  3. Exploring a Variety of Framing Options

                  Once we understand your goals, we’ll guide you through a variety of framing options.

                  From sleek, modern frames to more ornate, classic designs. There’s something to suit every style and taste. You’ll also be able to choose from a wide range of matting option.Matting can add depth and contrast to your artwork.

                  During the consultation, you’ll also be able to see and feel different materials firsthand.

                  This is a great opportunity to explore various textures, colours, and finishes to ensure that the final product complements your artwork perfectly. Whether you need a classic frame for an oil painting or something more modern for a photograph. We’ll help you find the perfect match.

                  Explore more about: How to Choose the Right Frame Size & Colour?

                  4. Customisation to Fit Your Needs

                  One of the key benefits of in-store framing consultation is the ability to fully customise your frame.

                  Our experienced framers will work with you to tailor every aspect of the frame to your needs. From selecting the right glass to choosing the correct mounting technique. We ensure that your piece is not only beautifully displayed but also protected for the long term.

                  For example, if you’re framing artwork or memorabilia, we can suggest using acid-free materials and UV protection glass to prevent damage from light or moisture. If you’re framing something oversized or unusually shaped, we’ll find the best solutions to make it work.

                  This kind of hands-on, personalised service is what sets custom framing apart from pre-made options.

                  5. Getting a Detailed Quote & Timeline

                  Once you’ve chosen all your materials and design elements, we’ll provide a detailed quote for the framing. We carefully break down the costs so you know exactly what you’re paying for. Including the frame, matting, glass, and any special customizations.

                  Our pricing is always transparent. With no hidden fees. We work within your budget to ensure you’re satisfied with both the finished product and the cost. Additionally, along with your quote, you’ll receive an estimated date for the completion of your frame order.

                  Explore more about: Custom Framing | How Long it Takes to Make Custom Frame

                  6. Finalising Your Framing Project

                  After you’ve approved the design and the quote, we’ll begin crafting your custom frame.

                  Our team takes great care in every step of the framing process to ensure your artwork or photograph is perfectly preserved and ready for display.

                  Once completed, you’ll be able to pick up your framed piece and enjoy it for years to come.

                  Our picture framing Midland ensures that your frame is constructed to the highest standards of quality. You can also count on us for aftercare advice, so your framed piece stays in excellent condition over time.

                  For more information, let’s explore some key questions you should ask the framer during consultation.

                  7 Questions to Ask Your Picture Framer

                  Being prepared with a few key questions can help you feel confident about your choices. It ensures the finished piece meets your expectations. Here are some important questions to consider asking your picture framer:

                  Q1. What framing options do you recommend for my piece?

                  A professional framer can recommend different frame styles, matting options, and glass types based on your piece’s style, colours, and where it will be displayed. Their expertise will ensure the frame complements and enhances your artwork, rather than detracting from it.

                  Q2. How will you ensure the protection of my artwork?

                  Protection is key. Especially for valuable or delicate items.

                  Ask your framer how they will protect your piece from damage over time. This can include using:

                  • UV protective glass to prevent fading
                  • acid-free mats to prevent discolouration
                  • specific mounting techniques to avoid damaging the artwork

                  Knowing this information will give you peace of mind that your item will remain in pristine condition for years to come.

                  Q3. Can you show me samples of your previous work?

                  Seeing examples of previous framing projects can help you check the framer’s craftsmanship and style. Ask to view their portfolio to better understand how they approach different types of framing projects.

                  Q4. How long will the framing process take?

                  It’s important to have a timeline. Especially if you’re working on a deadline, such as a gift or exhibition. Ask your framer about the expected turnaround time for your project so you can plan accordingly.

                  Q5. What are the framing costs involved?

                  Ask for a detailed quote for the framing, including the costs of materials like frames, mats, glass, and any custom work. Understanding the cost breakdown is important for budgeting your framing project.

                  Q6. Will you provide aftercare instructions?

                  Once your piece is framed, you’ll want to ensure it stays in great condition. Ask your framer for advice on how to care for your framed item, including tips on cleaning, proper display, and storage.

                  Q7. Do you offer any guarantees or warranties?

                  It’s always worth asking if the framer offers any guarantees or warranties on their work. A trustworthy picture framer will stand behind their craftsmanship. They can offer guarantees on the materials used or the overall durability of the frame.

                  Are you searching for ‘framing artwork near me’?

                  Get Expert Framing Services at Framous Picture Framing

                  Our art framing Midland makes sure you receive the attention and car you deserve.

                  We’ve proudly served the Perth community for years. We offer a diverse collection of high-quality frames, mats, and custom framing solutions.

                  Our team is not just passionate about framing, but we are also dedicated to providing exceptional service and craftsmanship. Whether you need a simple frame or a more elaborate piece to highlight your artwork, our expert picture framing service is all what you need.

                  So, don’t wait.

                  Book your Framing Consultation Today

                  Explore Our Frames Online Now

                  Easy Guide to Protecting Your Art with Archival Framing 150 150 admin

                  Easy Guide to Protecting Your Art with Archival Framing

                  archival framing

                  Artwork is a precious possession for both artists and collectors. Its beauty and worth multiply with time. However, an artwork can degrade, fade, and die if we don’t care for it the way it needs.

                  So, how will you keep your artwork in a spotless condition?

                  The answer lies in using the best archival framing techniques. And Framous Picture Framing is here to guide you about effective archival methods. We will provide you with important tips to keep your artwork in mint condition for ages.

                  At Framous Picture Framing, we have been offering custom framing services since 1985. Our award-winning team will assist you in preserving and displaying the art pieces. So, your little treasures don’t get lost in a store room.

                  Let’s move toward the basics of archival framing.

                  What is Archival Art Framing?

                  Archival framing is a conservation method designed to protect and preserve the artworks. High-quality, acid-free framing materials are used in it that don’t allow any damage of time.

                  Manufacturing and methods of archival framing are not like any regular art frame. All the components from matting to glass frame are chosen for long-term protection.

                  How Archival Framing Helps in Preserving Your Art?

                  Archival framing is the only way to keep prestigious art and antique prints to live through long period of time. This specialised frame acts as a barrier against dust, moisture, light, and pollutants. It also provides structural support to prevent warping, bending or tearing.

                  It is specifically important for preservation of:

                  • Investment Pieces: Reselling of valuable works
                  • Sentimental Art: Family photos, heirlooms, and memories
                  • Fragile Art: Water colours or prints on paper

                  One-time investment in custom framing saves the monetary value of your art piece. It helps in retaining the original aesthetics and making the art eternal for generations to come.

                  Before moving towards archival techniques in detail. You must know the common risk factors that needs to be targeted while framing.

                  5 Common Factors that Damage Your Artworks

                  Simple environmental factors that seem harmless but have the potential to cause huge damage to your delicate piece of art. Here is the list of such elements and damages caused by them.

                  1. Light – Colour Fading

                    Even with a slight knowledge of art or framing, you must have heard about the hazards of UV light.

                    All the types of light, natural or artificial, contain ultraviolet rays in them. Glass framing help in reflection of these rays but can’t block them completely. Some of the rays still get to the art. They react with the ink or painting material and fade the color of it.

                    Advanced printing inks are made with UV resistance but they don’t guarantee the complete protection.

                    2. Darkness – Discolouration

                    You must have thought about packing your art pieces in dark rooms in order to protect them. But unfortunately, light is not the only problem.

                    There are several chemicals present in atmosphere even in darkness which have the potential to same reaction. They will fade out the pieces covered in packaging or forgotten in storage rooms.

                    3. Humidity – Warping

                    Humidity is the major cause of damage specially in case of photographs, fine art prints and albums.

                    It causes the dampness of package and softening of layers or pages. So, they will easily adhere to covering material or any surface in contact. This damage can’t be reversed by any mean.

                    Humidity also promotes the growth of mold in old art pieces and risk the health of workers dealing with them. Blurring of digital artworks is another harm of humidity.

                    4. Acidic Materials – Yellowing & Tearing

                    Low-quality packaging and framing products contains acidic chemicals which degrade the quality of artworks.

                    Mats and mounting boards are commonly made with non-purified paper products. They contain lignin, a wood chemical, which causes the covered pieces to fade.

                    The same acidic components can turn the art paper brown and brittle. Such paper easily crumbles and tears into pieces even with a light touch.

                    5. Self-Destruction

                    The chemicals used to create the image in photographs can damage their own print. This process of self-destruction is called “autocatalysis”. Development liquids of photographs or prints react with environmental chemicals and lead to several harmful reactions.

                    All these damages highlight the severe need of proper preservation method. Archival framing use number of effective techniques to protect your beloved piece of art.

                    Methods & Techniques Used in Archival Framing

                    Archival framing is done according to the standards of Professional Picture Framers Association (PPFA).

                    PPFA outlines the six essential steps involved in archival procedure for artworks. These steps are given as:

                    1. Matting

                      Matting of a page or any art material protects it from the external factors. It creates a shield to minimize any reaction caused by air, moisture, and light.

                      But make sure to use advance methods as regular matting can seep acids into your artwork, causing it to discolour and damage.

                      2. Backing

                      It involves applying a neutral-pH backing board or paper to the artwork. Backing allows additional protection and support from acidic elements of atmosphere.

                      For proper protection, acid-free mat board and foam core should be used.

                      3. Glazing:

                      Glazing involves the use of UV-protective glass or acrylic shield. It blocks harmful ultraviolet rays that cause fading of artwork. This step is essential for protection of sensitive prints and manuscripts.

                      4. Mounting:

                      Mounting involves the adherence procedure of your artwork to a backing board or paper. It also protects the piece from humidity related damage and warping.

                      5. Hinging:

                      Hinging provides an additional sheath necessary for the display of artwork. It attaches the artwork to backing board with archival hinging linen or paper tape. This tape does not leave any residue and avoids any damage caused during installation, removal or cleaning.

                      6. Sealing:

                      It is the last step of archival framing. In the sealing process, artwork is enclosed in an inert sealant as outermost covering. It gives protection from dust and moisture.

                      Spacers should be used to create a gap and avoid direct contact of art piece with sealant.

                      Proper archival framing with these Standards is the best way to preserve your artwork in its original condition. Just make sure to do every step with great care and keep expert guidelines in mind.

                      5 Expert Framing Tips for Protection of Your Art

                      Archival framing techniques require great care and attention at each step. Here are some tips to consider while framing your artwork.

                      1. Choose the Right Glass: Always use a specific UV-protective glass to shield your artwork from harms of the light.
                      2. Handle Artwork with Care: Wear proper gloves while handling your artwork to avoid direct contact and transfer of bodily heat or moisture.
                      3. Use Acid-Free Materials: All materials used from backing board to hinging tape should be acid free to protect the art from chemical reactions.
                      4. Consider Environmental Factors: Hang your framed pieces away from direct light and keep them inside glass doors for additional protection.
                      5. Consult a Professional: Don’t hesitate to seek advice from an expert in field like Framous Picture Framing in case of any confusion or questions.

                      Conclusion

                      Protecting your artwork with archival framing is one of the best investments you can make to avoid various long-term losses. It involves the specific framing materials, methods and techniques to keep your artwork in its original condition. It saves your piece from environmental and chemical damage. If you want to preserve a valuable piece of art or a family photograph, archival framing will do it for you.

                      After going through the processes like matting, glazing, mounting, hinging and sealing. Your artwork will remain vibrant and undamaged for years to come.

                      Need Help with Custom Archival Framing?

                      Contact Framous Picture Framing to Preserve Your Valued Art Pieces

                      At Framous Picture Framing, we provide you a trusted picture framing shop for all your designing and artistic needs. The extensive selection of archival framing products and materials is available here to suit and protect every piece of art.

                      Our experienced Perth picture framers will guide you in choosing suitable methods, decorative frames and relevant aesthetics. We also provide custom framing for your photographs, limited-edition prints, collection of tickets, favourite memories or treasured autographs.

                      Get in touch to get an artistic advice.

                      Visit our website to get details of services and areas of expertise.

                      How to Frame Cross Stitch and Embroidery? 150 150 admin

                      How to Frame Cross Stitch and Embroidery?

                      Round,And,Oval,Hoops,For,Cross stitch,With,Special,Square mesh,Fabric

                      In this article we are going to go over some of the options that you have when it comes to stitch work and textiles framing 

                      Choosing the Right Type of Glass for Your Framing Textile Art

                      You have a lot of different options when it comes to using glass for framing needlework and fabric. There are many different options including Plexiglass or forgoing glass altogether. 

                      We have discussed some of the popular options on the market that you can avail. However, what option is the best one is always going to depend on what you need and are asking for. Things like how much are you willing to spend? Is fading a problem for you ? Are you bothered by glare? There are lots of ups and downs. 

                      No Glass

                      First of all we have the option of not using glass altogether when trying to frame a cross stitch. This is the preferred style of a lot of professionals in the industry.

                      Another benefit is that there is zero reflection. On the other hand it might suffer from damage from too much sunlight or your displaying and hanging textile art might become dirty. This is best for people who like to keep things simple. 

                      Conservation Glass for Displaying and Hanging Textile Art

                      Conservation and museums are great for those in the business of framing. The simple reason is the great quality. This is widely available in the market.

                      Plexiglass for Fabric Framing

                      Some go for acrylic or plexiglass as opposed to regular glass because it is shatter proof, anti reflective and very light in weight. What is more is scratch resistant and anti static as well. 

                      Another great reason to go with plexiglass is if you are looking to have the product shipped. With the latest advancements in technology there are many different options when it comes to the use of plexiglass. It is now all about your own preference. 

                      Regular Glass for Stitch Work and Textiles Framing

                      As opposed to plexiglass, conventional glass does not scratch as much, costs less money, does not have much of a static charge and does not bow easily. Lastly, you do not have to remove any protective covering.

                      Regular glass is most in vogue where the cost is the deciding factor and nobody wants to spend a fortune. Conventional glass has nothing really special about it.  In case you do not want to make a high end project then going with regular glass is a good idea. 

                      Museum Glass

                      On the top of the food chain is museum glass. It is the most expensive option out there and promosies the best quality. Museum glass has great clarity and blocks out almost all UV rays. This will have a great impact on your product as the colors will look great. 

                      Choosing the Right Kind of Matboard for Your Cross Stitch

                      Just like with glass you have different options when it comes to mat boards. 

                      Stitch Work and Textiles Framing Without Matting

                      If the framing does not have matting then it is going to need frame spacers in order to help. 

                      Decorative Matboard for Fabric Framing 

                      Decorative matboard also known as acid-free matboard is the least expensive option and comes in the widest range of colors.

                      This matboard is paper constructed from wood pulp that has been fixed with a neutral pH bath. In the end the lignins in the paper will degrade, releasing acids. .

                      Frame Cross Stitch and Embroidery Using a Conservation Matboard

                      Conservative matboard is a very nice middle option as it is cheaper than museum matboard while still having some conservation properties. These are the best grade paper matboards.

                      Museum Grade Matboard

                      Archival matboards or museum grade ones are very expensive and of the highest quality. Museum matboard or archival matboard is the highest quality and most expensive.

                      This matboard is made 100% from cotton. ThIS includes the face, the core, along with the backing. Cotton rag is free of acids and lignins. The mat starts and remains pH neutral throughout its lifetime.

                      Mounting Your Cross Stitch

                      Pinning and lacing are how top notch mount cross stitch work. Everyone has their preferences so try both and decide which you like more.

                      For mounting your work, you will require rust-proof pins or cotton thread depending on the means you choose.

                      Lacing

                      This takes up a lot more time than pinning. However, the end product is much better. All you need is a cotton thread, and a needle. One of the recommended ones is the 25 tapestry needle with a size 10 crochet thread. However, there is no hard and fast rule with this and you can go as you like with them. 

                      Pinning

                      One of the most popular methods used by a lot of stitching companies and professionals is just to pin them. This is because it is much faster and very easy when compared to lacing. You can use rust proof pounds, for instance brass pins or stainless steel. This is a good idea so the pins do not negatively impact your work. Also, if the pins are plated with nickel then they will not rust at all. Satin pins, dressmaker and silk are great because they rest well against a foam board.

                      Closing Up Your Frame

                      The hardest part is over. Mounting your piece is going to be the most time-consuming part of framing the cross stitch.

                      Final Thoughts

                      It’s up to you how you would like to frame your cross stitch.

                      You can choose to exclude certain components to make the project super affordable or you can pick the best framing materials to maintain your stitching for a lifetime.

                      What do you like when it comes to the perfect fabric framing? Let us know what you found to be the best solution.